EasyManua.ls Logo

SiPix STYLECAM EXTREME - User Manual

Default Icon
19 pages
Print Icon
To Next Page IconTo Next Page
Loading...
2.0MP Digital Camera
Owner’s Manual
1
Prepare Your Camera
5-1 Attaching the Wrist Strap 11
5-2 Inserting the Batteries 11
5-3 Inserting & Removing the Memory Card 12
5-4 Language Setup 14
5-5 Date/Time Setup 14
Ready to Take a Picture
6-1 Setup Mode 15
6-2 Capture Mode 17
6-3 Movie Mode 20
6-4 Playback Mode 21
6-5 PC-Connection Mode 23
6-6 TV Output Mode 25
Software Installation
7-1 Installing the Mass Storage Driver 26
7-2 Installing the ArcSoft Applications 27
Transfer Images & Videos
8-1 Downloading Images & Videos 31
One Year Limited Warranty – US & Canada
32
Warranty Services – US & Canada
33
Technical Support – US & Canada
34
Technical Support – Europe
35
Technical Support – Asia/Pacific
37
READ ME FIRST
1-1 Attention 2
1-2 Before Using Your Camera 2
1-3 Operation Caution 3
1-4 Package Contents 3
Getting to Know Your Camera
2-1 Components 4
2-2 Product Specifications 6
2-3 System Requirement 6
Controls, Operations & Display
3-1 LED Indicators 7
3-2 LCD Monitor Display 7
3-3 Power Supply 8
3-4 Shutter Button 9
3-5 Mode Selector 9
3-6 Menu/OK Button 9
3-7 Flash Button 10
3-8 Display Button 10
3-9 Macro Mode Switch 10
TABLE OF CONTENTS
Question and Answer IconNeed help?

Do you have a question about the SiPix STYLECAM EXTREME and is the answer not in the manual?

Summary

READ ME FIRST

1-1 Attention

Information regarding software CD-ROM usage and product servicing precautions.

1-2 Before Using Your Digital Camera

Advice on testing the camera before important events and copyright information.

1-3 Operation Caution

Warnings about operating the camera in various environments and handling liquid contact.

1-4 Package Contents

Lists the accessories included with the StyleCam Extreme camera package.

Getting to Know Your Camera

2-1 Components

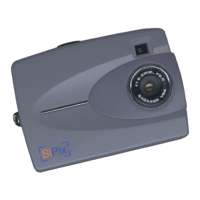
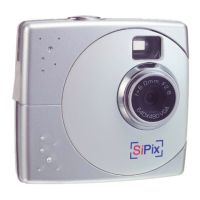
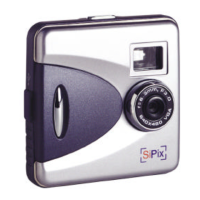
Identifies and labels the front and back view components of the camera.

Controls, Operation & Display

2-2 Product Specifications

Detailed technical specifications of the camera, including resolution, lens, and power.

2-3 Minimum System Requirement

Lists the recommended computer system requirements for using the camera software.

3-1 LED Indicators

Explains the meaning and usage of the camera's LED indicators (Red and Green LEDs).

3-2 LCD Monitor Display

Describes the icons and information displayed on the camera's LCD monitor.

3-3 Power Supply

Instructions on how to power the camera on/off and details about auto-power off feature.

3-4 Shutter Button

Explains the two-step function of the shutter button for focusing and taking pictures.

3-5 Mode Selector

Details the different operational modes available via the mode selector dial.

3-6 Menu;OK Button

Describes the function of the Menu/OK button for navigating menus and confirming selections.

3-7 Flash Button

Instructions for selecting different flash modes (Auto, Red-eye, Off) in capture mode.

3-8 Display Button

Explains how to use the Display button to change LCD display modes and access playback.

3-9 Macro Mode Switch

Guides on using the macro switch for close-up photography and its associated LED indicator.

Prepare Your Camera

5-1 Attaching the Wrist Strap

Step-by-step instructions for securely attaching the wrist strap to the camera.

5-2 Inserting the Batteries

Detailed guide on how to open the compartment and correctly insert batteries.

5-3 Inserting & Removing the Memory Card

Instructions for safely inserting and removing memory cards, including notes on formatting.

5-4 Language Setup

Guide on how to select the desired on-screen display language for the camera.

5-5 Date;Time Setup

Instructions for setting the correct date and time displayed on the camera's system.

Ready to Take a Picture

6-1 Setup Mode

Overview of the Setup mode for configuring camera settings like resolution, language, and date/time.

6-2 Capture Mode

Instructions on how to use the camera to take still pictures, including focusing and shutter use.

6-3 Movie Mode

6-4 Playback Mode

6-5 PC-Connection Mode

6-6 TV Output Mode

Software Installation

7-1 Installing the Mass Storage Driver

Steps to install the necessary driver for connecting the camera to a computer for data transfer.

7-2 Installing ArcSoft Applications

Instructions for installing bundled photo and video editing software from the CD-ROM.

Transfer Image & Videos

8-1 Downloading Images & Videos

Comprehensive guide on transferring pictures and videos from the camera to a computer.

One Year Limited Warranty - US & Canada

Warranty Services - US & Canada

Technical Support - US & Canada

Technical Support - EUROPE

Technical Support - ASIA

SiPix STYLECAM EXTREME Specifications

General IconGeneral
BrandSiPix
ModelSTYLECAM EXTREME
CategoryDigital Camera
LanguageEnglish

Related product manuals