E |3
NetUSB Printing using Auto-Connect Printer
After the driver is installed, you can see a newly created printer in the Control
Panel. Follow the steps below to perform NetUSB printing.
• In the Control Center, click the MFP server that has the desired printer
(or MFP) attached.
• Click the desired printer (or MFP).
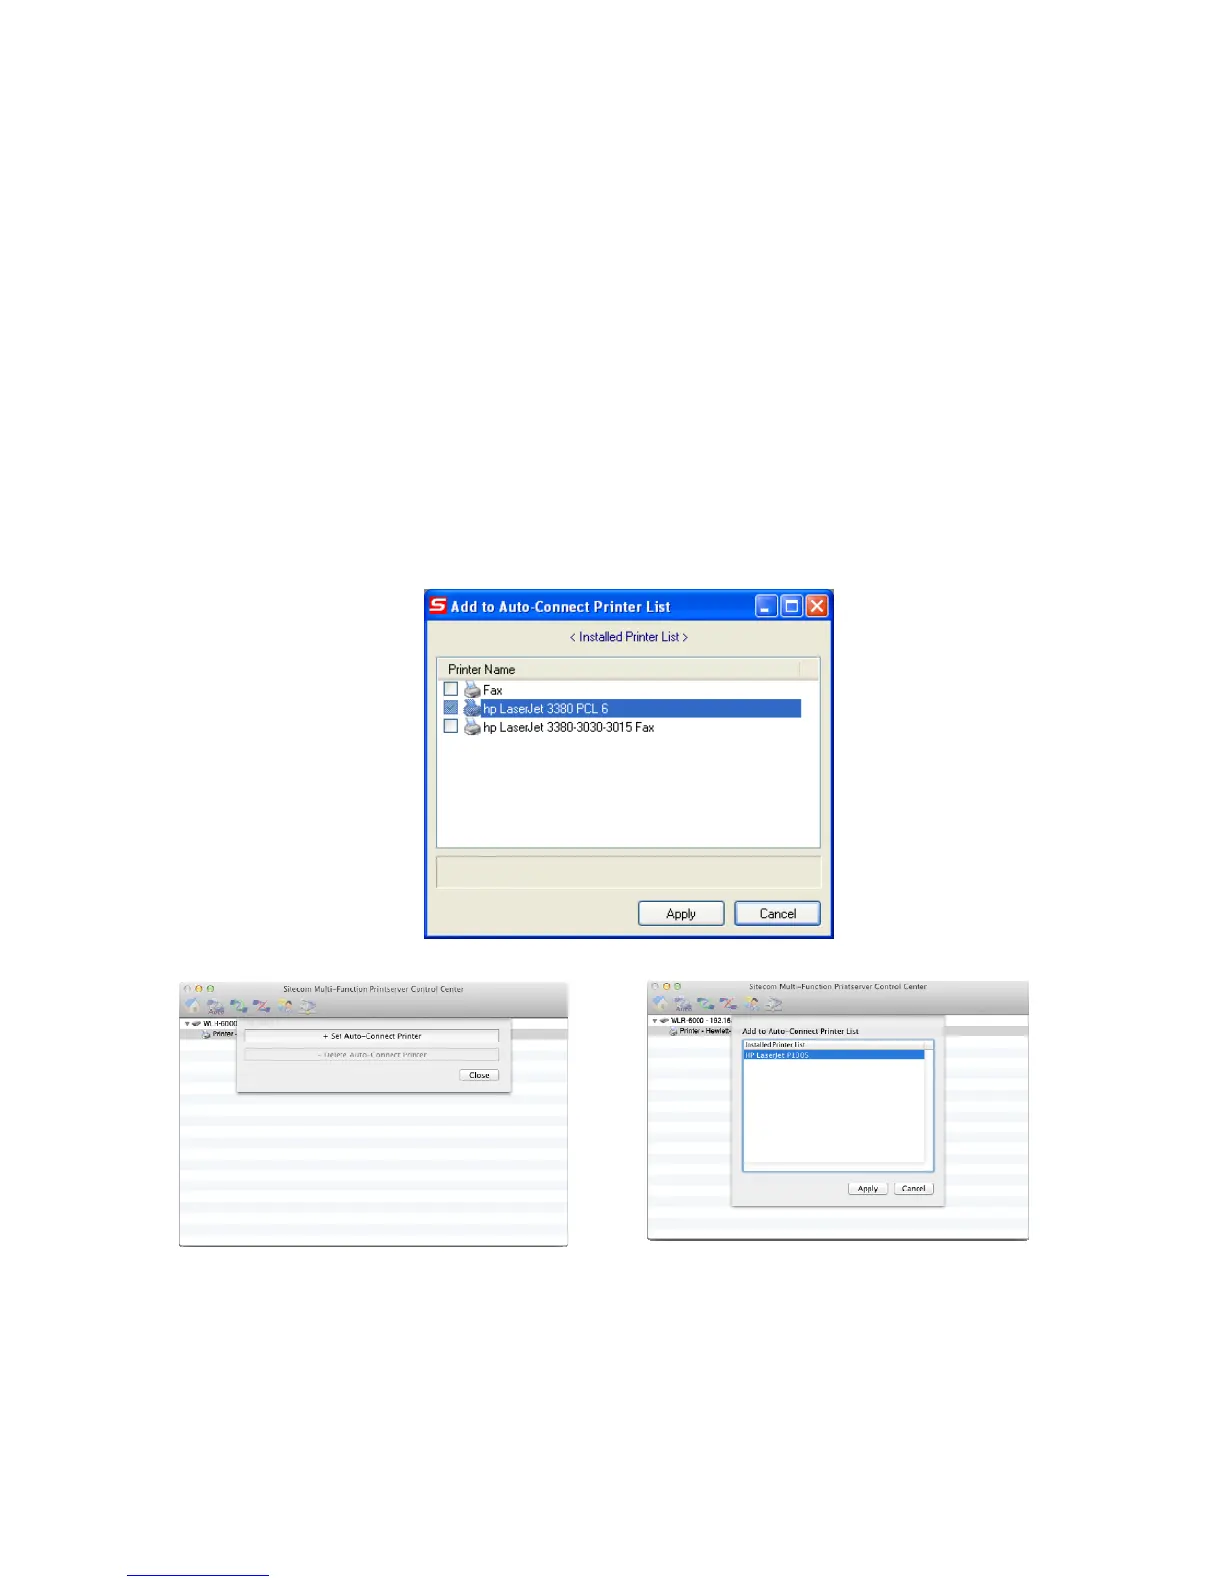
• Click the “Auto Connect Printer” button and choose “Set Auto-Connect
Printer”. The following figure will appear.
• Choose the desired printer. The desired printer must be the Windows
printer (this is a logical printer) that matches the printer attached on the
MFP server (this is a physical printer). Then click the “Apply” button.
Windows
Mac OS
•
Then, the printer will be marked as an “Auto-Connected Printer” in red.