13
Calibration
To Start:
1 - Remove the enclosure lid (Note: the screws are self-retaining)
2 - Start the power supply and wait 5 minutes until the CF12 is active and has reached a
stable point within the medium.
3 - Let the regular or desired flow reach its point of normal operation.
Calibration for Flow / No Flow:
1 - Set the flow rate at the normal range of operation.
2 - Turn the potentiometer counter-clockwise until the central LED turns red.
3 - With the central LED red, turn the potentiometer clockwise until the central LED
changes to a blinking green state.
4 - Continue to turn the potentiometer clockwise until all green LEDs in the bar graph are
on.
5 - In order to be sure that the adjustment is not at a critical state give the potentiometer
an additional quarter turn clockwise.
Set Point Adjustment:
The flow switch can be adjusted to indicate either increasing flow, or decreasing flow at a
specific set point within 3cm/s to 3m/s.
It is important to determine the specific set point at which the flow switch should activate
or de-activate.
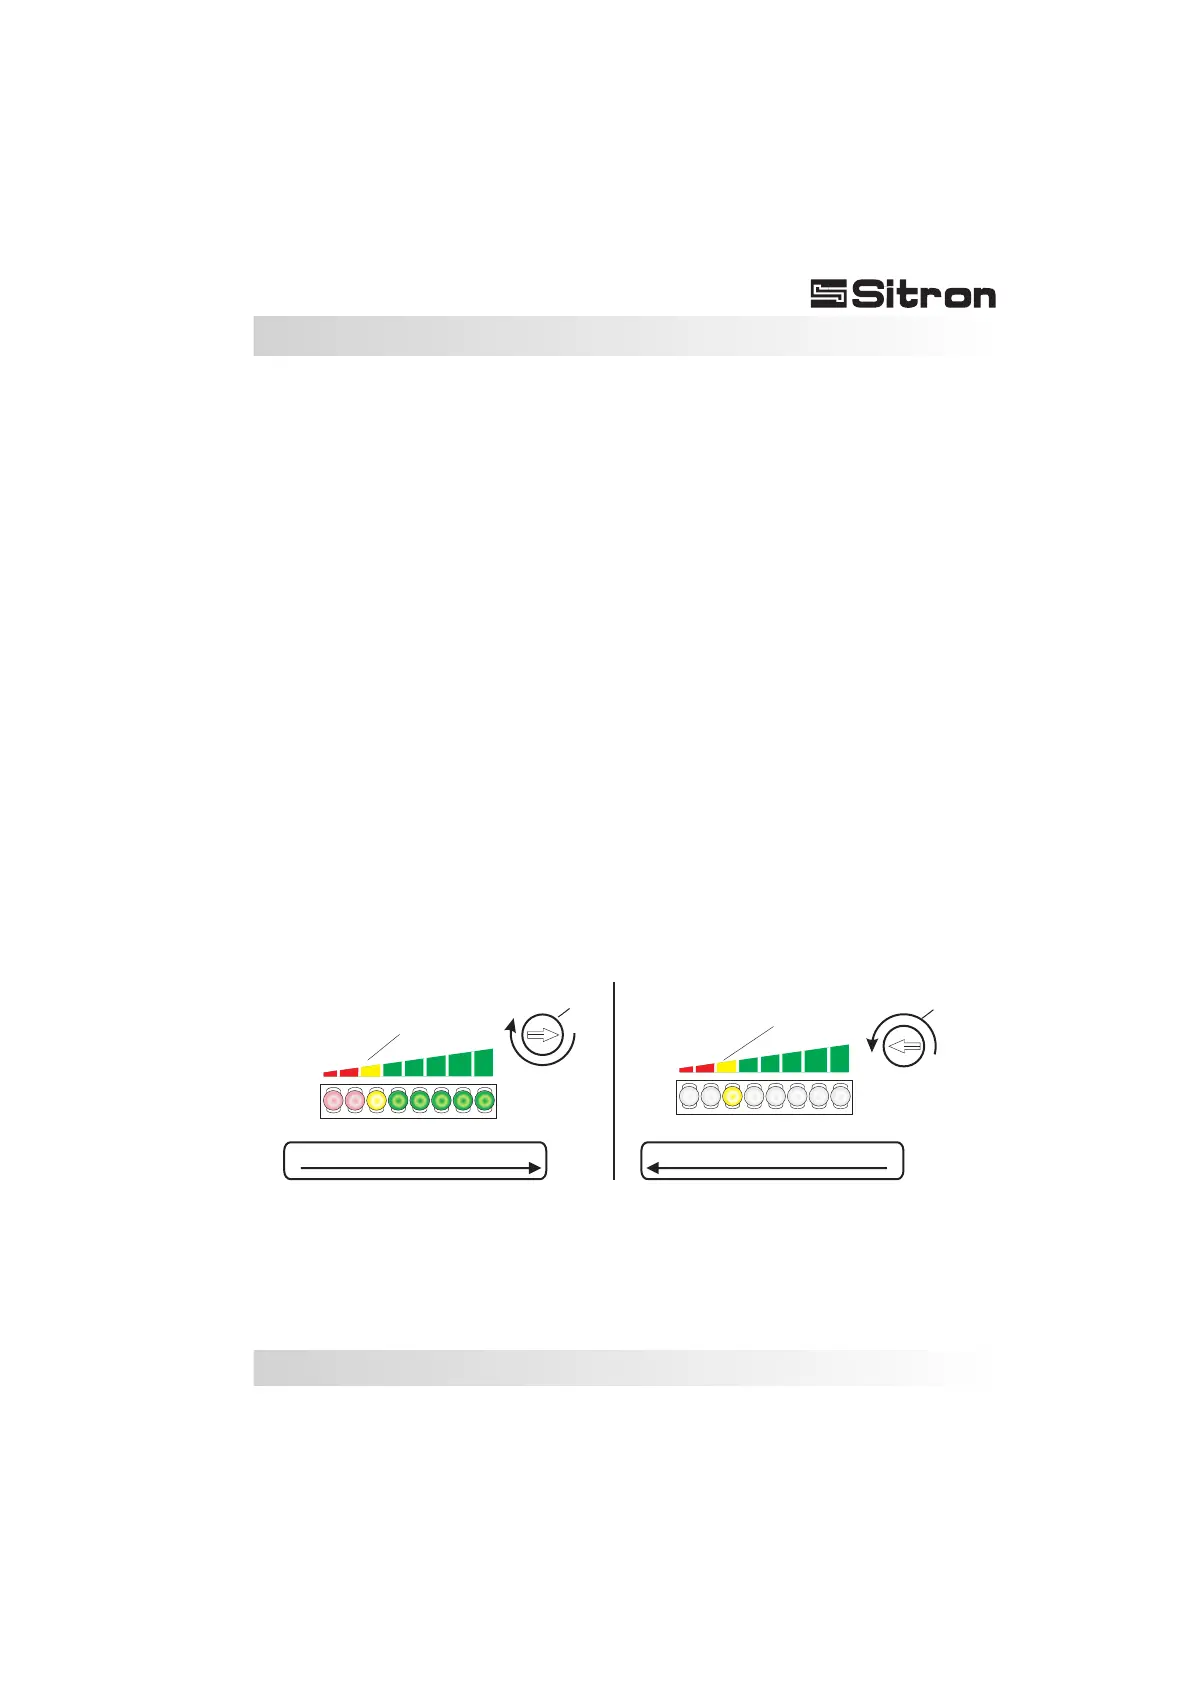
0%
100%
BARGRAPH - Lights ON
Set Point
BARGRAPH - Lights ON
0%
100%
BARGRAPH - Lights OFF
Set Point
BARGRAPH - Lights OFF
Adjust
Adjust