8
6 Fail-safe isolating transformer (the power source is
electrically separated from the transformer output)
7 Do not dispose of the charger together with
household waste material
8 Do not dispose of the battery together with
household waste material
WHEN CONNECTING NEW 3-PIN PLUG (U.K. ONLY):
• Do not connect the blue (= neutral) or brown (= live) wire
in the cord of the charger to the earth terminal of the
plug
• If for any reason the old plug is cut off the cord of the
charger, it must be disposed of safely and not left
unattended
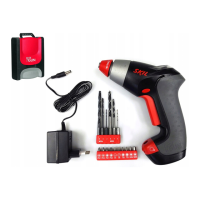
USE
• Charging battery 9
- battery of new tools is not fully charged
- connect charger to power source as illustrated
- insert battery into charger
- red light F will turn on indicating that the battery is
being charged
! remove battery from charger after charging
period has ended thereby lengthening the service
life of the battery
IMPORTANT:
- after 3 hours the charging operation will be
completed, and the battery may be used, even
though the red light may still be on (the red light
may require more than 3 hours to turn off)
- while charging, the charger and the battery may
become warm to touch; this is normal and does not
indicate a problem
- ensure that the outside surface of the battery is clean
and dry before inserting into charger
- do not charge at temperatures below 0°C and over
40°C; this will seriously damage the battery as well
as the charger
- do not remove battery from tool while it is running
! a battery that is new or has not been used for a
longer period does not develop its full capacity
until after approximately 5 charging/discharging
cycles
- do not repeatedly recharge the battery after only a
few minutes of operation; this may result in a
reduction of operating time and battery effi ciency
- the battery must be kept separate from the natural
environment and should not be disposed of as
normal domestic waste (symbol 8 will remind you of
this when the need for disposing occurs)
! prior to disposal protect battery terminals with
heavy tape to prevent short-circuit
- if you anticipate long periods of non-use for the tool,
it is best to unplug the charger from its power source
• On/off 0
• Speed control for smooth starting !
• Changing direction of rotation @
- when not properly set in left/right position,
switch A 2 cannot be activated
! change direction of rotation only when tool is at a
complete standstill
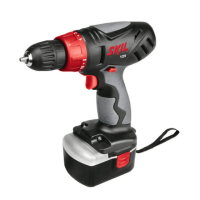
• Changing bits #
- insert the bit as deep as possible in the chuck
! do not use bits with a damaged shank
• Torque control (VariTorque) $
- limits the amount of output torque delivered by the
chuck (16 clutch settings)
- when turning in a screw, fi rst try VariTorque position 1
and increase until the desired depth has been
reached
• 2 Mechanical speeds %
- set switch E to desired speed
! change speed while tool is running slowly
1 = HIGH POWER
- high torque
- for screwdriving and drilling large diameters
- for tapping thread
2 = HIGH SPEED
- lower torque
- for drilling small diameters
• Holding and guiding the tool ^
- keep the ventilation slots uncovered
- do not apply too much pressure on the tool; let the
tool do the work for you
APPLICATION ADVICE
• Use the appropriate bits &
! only use sharp bits
• When drilling ferrous metals
- pre-drill a smaller hole, when a large hole is required
- lubricate drill bit occasionally with oil
• When turning in a screw at/near the cross cut end or an
edge of wood, pre-drill a hole in order to avoid cracking
of the wood
• For an optimal use of the tool a steady pressure on the
screw is required, especially while removing
• When screwdriving in hard wood one should pre-drill a
hole
• Splinterfree drilling in wood *
• Dustfree drilling in walls (
• Dustfree drilling in ceilings )
• Drilling in tiles without skidding ¡
• For more tips see www.skileurope.com
• Vibration level
The vibration emission level stated at the back of this
instruction manual (indicated by an asterisk) has been
measured in accordance with a standardised test given
in EN 60745; it may be used to compare one tool with
another and as a preliminary assessment of exposure to
vibration when using the tool for the applications
mentioned
- using the tool for different applications, or with
different or poorly maintainted accessories, may
signifi cantly increase the exposure level