12
- the battery is nearly empty (to protect against
deep discharge) --> a low battery level or ashing low
battery level
8
b is shown by the battery level indicator
when pressing button M; charge battery
!
damaged
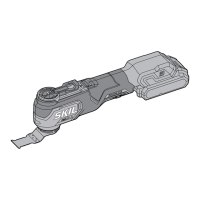
• Changing accessories
q
! remove battery from tool
- remove/mount the required accessory as illustrated
- When the clamping lever is perpendicular to the tool,
it can be rotated 360° to nd a position where the
crossbar can stuck the groove after ipping over. The
clamping screw with washer can only be loosened or
tightened when the crossbar of the clamping lever is
stuck in the groove.
- ensure that the openings of the accessory engage into
the tabs of the tool head (any snap-in position possible)
- mount the accessory with the depressed centre
pointing downwards
- check the tight seating of the accessory (incorrect
or not securely fastened accessories can come loose
during operation and create a hazard)
• Mounting of sanding sheet
w
- tap the dust out of the VELCRO material on sanding
pad E before mounting the sanding sheet
- mount VELCRO sanding sheet H as illustrated
! replace worn sanding sheets in time
! always use the tool with the total VELCRO surface
covered with sanding sheet
• On/o
- switch on/o the tool by pushing switch C
2
in “I”/”O”
position
! before the accessory reaches the workpiece, the
tool should run at full speed
!
the workpiece
• Adjusting working speed
e
- with wheel D the required oscillating frequency can
be adjusted from low (1) to high (6) (also while tool is
running)
- the optimal working speed depends on the material
and can be determined with practical trials
• Holding and guiding the tool
! while working, always hold the tool at the grey-
coloured grip area(s)
r
- keep ventilation slots K uncovered
- do not apply too much pressure on the tool (excessive
pressure will cause excessive heat and may shorten
the service life of the accessory)
• Depth adjustment accessory (DEPTH STOP)
t
APPLICATION ADVICE
• For optimal results on dierent materials use table
y
as reference for determining the right accessory
(accessories not standard included)
• For more information see www.skil.com
MAINTENANCE / SERVICE
• Always keep tool clean (especially ventilation slots K
2
)
! remove battery from tool before cleaning
• If the tool should fail despite the care taken in
• Do not touch the moving sanding sheet
• Do not continue to use worn, torn or heavily clogged
sanding sheets
• When sanding metal, sparks are generated; do not use
vacuum cleaner and keep other persons and combustible
material from work area
BATTERIES
• The battery supplied ,if any, is partially charged (to
ensure full capacity of the battery, completely charge the
battery in the battery charger before using your power
tool for the rst time)
• Only use the following batteries and chargers with
this tool
- SKIL battery: BR1*31****
- SKIL charger: CR1*31****
• Do not use the battery when damaged; it should be
replaced
• Do not disassemble the battery
• Do not expose tool/battery to rain
• Permitted ambient temperature (tool/charger/battery):
- when charging 4...40°C
- during operation –20...+50°C
- during storage –20...+50°C
EXPLANATION OF SYMBOLS ON TOOL/BATTERY
3
This tool accepts most commonly available multi-tool
accessories, including existing OIS and Starlock basic
accessories
4
Read the instruction manual before use
5
Batteries may explode when disposed of in re, so do not
burn battery for any reason
6
Store tool/charger/battery in locations where temperature
will not exceed 50°C
7
Do not dispose of electric tools and batteries together
with household waste material
USE
• Charging battery
! read the safety warnings and instructions
provided with the charger
• Removing/installing the battery
2
• Battery level indicator
8
- press the battery level indicator button M to show the
current battery level
8
a
! when the lowest level of the battery indicator
8
b, the
battery is empty
!
after pressing button M
8
c, the battery is not
within the allowable operating temperature range
• LED-light L
9
LED-light automatically lights on when activating the on/
o switch
!
protection is activated (see below)
• Battery protection
The tool is suddenly being switched o or prevented from
being switched on, when
- the load is too high --> remove load and restart
- the battery temperature is not within the allowable
operating temperature range of -20 to +50°C --> 2
levels of the battery level indicator start ashing when
pressing button M
8
c; wait until battery has returned
within the allowable operating temperature range
 Loading...