BLADE STORAGE COMPARTMENT
Your tool is equipped with a blade storage
compartment on the backside of your saw
(Fig. 5). To open, pull compartment in direction
of arrow. To close, push compartment toward
the tool until it snaps into place.
Be sure compartment is closed to prevent
blades from falling out.
FIG. 5
BLADE
STORAGE
COMPARTMENT
-
8
-
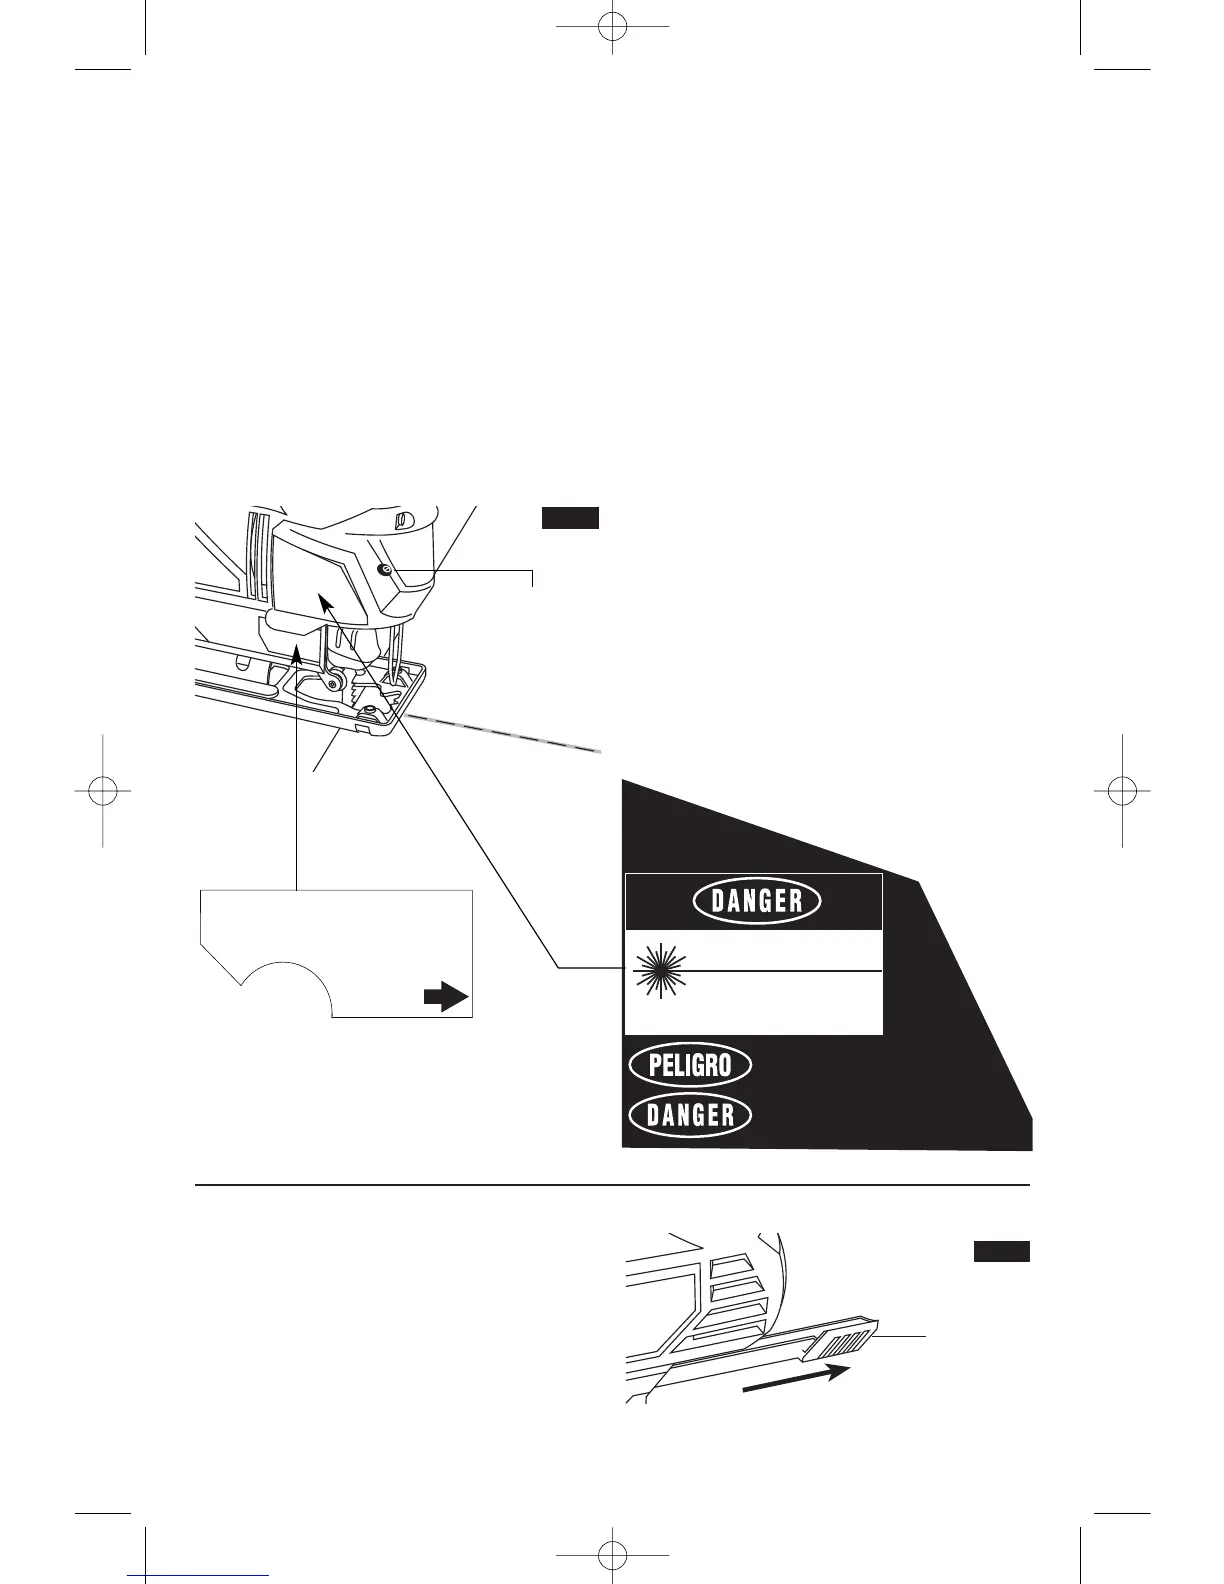
LASER LIGHT ON/OFF BUTTON
(Model 4495 only)
T
he laser “ON/OFF” button allows you to turn
the laser feature on or off.
To turn laser ON, depress the button.
To turn laser OFF, depress the button again.
TO ADJUST THE LASER LINE GUIDE
Your laser line guide is pre-set at the factory
and should not need adjustment. If adjustment
is required, use a flat head screwdriver to turn
the adjustment screw located on the side of
the laser module (Fig. 4). Turn on the laser
light ON. Rotate the adjustment screw until the
laser line is in the center of the blade. There is
no need to turn the tool “ON” while adjusting
the light beam.
The Laser line guide has a limited amount of
travel. Do not continue to turn the adjustment
s
crew after the line stops moving or if it
becomes significantly harder to turn the screw.
Overturning the adjustment screw may cause
the adjustment system to break or cause the
adjustment screw to fall out of the tool.
USING THE LASER LINE GUIDE
Only turn on the laser light on when the tool is
on the workpiece.
1. First mark the line of cut on your workpiece
(good side down.)
2. Insert plug into the power source.
3. Place the front edge of the saw foot on the
workpiece, turn laser light ON and align beam
with the line of cut .
4. Hold the tool firmly, squeeze the trigger and
allow the tool to reach desired speed.
5. Press down (to keep the saw foot flat
against the work surface) as you slowly push
the saw forward, keeping the beam in line with
the line of cut .
6. After completion of the cut, turn the laser
light OFF.
LASER LIGHT
ADJUSTMENT
SCREW
FIG. 4