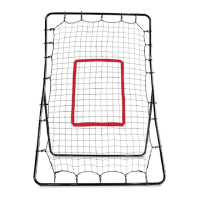
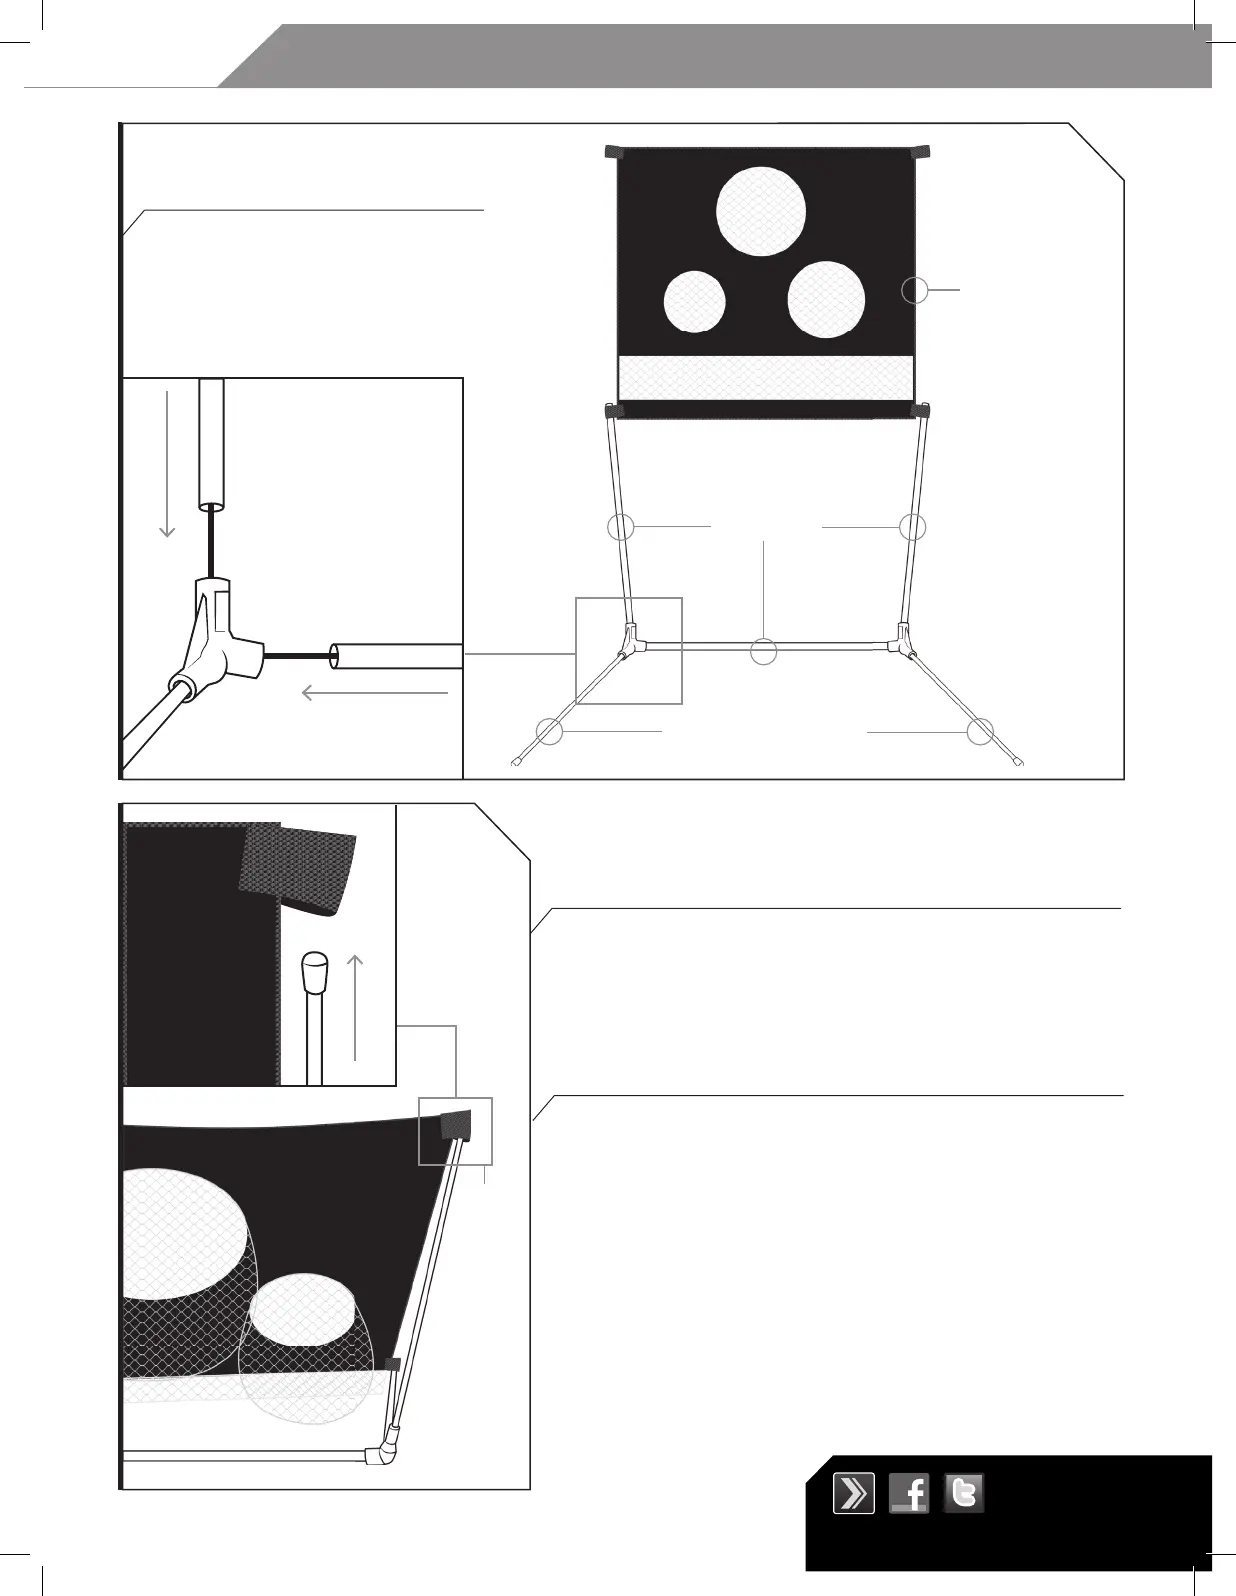
NOTE: Ensure all poles are fully inserted. Failure to do so may result in damage to the Chipping Net.
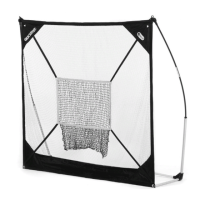
1 – Slide each of the Tension-Tite™ Arm Poles into the corresponding top corner pocket on the
Chipping Target.
Remove the Tension-Tite™ Arm Poles from the pockets on the Chipping Target.
WARNING: Chipping Net is under tension when assembled. Please take the utmost care when
releasing the tension during disassembly. Failure to do so may result in injury.
Disconnect the Base Poles from the corner joints and fold the frame so all of the poles lay parallel.
Roll up the Frame into the Chipping Target, and place into the Carry Bag.
STEP 1
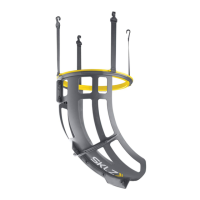
BASE POLE ASSEMBLY
STEP 2
CONNECT THE CHIPPING TARGET TO THE TENSION-TITE™ ARM POLES
STEP 3
STORING YOUR QUICKSTER CHIPPING NET
1 – Insert each of the Base Poles into the holes of the
corresponding corner joints.
NOTE: Ensure are poles are fully inserted. Failure to do
so may result in damage to the Chipping Net.
VISIT SKLZ.COM FOR
INSTRUCTIONAL VIDEO AND CONTENT
Training Videos & Articles: SKLZ.com
facebook.com/SKLZgolf
twitter.com/SKLZ
SKLZ.COM
sV1
SETUP AND STORAGE
BASE POLES
TENSION-TITE ARM POLES
CHIPPING TARGET
(back side laying down)
AERIAL VIEW
BACK
VIEW
CORNER
POCKET
ChippingNet_Instru_2-sided_8x11_sV1.indd 2 1/17/14 3:40 PM