EasyManua.ls Logo

SKLZ PRO MINI HOOP User Manual

SKLZ PRO MINI HOOP
2 pages
To Next Page IconTo Next Page
Page #1 background imageLoading...
Page #1 background image
facebook.com/ProMiniHoop
INSTRUCTION MANUAL
INCLUDES:
» Pro Mini Hoop Classic
» Mini Ball
Thank you for choosing Pro Mini Hoop. If there is anything else we can
do, don’t hesitate to send us an email (customerservice@sklz.com) or give
us a call (1-877-225-7275).
BEFORE YOU BEGIN:
» Make sure you have all of the Pro Mini Hoop components.
» Read all setup and usage instructions carefully.
» Ensure your playing area is clear and remove any objects from the
surrounding area to avoid damage or injury.
» Always check for wear and tear before use. If any is found, do not use
the product.
iWARNING:
» Do not hang on the rim in order to avoid damage to product or
personal injury.
iCAUTION:
» Before use, make sure that the backboard is securely mounted.
IMPORTANT:
SAVE THIS INFORMATION IN THE EVENT
THAT THE MANUFACTURER NEEDS TO BE
CONTACTED FOR REPLACEMENT PARTS.
I SAFETY INSTRUCTIONS:
FAILURE TO FOLLOW THESE SAFETY INSTRUCTIONS MAY RESULT
IN SERIOUS INJURY OR PROPERTY DAMAGE AND WILL VOID YOUR
WARRANTY.
Most injuries are caused by misuse and/or not following instructions. Use
caution when using this product.
PRO MINI HOOP PARTS:
BACKBOARD
A
RIM
B
NET
C
RIM PLATE
D
NUTS (3)
F
MINI BASKETBALL
H
BOLTS (3)
E
WRENCH
G
NET
C
RIM
BACKBOARD
B
A
designed by
PMH_Classic_Instru_8.5x11_sV1.indd 1 7/8/14 4:59 PM
Question and Answer IconNeed help?

Do you have a question about the SKLZ PRO MINI HOOP and is the answer not in the manual?

SKLZ PRO MINI HOOP Specifications

General IconGeneral
Diameter127 mm
MaterialFoam
Proper useIndoor
Product main colorOrange
Suitable for indoor useYes
Suitable for outdoor useNo

Summary

Instruction Manual Introduction

Important Information

Save this information for contacting the manufacturer for replacement parts.

Safety Instructions

Follow safety instructions to avoid injury or property damage and voiding warranty.

Preparation Before Use

Check components, read instructions, clear area, check for wear before assembly or use.

Warnings and Cautions

Do not hang on rim; ensure backboard is securely mounted before use.

Pro Mini Hoop Assembly Steps

Rim and Backboard Assembly

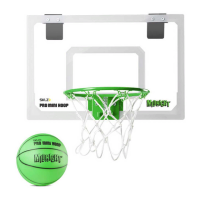
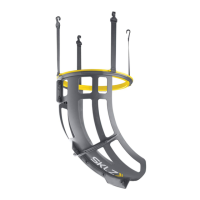
Align rim plate, attach rim with bolts and nuts to the backboard securely.

Attaching the Net

Attach the net to the rim by looping the long end over the metal loops.
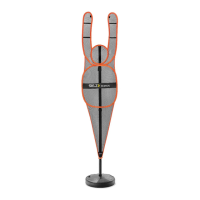
Related product manuals