EasyManua.ls Logo

SkyBound Mini Trampoline 36 inch User Manual

SkyBound Mini Trampoline 36 inch
4 pages
To Next Page IconTo Next Page
Page #1 background imageLoading...
Page #1 background image
ASSEMBLY AND INSTALLATION MANUAL
www.SkyBoundUSA.com
www.TrampolinePartsCenter.com
help@skyboundusa.com
888-891-4689
Monday through Friday
8:00 am to 5:00 pm PST
or visit www.SkyBoundUSA.com
or www.TrampolinePartsCenter.com
-Kiki (Founder) & Team SkyBound
For customer service, please contact:
“Nurturing the inner-child in all of us by
uniting communities worldwide and
promoting an active lifestyle.”
When I shop, I am not just buying a product or
service. I purchase why that brand focuses on
what they do, what their corporate philosophy is,
the quality of their products, and whether or not
my personal core values align with that brand’s
vision. When I don’t feel great about a company’s
brand, products, or how I’m being treated as a
customer, then I know they are not delivering on
what matters most: exceeding the customer
expectation by delivering happiness with their
products, quality, and service.
This primary focus is what drives our culture at
Team Skybound. For supporting our vision, we
would like to personally thank you for trusting us
to deliver happiness to you and your family!
A PERSONAL MESSAGE FROM OUR FOUNDER
2022 BX International Inc – ALL RIGHTS RESERVED
Mini Trampoline 36 inch
Question and Answer IconNeed help?

Do you have a question about the SkyBound Mini Trampoline 36 inch and is the answer not in the manual?

SkyBound Mini Trampoline 36 inch Specifications

General IconGeneral
BrandSkyBound
ModelMini Trampoline 36 inch
CategorySports & Outdoors
LanguageEnglish

Summary

A Personal Message from Our Founder

Trampoline Parts

Assembly Instructions

WARNING

Crucial safety warnings about product wear, potential injury, supervision, and safe usage environments.

STEP 1

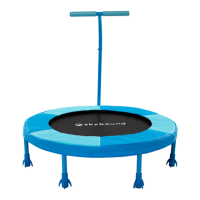
Install feet to each leg and secure top rails using specified parts and Allen key.

STEP 2

Attach the trampoline mat to the frame using springs and the provided spring tool.

STEP 3

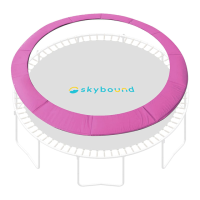
Install and secure the spring pad cover, ensuring the piece pad strap is tied.

STEP 4

Mount the 2-piece handle, insert into the frame, and secure with hardware.

Related product manuals