13
16
17
14
15
5
18
19
16
17
14
15
5
18
19
16
17
14
15
6
18
19
4
4
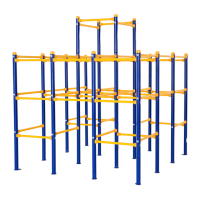
4. First find the Corner Upright 2 (4) with marked 4.
Attach three Plastic Protectos (14) to two Long
Cross Bars (5) and the Short Cross Bars (6) with
three M6X40mm Button Bolts (16), three M6
Washers (17) and three M6 Locknuts (15).
Finally fix Corner Upright 2 (4) with three M8 Arc
Washers (18) and the Short Cross Bar (6) three
M8X35mm Bolts (19).
Finally press the Plastic Cap (13) to the Corner
Upright 2 (4).
Do not tighten the locknuts.
6
6
6
6
16
17
14
15
18
19
14
14
14
4
8
7
1
5
11
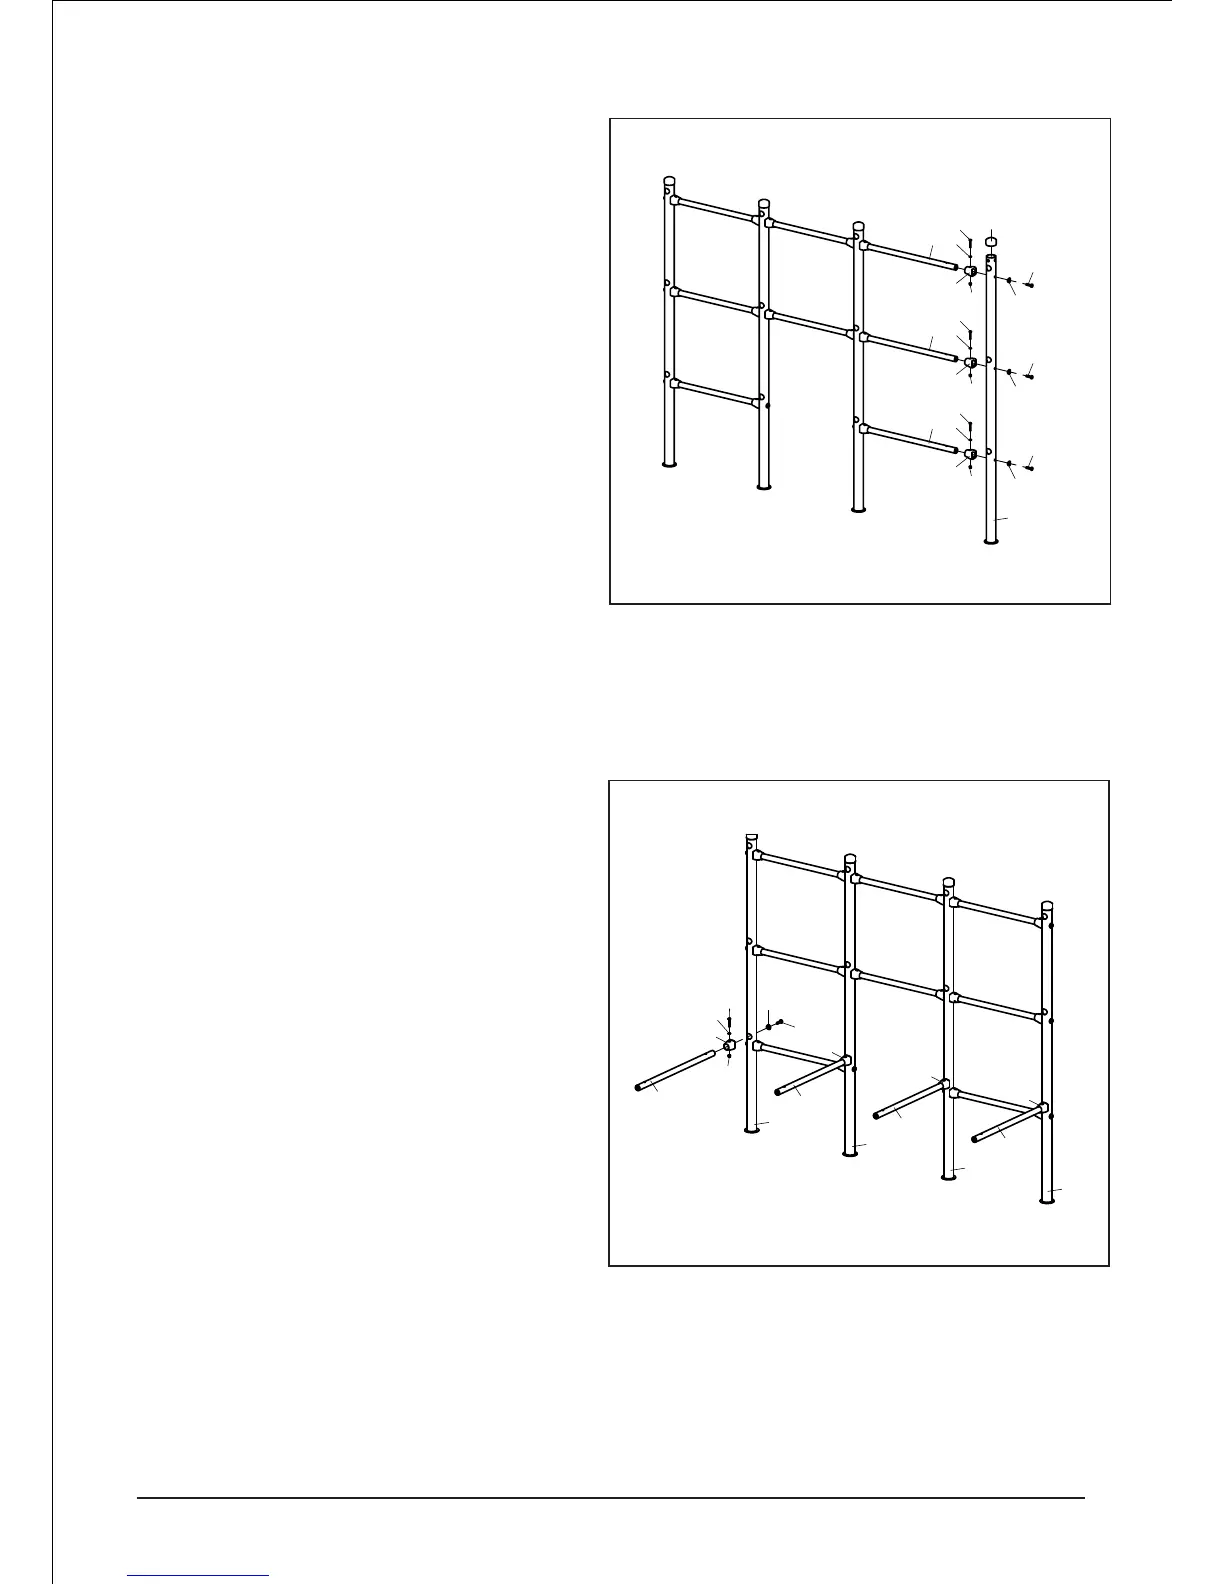
Repeat step 1 to step 5.
5. Attach the Plastic Protectos(14) to the Short
Cross Bars (6) with the M6X40mm Button Bolts
(16), the M6 Washers(17) and the M6 Locknuts
(15). Then fix the Corner Upright 1 (1) with the M8
Arc Washers (18) and the M8X33mm Button Bolts
(19).
Then fix the Side Upright 3 (7), the Side pright 4 (8)
and the Corner Upright 2 (4) in the same way.
Do not tighten the locknuts.