EasyManua.ls Logo

SLX Extreme Series - User Manual

SLX Extreme Series
10 pages
Print Icon
To Next Page IconTo Next Page
Loading...
SHORELINE 4X4 INSTRUCTIONS
EXTREME SERIES BULLBAR
1. Auto electrical work should be carried out by a competent person. Vehicle
wire colours are listed as a guide only and may vary on some makes and
models.
2. The function of each wire should be checked before any connections are
made.
3. All wires tapped into should be soldered and then insulated with electrical
tape or heat shrink.
4. Grounding/Earth points must always be connected to the factory grounding
points, not to the battery negative terminal. See owner’s manual.
5. Using only a LED test light, test all electrical components of the vehicle before
and after wiring.
This is to ensure everything works correctly.
6. the installation of large or light-coloured antennas or aerials to the
front of a bull bar as this may cause the lane departure system to malfunction.
Only a competent person should perform accessory installations. It is the
responsibility of this person to ensure correct fitment.
Whilst working on this vehicle, always use appropriate safety equipment.
Read and understand instructions fully before commencing fitment.
Check the hardware supplied against the contents list on the following pages.
Do not use this product for any vehicle make or model other than specified in
these instructions.
This product and or hardware must not be modified in any way. Do not
remove labels from this product.
Recording the batch number on the customer’s job card is good practice for
future reference, or complete the information below and file with customer job
card.
Care
To maintain the finish of the product, wash regularly using a PH neutral car
wash, hose off and
chamois dry.
Do not use acidic or alkaline cleaners.
Plastic components can be maintained with a silicone spray or similar (non-
acidic or alkaline based).
Ironman 4x4 recovery points are FEA tested during design and destruction
tested during development
to establish the Working Load Limits (WLL).
Question and Answer IconNeed help?

Do you have a question about the SLX Extreme Series and is the answer not in the manual?

Summary

General Installation and Electrical Guidelines

Electrical Connection Procedures

Guidance on soldering, insulation, testing, and grounding for electrical connections.

Installation Safety and Competency

Emphasizes competent personnel, safety equipment, and full instruction understanding.

Product Care and Recovery Point Guidelines

Vehicle Accessory Care

Instructions for washing, drying, and cleaning plastic components.

Recovery Point Usage

Advises on correct use of recovery points, strap types, and load limits.

Fitting Instructions Overview

Bumper Removal and Preparation

Steps to remove the vehicle's bumper and associated components.

Bracket and Cradle Mounting

Instructions for fitting adapter brackets and the winch cradle.

Washer Bottle Relocation and Wiring

Procedures for relocating the washer bottle and routing wiring.

Bar Mounting and Final Connections

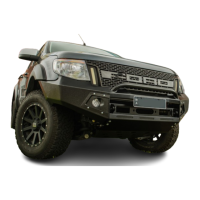
Steps for mounting the bullbar and connecting fog lights.

Bash Plate Installation

Guidance on mounting the supplied bash plate.

Overview

This document provides fitting instructions and important information for the Shoreline 4x4 Extreme Series Bullbar X-1, specifically designed for the Mitsubishi MQ Triton.

Function Description:

The Shoreline 4x4 Extreme Series Bullbar X-1 is an aftermarket accessory designed to be installed on the front of a Mitsubishi MQ Triton. Its primary functions include:

  • Vehicle Protection: The bullbar provides enhanced protection to the front of the vehicle, particularly in off-road conditions or in the event of minor collisions.
  • Accessory Mounting: It serves as a robust platform for mounting various accessories, such as LED fog lights (integrated into the bullbar), a winch (via a dedicated winch cradle), and potentially other recovery or lighting equipment.
  • Recovery Points: The bullbar incorporates front tow points, rated to 3.75T, which are crucial for vehicle recovery operations. These points are designed for straight-line pulls and are not intended for snatching.
  • Aesthetic Enhancement: The bullbar also contributes to the rugged and aggressive aesthetic of the vehicle.

Important Technical Specifications:

  • Vehicle Compatibility: Specifically designed for the Mitsubishi MQ Triton.
  • Recovery Point Rating: Front TOW points are rated to 3.75T.
  • Recovery Point Usage: Designed for straight-line pulls only; not for snatching.
  • Electrical Components: Includes provisions for LED fog lights, requiring electrical wiring and connections.
  • Washer Bottle Relocation: The installation process involves relocating the factory washer bottle and extending its wiring and hose.
  • Winch Compatibility: Features a winch cradle for mounting a winch.

Usage Features:

  • DIY Installation (with Competent Assistance): The manual provides step-by-step instructions for installation, although it strongly recommends that only a competent person perform accessory installations, especially for electrical work.
  • Integrated Lighting: The bullbar comes with LED fog lights that integrate into the vehicle's existing wiring.
  • Winch Mounting: A dedicated winch cradle allows for easy installation of a winch, enhancing the vehicle's recovery capabilities.
  • Recovery Points: The front tow points are designed for safe vehicle recovery, provided they are used correctly with an equalising or bridle strap.
  • Lane Departure System Consideration: Users are advised against installing large or light-coloured antennas or aerials on the bullbar, as this may cause the vehicle's lane departure system to malfunction.

Maintenance Features:

  • Cleaning: To maintain the product's finish, regular washing with a PH neutral car wash, followed by hosing off and chamois drying, is recommended.
  • Avoid Harsh Cleaners: Acidic or alkaline cleaners should not be used on the bullbar.
  • Plastic Component Care: Plastic components can be maintained with a silicone spray or similar (non-acidic or alkaline-based) product.
  • Recovery Point Integrity: The recovery points are FEA tested during design and destruction tested during development to establish Working Load Limits (WLL). Users are warned not to alter or modify the recovery points in any way, as this may compromise their strength and integrity.
  • Proper Recovery Technique: It is advised to use an equalising or bridle strap during recovery to prevent fatigue or bending of the recovery points, which could void the warranty. Single recovery points should never be used with a side load pull. Recovery points are designed for straight-line pulls; angled or sideways pulls may reduce the WLL.
  • Electrical Connections: All wires tapped into should be soldered and insulated with electrical tape or heat shrink for long-term durability and safety.
  • Grounding: Grounding/Earth points must always be connected to the factory grounding points, not directly to the battery negative terminal, as per the owner's manual.
  • Pre- and Post-Wiring Checks: A LED test light should be used to test all electrical components of the vehicle before and after wiring to ensure correct functionality.

Installation Process Overview:

The installation involves several steps, including:

  1. Preparation: Clearing the area around the car and unwrapping the bullbar.
  2. Bumper Removal: Removing the grill cover, screws, clips, and bolts securing the bumper, and disconnecting fog light wiring.
  3. Trimming: Trimming the air dam to sit flush with the intercooler piping, and trimming inner wheel liners and flares.
  4. Bracket Installation: Unbolting and disposing of the existing metal bracket, then mounting adaptor brackets to the chassis.
  5. Winch Cradle Mounting: Mounting the winch cradle to the adaptor brackets.
  6. Washer Bottle Relocation: Unscrewing and removing plastic trim under headlights, removing the factory washer bottle, mounting a new washer bottle bracket, and routing/extending wiring and water hose to the new bottle.
  7. Bullbar Mounting: With a helper, mounting the bullbar to the bracket, ensuring it is level and maintaining a 10mm gap between the headlights and the bar.
  8. Electrical Connections: Soldering LED fog lights into the factory wiring and extending washer motor wiring.
  9. Finishing: Tidy up wiring and hoses with cable ties, refit the grill, mount the supplied bash plate, and trim the grill cover to access the replacement window washer tank.

Safety and Best Practices:

  • Always use appropriate safety equipment while working on the vehicle.
  • Read and understand all instructions fully before commencing fitment.
  • Check supplied hardware against the contents list.
  • Do not use the product for any vehicle make or model other than specified.
  • Do not modify the product or hardware in any way.
  • Do not remove labels from the product.
  • Recording the batch number on the customer's job card is good practice for future reference.

SLX Extreme Series Specifications

General IconGeneral
BrandSLX
ModelExtreme Series
CategoryAutomobile Accessories
LanguageEnglish