49709 / 02
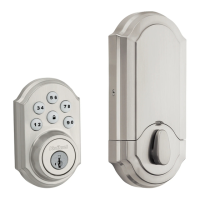
909 Models
J
1"
25 mm
2⅛"
54 mm
1½"
54 mm
1⅜" — 2"
35mm — 51mm
2⅜" (60 mm)
or • o • ou
2¾" (70 mm)
If • Si • Si
2⅜" (60 mm)
If • Si • Si
2¾" (70 mm)
Check Dimensions
Revise las medidas
Vérifier les dimensions
B
A
A
F
B
K
x4
AA
M
N
N
or
o
ou
C
D
E
M
P
Cable goes
underneath latch
El cable va por
debajo del pestillo
Le câble passe
sous le verrou
Push cable into
side hole.
Empuje el cable
hacia el orificio
lateral.
Pousser le câble
à travers le trou
latéral.
Keep parallel
Mantener paralelo
Gardez parallèle
G
H
H
Do not use electric drill or
electric screwdriver to
tighten screws.
No utilice el taladro
eléctrico o destornillador
eléctrico para apretar los
tornillos.
Ne pas utiliser une
perceuse électrique ou un
tournevis électrique pour
serrer les vis.
Insert key and test latch. If latch does not
extend or retract smoothly, adjust screws (H).
Remove key when finished.
Inserte la llave y probar el pestillo. Si pestillo no
extender o retraer con suavidad, ajuste los
tornillos (H). Retire la llave cuando haya
terminado.
Insérer la clé et tester le verrou. Si le verrou ne
s’étend pas ou ne se retracte pas facilement,
ajuster les vis (H). Retirer la clé lorsque vous
avez terminé.
J
L
J
K
K
Push excess cable into
interior housing (J).
Empuje el excedente de cable
hacia la cubierta interior (J).
Pousser le câble excédentaire
à l’intérieur du boîtier (J).
L
R
Q
Q
(1) Hold LOCK button on keypad while (2)
inserting the battery pack into the interior.
The lock will extend & retract deadbolt latch.
Two beeps will sound in approximately 30
seconds to confirm successful installation.
(1) Mantenga presionado el botón del candado en el
teclado mientras (2) introduce el paquete de pilas en el
interior. La cerradura se extenderá y hará retroceder el
pasador del cerrojo. Sonarán dos pitidos en
aproximadamente 30 segundos para confirmar que la
instalación ha sido exitosa.
Do not use on 1½" (38 mm) holes.
No lo use en orificios de 38 mm (1½").
Ne pas utiliser sur des trous de 38 mm (1½").
180°
Program user codes before installing cover. See reverse side.
Programe los códigos de usuario antes de instalar la cubierta. Consulte la información al dorso.
Programmer les codes d'utilisateur avant d'installer le couvercle. Voir l'endos.
For select models only.
Por solamente modelos selectos.
Pour certains modèles seulement.
(1) Maintenir le bouton de VERROUILLAGE du clavier pendant (2)
l’insertion du bloc-piles à l’intérieur. Le mécanisme de verrouillage
allongera et ramènera le verrou du pêne dormant. Deux signaux
sonores se feront entendre après environ 30 secondes pour
confirmer le succès de l'installation.
Tools Needed
Herramientas necesarias
Outils nécessaires
AA
AA
AA
AA
A
B
C
D
E
F
G
J
H
K
L
M
Q
R
N
P
For select models only.
Por solamente modelos selectos.
Pour certains modèles seulement.
Quick Installation Guide
Guía de instalación rápida
Guide d’installation rapide
© 2013 Spectrum Brands, Inc.
1
2
3
4
5
6
7
8
9
10
11