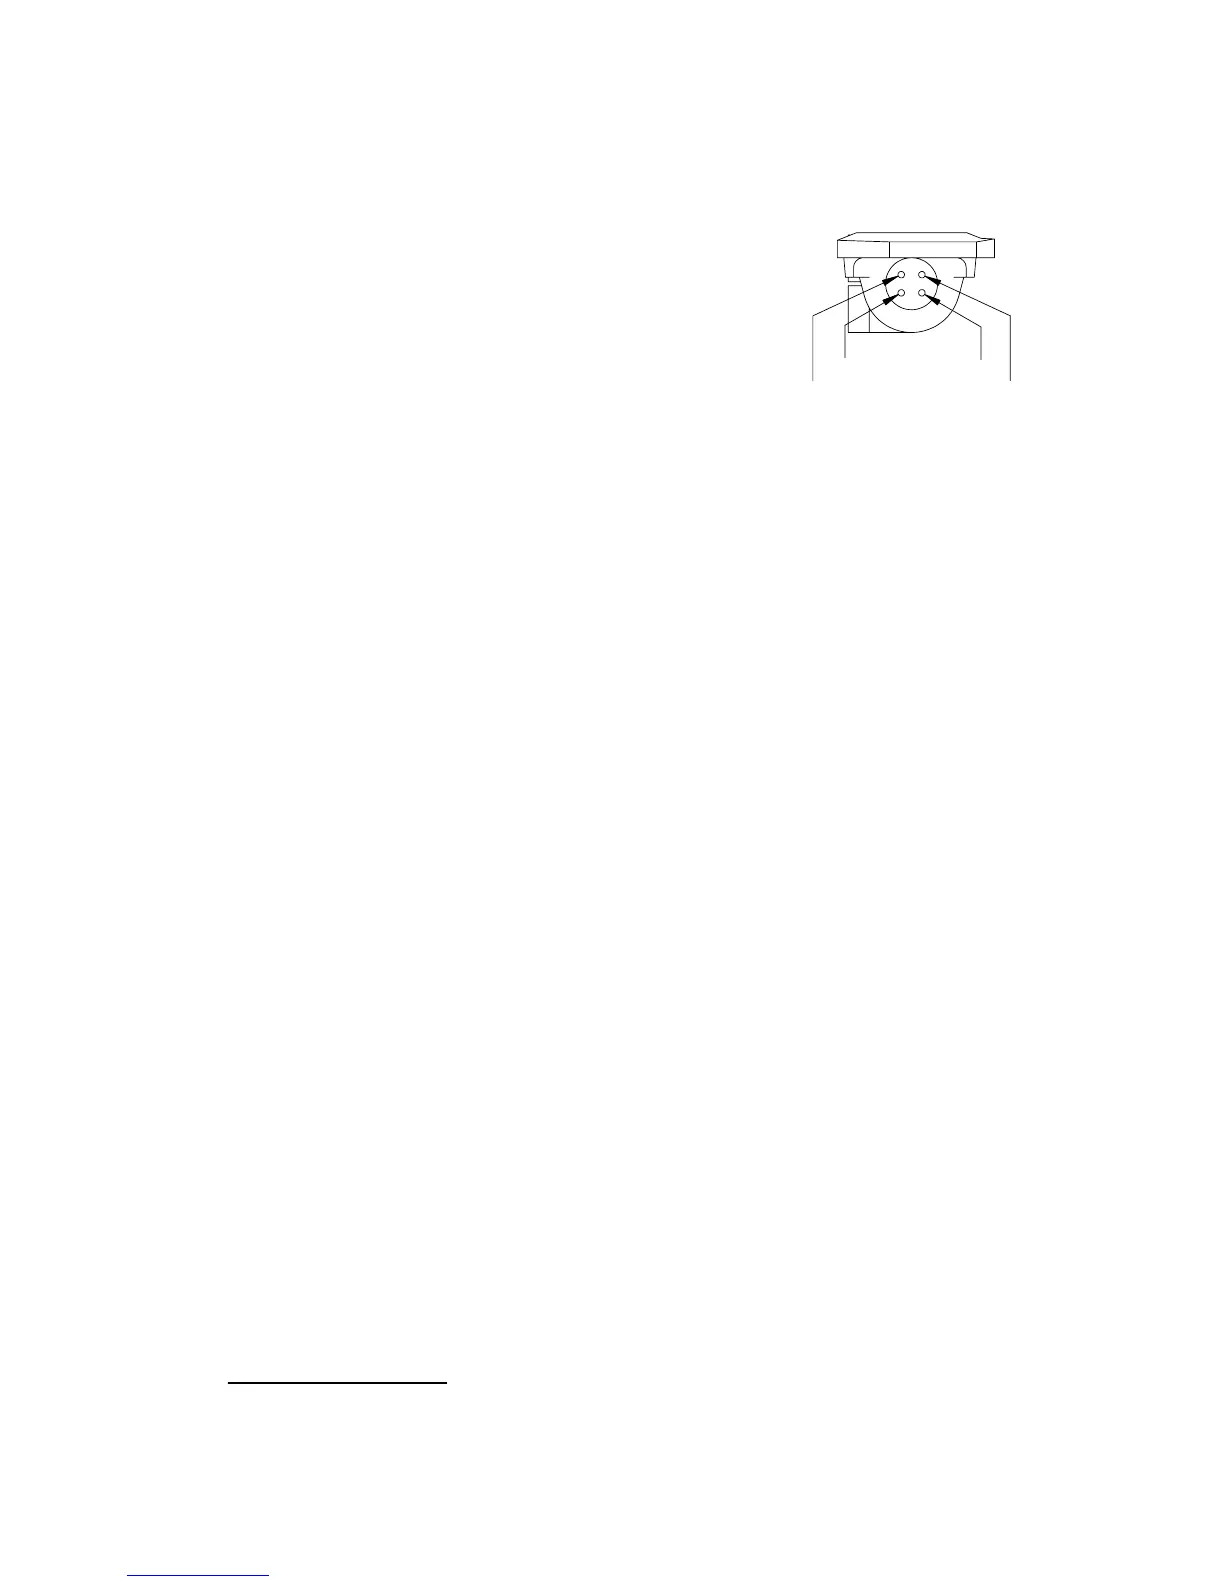
LCOFC cartridge leads have 1mm diameter receptacles for the headshell and standard
1,25mm for the cartridge. The latter may require adjustment with pliers or a screwdriver
blade for a snug fit on non-standard terminals.
Connections to the cartridge must never be made by direct
soldering. The colour coding is as follows:
Red - right channel Green - right
channel ground
White - left channel Blue - Left channel ground
2. The LCOFC cartridge leads, Part No. 4899, can be replaced
and may be obtained from your dealer or
3. Four lengths of alloy screw, nuts and washers are provided for cartridge fixing:
6,5mm (1/4”) 11mm (7/16”) 16mm (5/8”) 19mm (3/4”)Select a
pair, using the shorter if more than one length is suitable. For the purist, use without the
finger lift is preferred but it is unlikely that the difference will be audible. When used,
the two stainless steel washers should first be placed in the counter-bores in the
headshell.
4. Examine the top of the cartridge. It is important that it presents a good flat face to the
underside of the headshell. Before final tightening check that the cartridge is lying
parallel to the reference edge of the headshell.
5. Tighten the cartridge fixing screws securely using a screwdriver which must be a good
fit in the screw-slots to avoid damage. If necessary hold the nut with the 5,0/5,5 A/F
spanner to prevent rotation.
The screws are non-magnetic. Damage can be caused if a screw is snatched by magnetic
attraction whilst being offered up to the cartridge. For the same reason do not lay tools
down nearby.
15. Fitting the Headshell
1. Using the 2mm A/F hexagon wrench release the headshell clamp-bolt and remove it. The
nut should remain in its housing in the underside of the headshell as it is retained there
with adhesive.
2. Offer up the headshell to the tone-arm identifying the half-round key-way near the front.
3. As the headshell is pushed onto the tone-arm resistance will be felt as the spring loaded
contact pins in the tone-arm are compressed.
4. Align the bolt-hole in the headshell clamp-boss with the key-way in the tone-arm and
insert the clamp-bolt until it touches the nut. Tighten lightly using the 2mm A/F hexagon
wrench.
Removing the
headshell
Using the same wrench release the clamp-bolt and unscrew it. To remove the bolt push
the headshell onto the tone-arm using just enough pressure to overcome the spring
loaded contact pins in the tone-arm plug. The clamp-bolt should now be loose enough to
11
Red
Green
Blue
White
 Loading...