This document describes a Smeg dishwasher, providing essential information for its installation, operation, and maintenance.
Function Description:
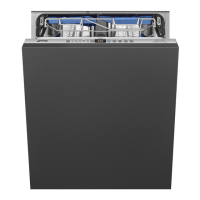
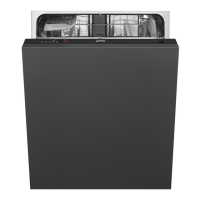
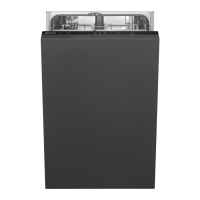
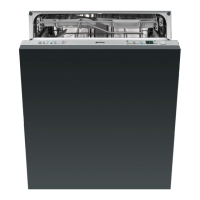
The Smeg dishwasher is designed and manufactured for washing and drying dishes in a household environment. It is also suitable for similar indoor uses such as staff kitchens in shops, offices, other workplaces, institutions, and for guests in hotels, hostels, bed and breakfast establishments, and other residential facilities. Any use other than washing and drying dishes is considered improper, and the manufacturer declines all responsibility for such uses.
The dishwasher offers various washing programs tailored to different needs:
- SOAK: Rinses dishes while waiting to be washed.
- 1/2 LOAD: For washing a few normally soiled dishes, washed immediately after use.
- ECO: The standard program for normally soiled dishes, even with dried-on residues, offering the lowest water and energy consumption.
- MIX 65°: For normally soiled mixed loads such as dishes and pans, even with dried-on residues.
- INTENSE 70°: For heavily soiled plates, pots, and pans, even with dried-on residues.
- EXPRESS 27': A quick cycle for lightly soiled dishes, washed immediately after use.
- CRYSTAL 45°: Ideal for wine glasses and lightly soiled fine china, designed for dazzlingly clean glassware.
- SILENT: For normally soiled dishes, even with dried-on residues, suitable for running during the night.
- FULL EXPRESS 60': A quick cycle for normally soiled mixed loads, including dishes and pans with dried-on residues, washed and dried in 60 minutes.
- HYGIENE 99.9%: An intensive wash cycle for plates, pots, pans, cutting boards, and feeding bottles, ideal for baby dishes or for allergy sufferers. This program has been tested by an external laboratory (VDE) without an option selected and should not be interrupted for effectiveness.
Some programs include an "Automatic door opening – Dry Assist" feature, where the door opens slightly during the drying cycle to assist drying. This feature is always included in the ECO program.
Important Technical Specifications:
- Water Supply Pressure: Minimum 0.05 MPa (0.5 bar) to maximum 0.9 MPa (9 bar).
- Water Supply Temperature: Maximum 60°C.
- Capacity: 12-13 standard place settings.
- Class of Protection Against Moisture: IPX0.
- Protection Against Electric Shock: Class I.
- Electrical Data: Refer to the data plate on the appliance.
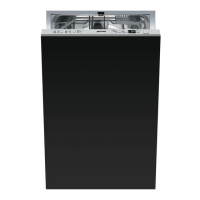
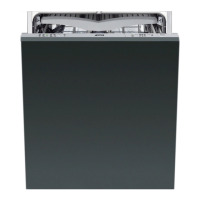
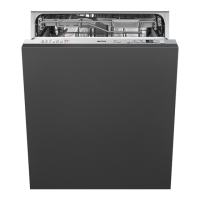
- Appliance Dimensions (Fully Integrated): 597-600 mm width, 550 mm depth, 820-890 mm height.
- Appliance Dimensions (Fully Integrated STX): 597-600 mm width, 570 mm depth, 820-890 mm height.
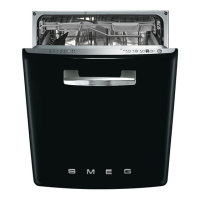
- Appliance Dimensions (Free Standing STX): 600 mm width, 593 mm depth, 850 mm height.
- Drain Hose Position: Free end should be positioned at a height between 30 and 100 cm. A horizontal drain extension hose (max 3 m) can be placed at a maximum height of 85 cm from the ground.
Usage Features:
The control panel includes:
- ON/OFF BUTTON (A): To power the appliance on or off.
- SALT and RINSE AID INDICATOR LIGHTS (B): (Depending on the model) Indicate when salt or rinse aid needs refilling.
- PROGRAM SELECTION BUTTON (C): To choose the desired wash program.
- PROGRAM INDICATOR LIGHTS (D): Illuminate to show the selected program.
- DELAYED START BUTTON and INDICATOR LIGHTS (E): Allows delaying the wash cycle by up to 9, 12, or 24 hours, depending on the model.
- OPTION (F): (Depending on the model) For selecting additional features.
To set and start a program:
- Press the ON/OFF button (A).
- Wait for the PROGRAM INDICATOR LIGHT (D) to illuminate.
- Press the PROGRAM SELECTION button (C) repeatedly until the desired program's indicator light illuminates.
- Select any required options (if available).
- Close the door; the program will start after about 2 seconds, indicated by a flashing light.
The dishwasher can be connected to either a cold water supply or a hot water supply (not exceeding 60°C). Connecting to hot water can reduce washing time by approximately 20 minutes but may slightly reduce effectiveness.
Maintenance Features:
Regular maintenance is crucial for the dishwasher's longevity and performance.
- Adding Salt: Unscrew the cap of the salt container. For the first time, fill with 1 liter of water, then add approximately 1 kg of regeneration salt using the provided funnel. Remove any salt residues before screwing the cap back on. Only use regeneration salt specifically for domestic dishwashers. After adding salt, run a wash cycle to remove excess salt.
- Adding Rinse Aid: Open the dispenser by pressing and lifting the tab on the cover. Refill when the rinse aid indicator light turns on. Close the cover until it clicks. Use a cloth to remove any spillage to prevent excess foam.
- Adding Detergent: Open the detergent dispenser cover by lightly pressing button P. Add detergent or a tablet, then close the cover by sliding it until it clicks.
- Cleaning the Water Intake Filter: Close the water supply tap, unscrew the end of the water intake hose, remove filter A, and clean it under running water. Reinsert the filter and screw the hose back on.
- Cleaning the Spray Arms: Remove the spray arms and wash them with a jet of water. Ensure they can rotate freely when reinserted. For the upper spray arm, unscrew locking ring R. For the lower spray arm, simply lift it up. For the orbital spray arm assembly, pull the longer arm and the orbital unit upward. For the planetarium sprayer, follow specific instructions.
- Cleaning the Filter Unit: Remove the planetarium spray arm (if fitted). Grip the tabs, turn them anticlockwise, and lift upwards. Push the central filter D from underneath to remove it from the micro-filter. Separate the two parts of the plastic filter by pressing the body in the indicated zone.
Troubleshooting:
The dishwasher can signal faults through the simultaneous illumination of indicator lights.
- E1 (Acquastop failure): Contact technical assistance.
- E2 (Safety level): Indicates a safety-related issue.
- E3 (Water heating fault): Problem with water heating.
- E4 (Water temperature detection fault): Issue with temperature sensor.
- E5 (Water intake fault): Problem with water entering the appliance.
- E6 (Water drainage fault): Problem with water draining.
- E7 (Turbine flow-meter fault): (Some models only) Displayed at the end of the cycle, does not affect operation.
- E8 (Alternate washing system fault): Issue with the alternate washing system.
- E9 (Water intake system fault): Problem with the water intake system.
- E11 (Wash pump fault): Contact technical assistance.
For E2, E3, E4, E5, E6, E8, E9 faults, stop the current program, switch off the dishwasher, then switch it on and program it again to start a new wash cycle. If the malfunction persists, contact an authorized Service Centre and provide the fault code.
- The manual is an integral part of the appliance and must be kept intact.
- Installation must be performed by qualified technicians according to regulations.
- Never leave waste packaging unattended; separate and recycle.
- The technical data plate must not be removed.
- The appliance must be earthed.
- Disconnect the appliance from the network during installation.
- Do not install in freezing conditions or near high-temperature equipment.
- Building-in underneath a hob or installing a hob on a free-standing appliance is forbidden.
- Ensure stability by fixing the appliance to adjacent cabinets or a continuous worktop.
- If not built-in, cover the door hinge area for safety.
- Check that mains voltage and frequency match the appliance's ratings.
- The plug and socket must be of the same type and meet regulations; do not use adaptors or shunt connections.
- The plug must be accessible after installation.
- If plugless, an omnipolar circuit breaker must be installed.
- Connect to water supply using new hoses.
- Test the appliance after installation with an empty wash cycle (45-70°C) and detergent.
- Only adults should use the dishwasher; children aged eight and above, or persons with reduced capabilities, must be supervised.
- Do not allow children to play with the appliance or approach when the door is open.
- Ensure the detergent distributor is empty after a wash cycle.
- Cleaning and maintenance by children only with supervision.
- Detergents are strongly alkaline; avoid contact with skin/eyes and never swallow.
- Do not drink water residues from dishes or the appliance.
- Never place explosive solvents, ash, wax, or paint inside.
- Never leave the door open to prevent tripping or overturning.
- Switch off after use to save electricity.
- Place sharp knives/equipment with tips downwards in the basket.
- Repairs must be done by trained and authorized technicians; unauthorized repairs void warranty and risk safety.
- In case of fault, disconnect from power and shut off water.
- Damaged supply cords must be replaced by the manufacturer or an authorized service center.
- Some components are live even when off; disconnect from power before maintenance.
- Do not clean with water jet, high-pressure, or steam cleaners.
- Models with "acquastop" prevent flooding; if tripped, contact a technician. Do not cut the water intake hose or allow the solenoid valve to drop into water.
- The acquastop device only works if the dishwasher is connected to the mains.
The appliance complies with European directives: 2009/125/EC, 2011/65/EU, 2014/35/EU, IEC/EN 62471 (risk group 1 for models with internal lighting), and IEC/EN 61770.
Disposal:
Dispose of separately from other waste (directives 2012/19/EC). The appliance does not contain hazardous substances. To dispose, cut the power cable and make the lock unusable. The manufacturer declines liability for damage from non-compliance with instructions, tampering, or use of non-original spare parts.