WWW.SMITTYBILT.COM
Installation Instructions
Scout Trailer Kit
Part#87400/87400-01
Fig 28
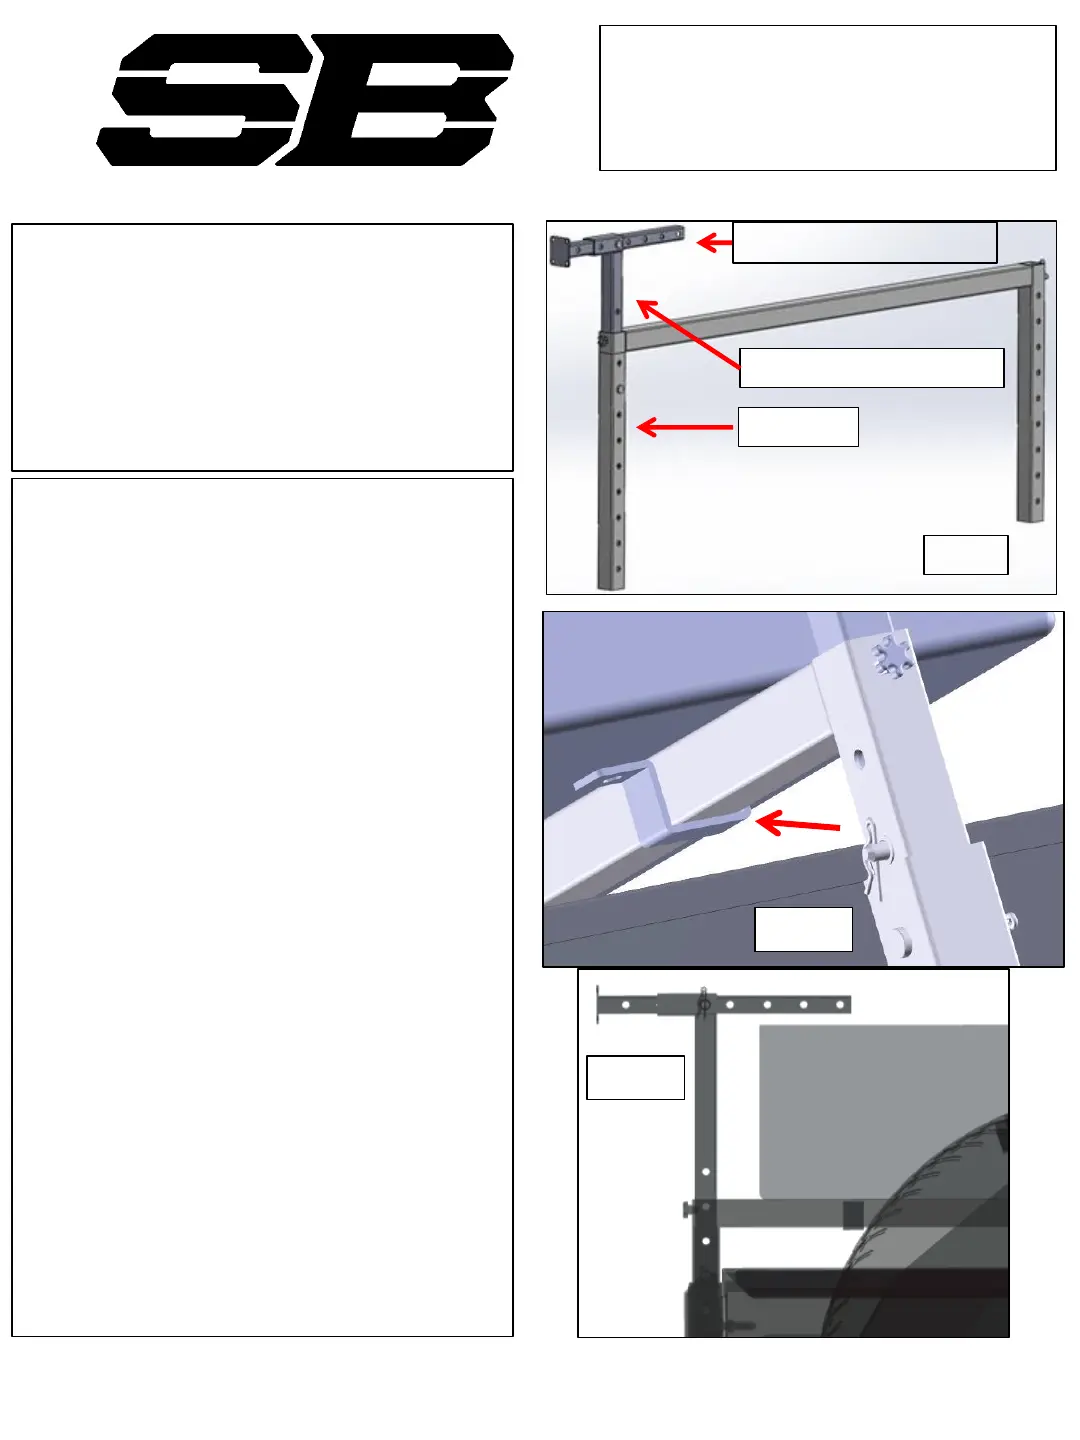
27. Install awning onto the horizontal awning
mount. Use hardware that is included in
your awning kit and mount per awning
instructions. There are 4 holes in the
awning mount, only 2 need to be attached
for most awnings. Make sure threaded
knobs are loose when mounting or
adjusting awning.
Tent rack
Vertical awning mount
Horizontal awning mount.
28. Install tent if desired. Follow tent mounting
instructions that are included with your tent.
We have included four “U brackets” that can
be used for tent mounting. They will cradle
the bottom of the tent mount. When
mounting the tent and if an awning is used,
make sure you have enough clearance
between the tent and the awning mounts.
This will offset the tent to one side of the
trailer, leave at least 1.5” of clearance
between tent and awning mount so you
have enough room to fasten the tent cover.
Fig 29. Observe the direction of the tent
opening when mounting tent. We have
found that positioning the rear of the tent
level with the rear door of the trailer box
gives the best results and balance, however
each trailer setup may be different and tent
position should be adjusted accordingly.
Make sure your tent opens to the opposite
side of the awning. Some like the awning
over the kitchen drawer with the tent
opening up over the generator drawer. If
you have the tent opening up over the
kitchen, it is recommended to have the tent
as far back on the tent mounts to provide
head room when using kitchen, or have the
tent mounts high enough up so you can walk
under tent. Fig 29&30.
Fig 29
Fig 30
27
 Loading...