EasyManua.ls Logo

Smoke Daddy Pellet Pro 2300 - User Manual

Smoke Daddy Pellet Pro 2300
13 pages
Print Icon
To Next Page IconTo Next Page
Loading...
Pellet Pro® 12” & 18” Lengths
Large 35lb Hopper Assembly
Operation Manual
Now with our exclusive PID Controller
& Universal Mounting Capabilities!
FOR OUTDOOR USE ONLY
Disclaimer:
The hopper assembly is used by us for custom applications and some modifications may be required. Our
hopper assemblies function as described, although we cannot guarantee that it will work with your
application. Smoke Daddy Inc. is not liable for any damage caused by the hopper assembly to or in applications
using materials or modifications not recommended to be used with the hopper assembly. Smoke Daddy Inc.
offers a 30-day money back guarantee where a full refund will be applied once product is received back in un-
used condition. Smoke Daddy Inc. will replace any factory defects within 1 year of purchase. Any misuse or
modifications made to the hopper assembly will void all warranties. Therefore, this product is being sold
subject to the following:
“This hopper assembly is provided ‘as is’ and with the limited warranty as stated above. Smoke Daddy makes
no further guaranties or warranties of any kind, either expressed or implied, including but not limited to
warranties for a particular purpose, warranty of merchantability or of non-infringement of any rights of third
parties.”

Other manuals for Smoke Daddy Pellet Pro 2300

Question and Answer IconNeed help?

Do you have a question about the Smoke Daddy Pellet Pro 2300 and is the answer not in the manual?

Summary

Pellet Pro 12 & 18 Lengths Large 35 lb Hopper Assembly Operation Manual

Pellet Pro Hopper Assembly Installation

RTD Probe Mounting Guidelines

Recommended placement for the RTD probe within the smoker chamber for accurate temperature readings.

Pellet Pro Startup and Operation

Initial Firing and Seasoning Instructions

Step-by-step guide for the first startup process to season the grill/application before regular use.

Subsequent Start-Up Procedures

Manual Lighting Procedure

Instructions for manually lighting the grill if the automatic ignition system or hot rod fails to operate.

Controller Interface and Functions

Button Controls and Settings

Explanation of controller buttons (Smoke, Mid, High, temp adjust, Feed, Probe, ON/OFF) and indicators (°F/°C, Standby).

Controller Operational Modes

Controller Button Functions

Troubleshooting and Support

Common Issues and Solutions

Addresses common problems like low smoke, controller errors, unresponsive controls, and hopper smoke with solutions.

Overview

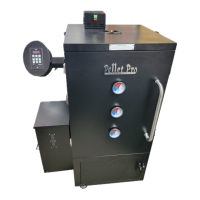
The Pellet Pro® Hopper Assembly is a versatile device designed for custom applications in pellet grilling and smoking. It comes in two lengths, 12" and 18", and features a large 35lb hopper capacity. This assembly is intended for outdoor use only.

Function Description:

The Pellet Pro® Hopper Assembly serves as the core component for a pellet grill or smoker, feeding wood pellets into a burn pot to generate heat and smoke for cooking. It is equipped with an exclusive PID controller that manages the auger timing/speed and fan motor timing/speed to maintain a consistent set temperature, minimizing temperature swings to within ±5°F. This digital controller eliminates the need for manual programming, offering a user-friendly experience. The assembly includes an RTD (Resistance Temperature Detector) probe for monitoring internal cooking chamber temperature and a meat probe for tracking food temperature. A new pellet dump feature allows for easy removal or change-out of flavor pellets.

Important Technical Specifications:

  • Hopper Capacity: 35 lbs
  • Hopper Lengths: 12" and 18"
  • Controller Type: Digital PID Controller
  • Temperature Range (Controller): 160°F - 450°F, with a "HIGH" setting for temperatures above 450°F.
  • Smoke Setting Range: 160°F - 210°F
  • Temperature Increments: 5°F
  • Operating Voltage: AC100V-240V ± 10%, 50-60Hz
  • Fuse: 5A glass fuse
  • Operating Temperature (Controller): -15°C ~ 70°C
  • Storage Temperature (Controller): -30°C ~ 70°C
  • Humidity (Controller): 0 ~ 95% RH
  • Power Cord: Requires a 15-20 Amp GFCI (20 Amp preferred) electrical outlet. For safe and reliable operation, a 12/3 gauge extension cord along with a 20amp GFCI is recommended.

Usage Features:

  • Universal Mounting: The Pellet Pro® Pellet Hopper can be mounted on either the left or right-hand side of an application. The controller can be switched to the desired side, and a backing plate covers the unused hole.
  • Easy Attachment: After cutting a hole in the application, the hopper assembly is attached using mounting bolts. The RTD probe is run through the smoker wall.
  • RTD Probe Mounting: It is recommended to mount the RTD Probe in the center of one of the smoker walls, halfway up the cooking chamber, ensuring the entire probe is inside the cooking chamber and the black plastic connector is outside the smoker.
  • Heat Deflector: A heat deflector three inches above the burn pot is recommended for optimal performance.
  • Initial Firing Instructions (Seasoning):
    1. Remove grill grates, grease drain pan, and heat baffle.
    2. Plug into a grounded electrical outlet.
    3. Fill hopper with pellets, turn power "on," and push "FEED" to charge the auger and feed pellets into the burnpot.
    4. Once pellets reach the burn pot, push "High" (Hot Rod will glow red – do not touch).
    5. Once smoke is visible, replace heat diffusor, drip pan, and grate. Close lid and set controller to 350°F.
    6. Run for 15 minutes at 350°F.
    7. Turn controller "off" to initiate a 15-minute shutdown cycle, ensuring all pellets are extinguished.
  • Subsequent Start-Up (Normal Operation): Turn power switch on and set the controller to the desired temperature using the "+" or "Mid" button. Open lid/door until a flame is established, then close to allow temperature to increase.
  • Temperature Adjustment: Use the "+" and "-" buttons to set desired temperatures in 5°F increments. The "Mid" button sets the temperature to 270°F, which can then be adjusted. The "High" setting feeds pellets constantly for maximum temperature.
  • Smoke Setting: Maintains a temperature range of 160°F - 210°F, producing a steady, high-quality smoke.
  • Standby Mode: Accessed by pressing "-" until "stby" is displayed. In this mode, only the fan runs, and no pellets are augered.
  • Manual Feed: The "FEED" button allows manual feeding of pellets, useful for clearing the auger tube before storage or charging it before each use.
  • External Probe: An "External Probe" button allows viewing the temperature from an attached external meat probe.
  • Temperature Display: The "°F/°C" button switches the display between Fahrenheit and Celsius.
  • Shutdown Cycle: When the controller is turned "off," it runs a 15-minute shutdown cycle where only the fan operates to ensure remaining pellets in the burnpot are extinguished.
  • Compatibility: The Pellet Pro® Controller is compatible with various pellet grill brands (e.g., Traeger, Camp Chef, Char-Broil) and custom installations that use an auger and fan.

Maintenance Features:

  • Burnpot Cleaning: It is recommended to clean the burnpot after every use to prevent flame-outs or inefficient start-ups due to ash accumulation.
  • Pellet Clearing: Use the "Manual Feed" function to clear pellets from the auger tube before long periods of storage.
  • Shutdown Cycle: The automatic 15-minute shutdown cycle helps burn off any remaining pellets, contributing to cleaner operation and preventing burnback.
  • Troubleshooting "Error" Message: If the controller displays "Error," check the black plastic snap connector for the RTD Probe wire and ensure both RTD wire leads are connected to the green terminal.
  • Troubleshooting Unresponsive Controller: If the controller is unresponsive or not maintaining temperature, push the "Off" button for a shutdown cycle, then quickly remove the fuse or unplug the hopper assembly, wait 5 seconds, and turn it back on to reset to factory settings.
  • Troubleshooting Smoke from Hopper: If smoke comes from the hopper due to burn-back, set the controller to Standby (STBY) and push "FEED" for approximately 2 minutes.
  • Fuse Replacement: If the control box doesn't power up, the fuse located on the front of the control box may need to be replaced.

Smoke Daddy Pellet Pro 2300 Specifications

General IconGeneral
BrandSmoke Daddy
ModelPellet Pro 2300
CategorySmokers
LanguageEnglish