6
If you would like to rack-mount the M-Patch 2, simply connect the supplied rack/
stand ears to each side of the M-Patch 2 using the included screws. This allows
you to rack-mount the unit in a standard 19” professional rack.
4. Connections
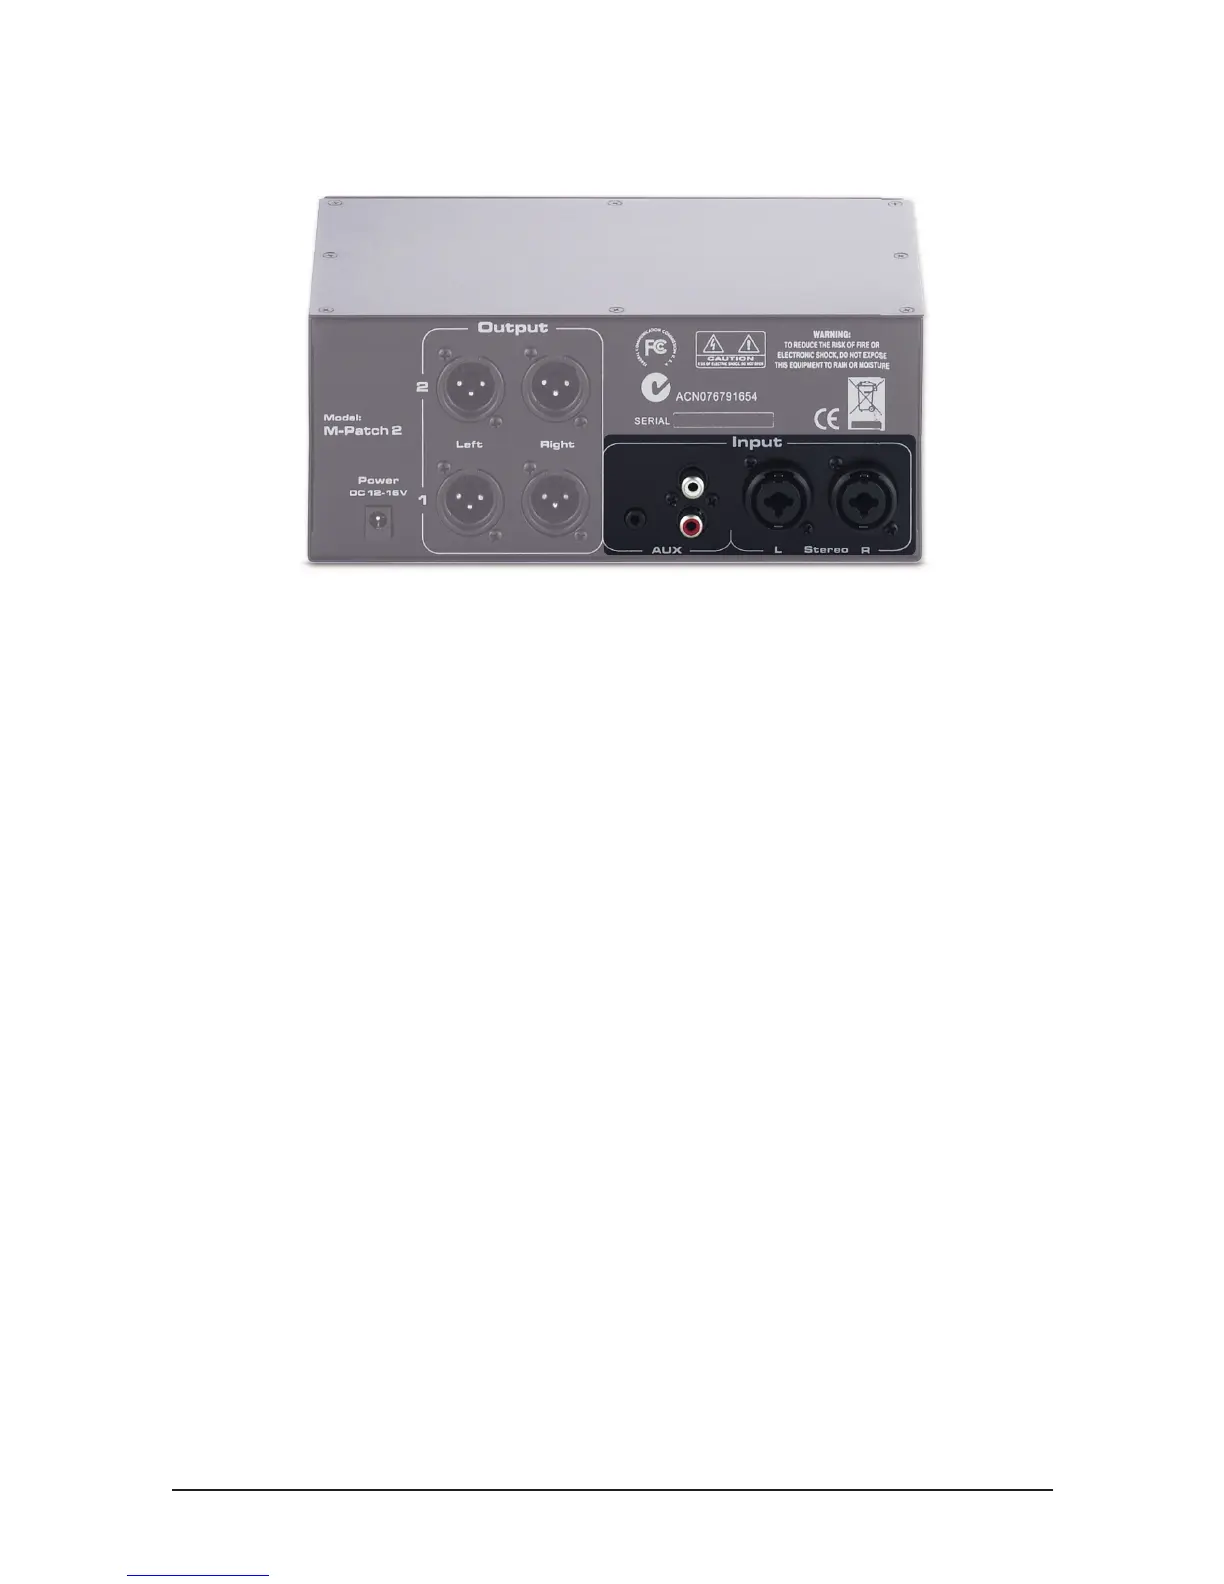
The M-Patch 2 features two (2) separate input channels named “Aux” & “Stereo”.
The connections are found on the rear panel.
(Input section on rear panel of M-Patch 2).
* Note: The M-Patch 2 accepts mic or line level input signals. Do not connect your
power amplier outputs to the M-Patch 2 inputs!
4.1 Stereo Inputs
The Stereo main inputs feature XLR bal/unbalanced combo connectors for L&R
input signal. This input is perfect for connection to your main audio interface device
(example; MBox 2, etc). Simply connect your cables directly to the unit with either
XLR or º” TS/TRS cables.
4.2 Aux Inputs
The Aux input channel features two different connection possibilities in the form of
2 x RCA (L&R) and a stereo 3.5mm mini-jack input. These connections are perfect
for devices such as a CD players line output or a 3.5mm stereo mini-jack connection
from your PC‘s standard soundcard.
* Note: You can connect up to three different devices to the three physical connector
possibilities simultaneously. The input selector on the front panel allows selection of
the desired input!