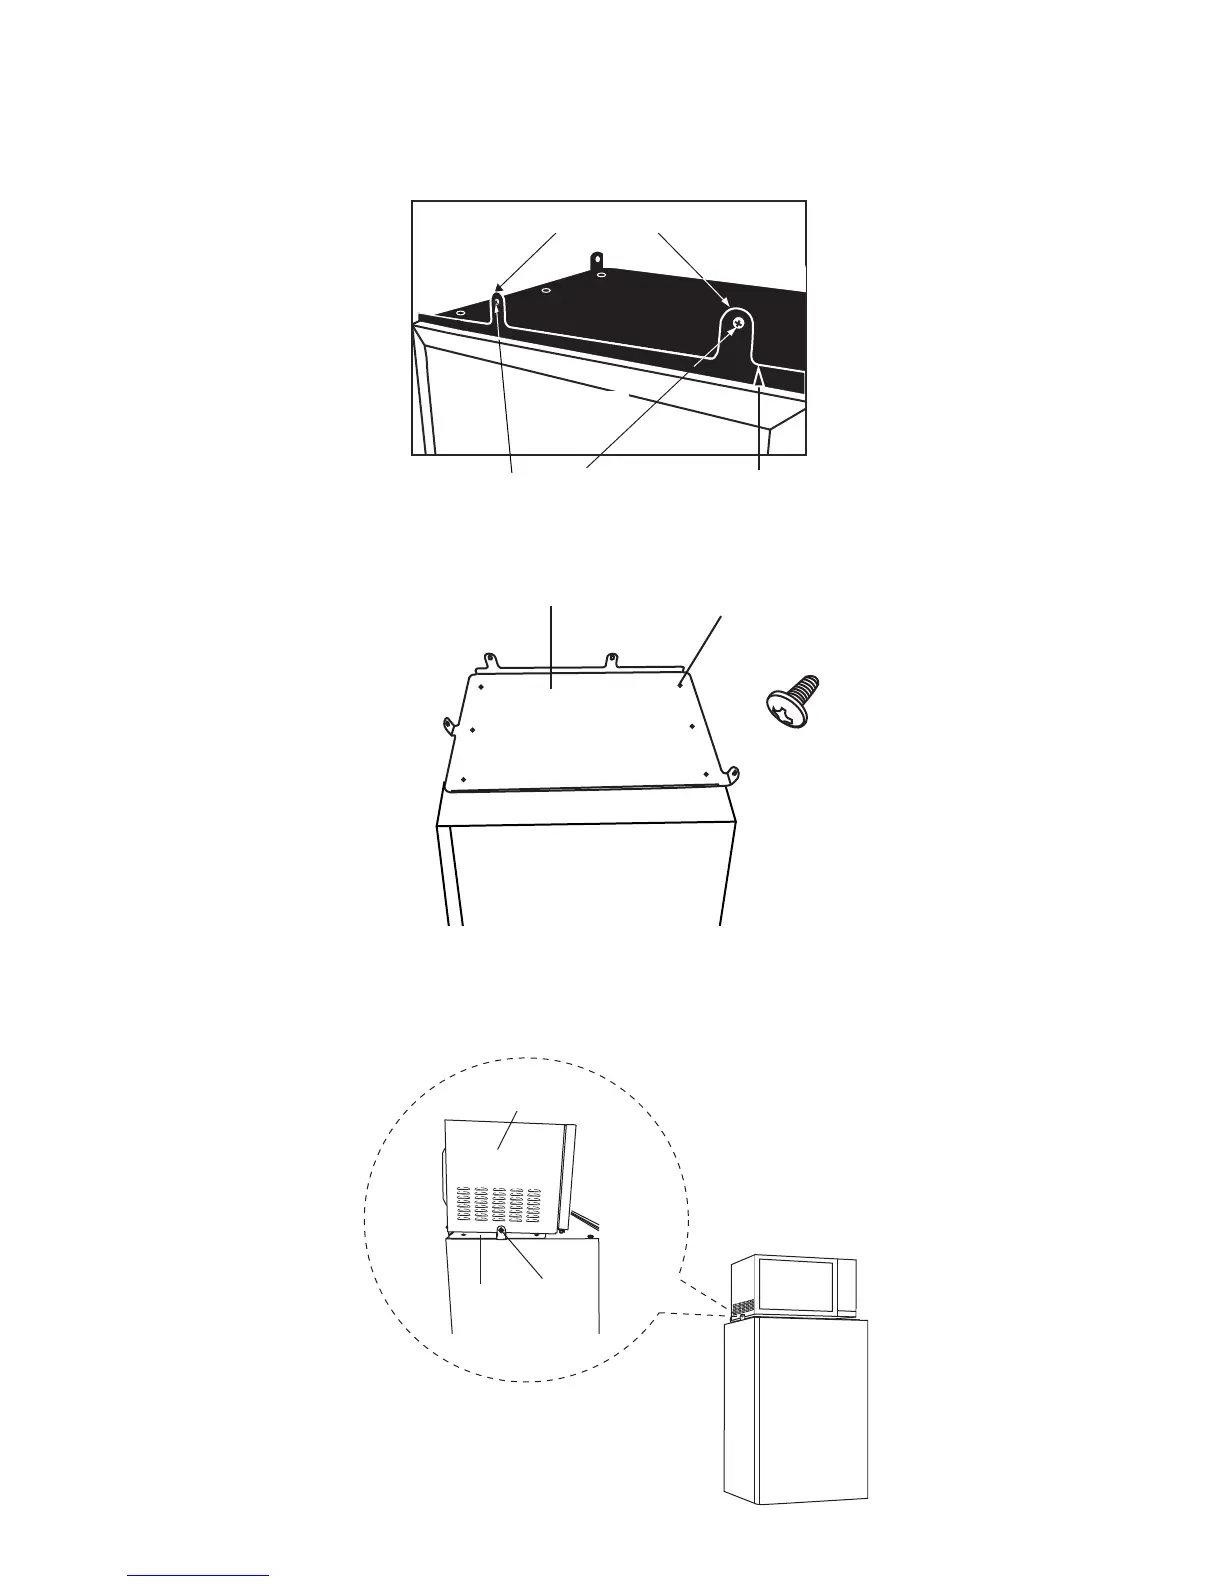
REFRIGERATOR BRACKET & MICROWAVE INSTALLATION
1. Place the bracket on top of the refrigerator with its rear lip with two loops facing upward. The rear lip of the bracket
should be lined up with the back edge of the refrigerator, with the two side loops facing up to accept the microwave.
2. With the bracket lined up as stated above the preset holes on top of the refrigerator should be lined up with the holes
on the bracket. Attach the bracket to the refrigerator using the six screws that come supplied with the refrigerator.
3. Place the microwave oven on top of the refrigerator and inside the two upright loops on the sides and in front of the two
upright loops on the back of the bracket. Line up the holes on each side and on the back of the bracket and attach the
microwave using the screws supplied. The two back screws come supplied with the refrigerator while the two side screws
are already on the microwave. Please remove the two microwave screws prior to placing the microwave oven on top of the
refrigerator.
4
2 LOOPS FACING UPWARDS
BACK OF
REFRIGERATOR
SCREWS
BRACKET
BRACKET
HOLES FOR SCREWS
SCREWS (x6)
come with
refrigerator
REFRIGERATOR
SIDE VIEW
MICROWAVE
Bracket
Screws
REFRIGERATOR
FRONT VIEW
 Loading...