ATI520J – Portable Cable Terminal Swager Operating and Maintenance Manual
Page 2 of 12
SETUP AND OPERATING PROCEDURE
1. Connect the air supply line to the foot valve. For efficient operation, use an inlet airline with at least 3/8” inside
diameter and 90 psi minimum line pressure.
2. Connect swager airlines to the foot valve.
3. Do not insert or remove dies until the air supply connected to the swager is shut off.
4. Do not operate the swager until both dies are in position.
5. Referring to the chart on pages 6 & 7, select a matched pair of swaging dies listed by Part Number opposite the
Terminal Type and Cable Size.
6. Clean the dies, remove any steel particles which may have adhered to the die cavity and apply a light film of oil to
the entire die.
7. Insert dies into swaging position. (See figure 5)
8. Keep hands clear of the die chamber at all times when air supply is connected.
9. Instructions on Page 4 should be read thoroughly before operating swager.
10. !!! CAUTION !!! : Do not operate the unit without safety guard in place.
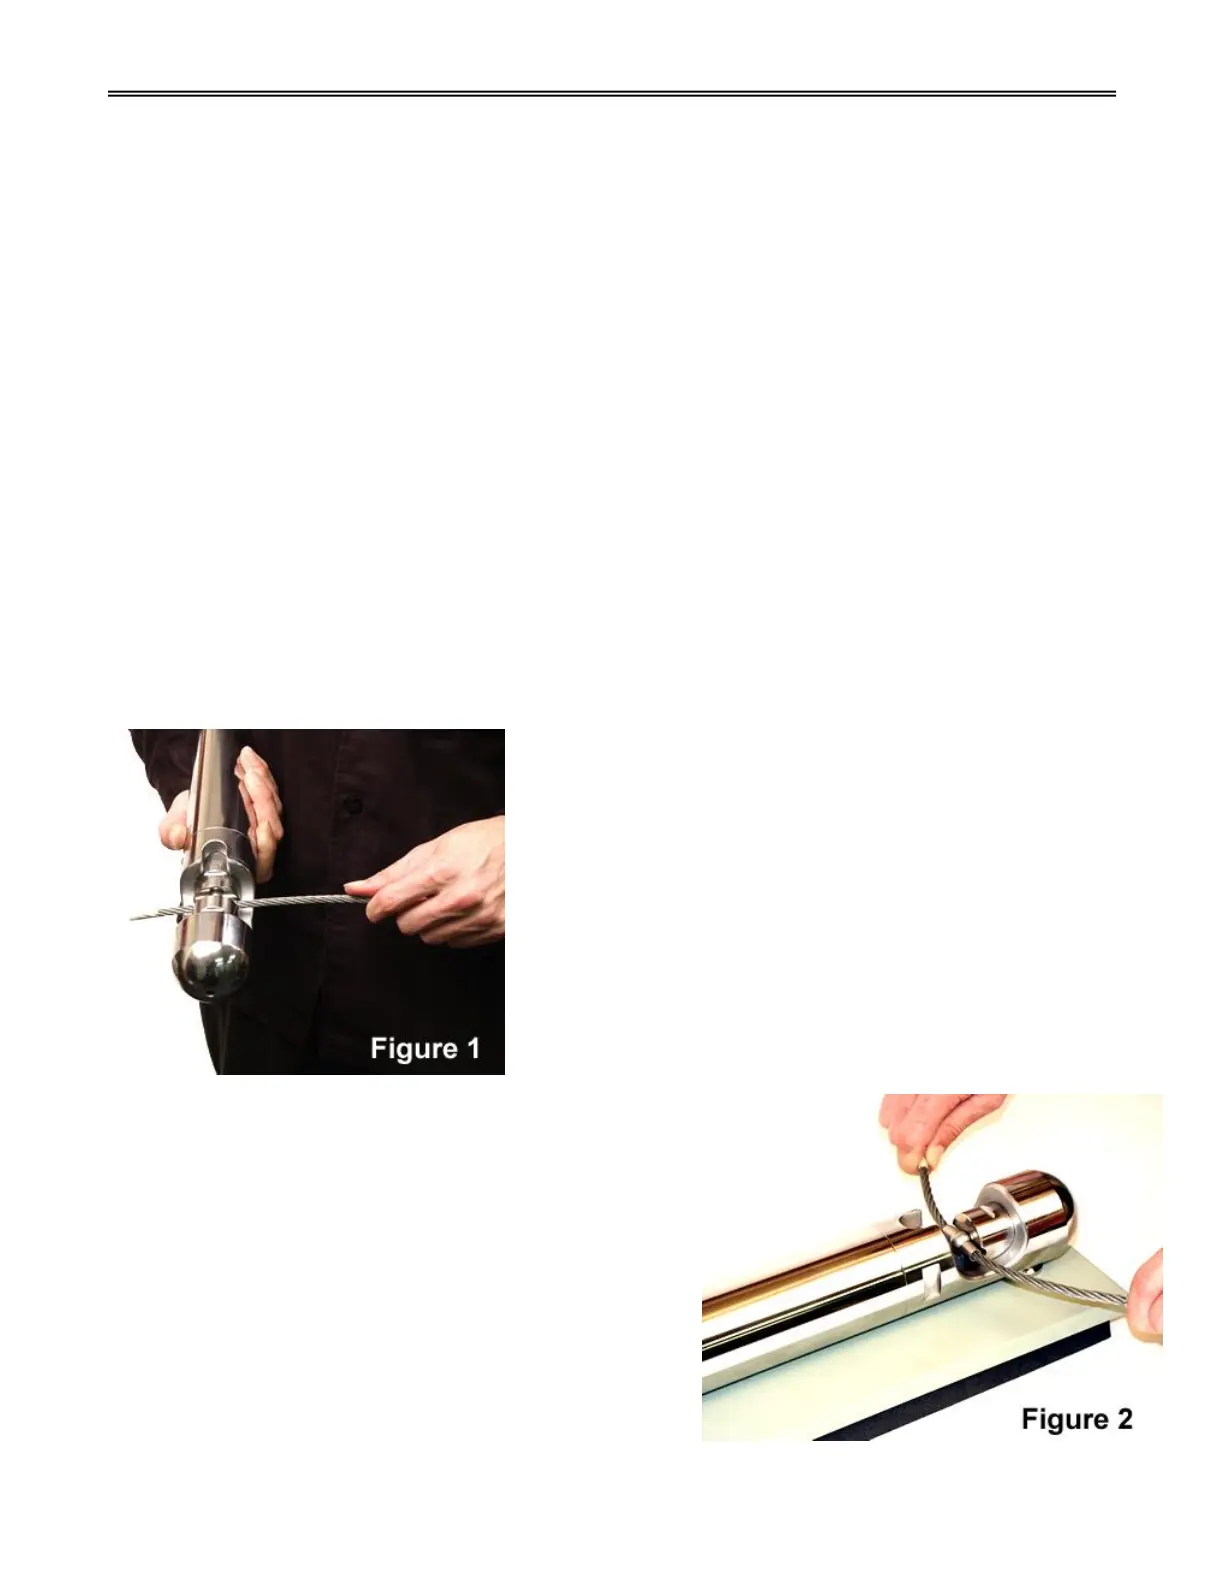
PORTABLE SWAGING
If a flat surface is not available, omit use of the base plate.
The swager should be hand-held with the cap seated in the cradle of
the arm. (See Figure 1)
Note: The safety guard has been removed for clarity and
should be in place during operation.
BENCH SWAGING
When a flat surface is available, large enough to
accommodate the ATI520CBP Base plate, place the swager on the
base plate with the pin engaging the underside of the yoke. Position
the swager with the yoke nose facing the operator.
Note: The safety guard has been removed for clarity
and should be in place during operation.
 Loading...