64
5-25
21
5-24
1 2
A
B
Operation
adhesive weights.
• Fit the balancing weight and firmly press the
adhesive weight onto the rim.
• Fit the second adhesive weight in the same manner.
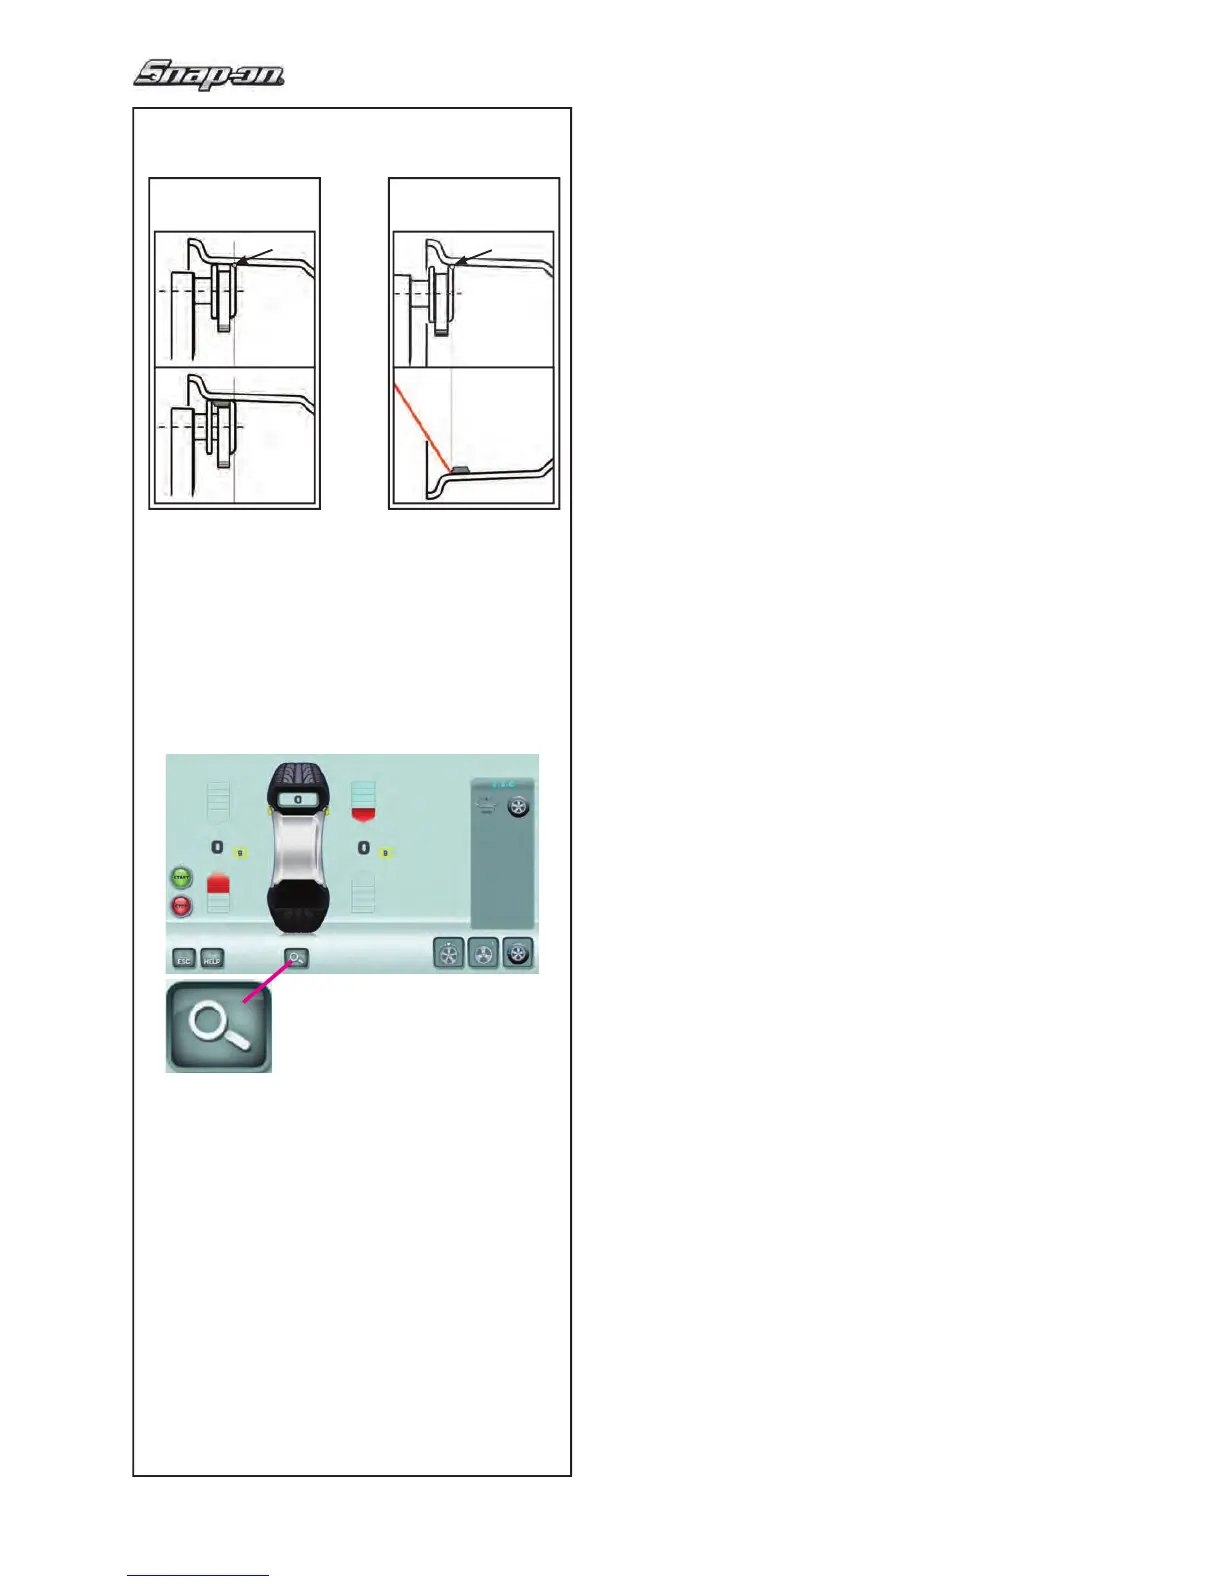
5.8.1.2 Weights application with feeler arm or
with laser pointer
The reading point on the rim is given by the upper r
ight
end of the feeler (A and B, Fig.5-24).
Based on the weights application system enabled (arm
or laser), the feeler must be positioned in different
positions (A for arm, B for laser) in order to achieve the
identical axial positioning of the adhesive weight on the
rim
F 5.4.2.1.
5.8.2 Check spin
It is good practice to perform a check spin after applying
the weights.
• Spin the wheel.
Having ! nished the Test Run, if the wheel is balanced
correctly, both the numerical indicators should indicate
0 and an OK should be displayed (Fig. 5-25).
Note
If there is no OK reading, dynamic unbalances below
the tolerance limit (suppression preset to 3.5 g) add to
a static unbalance above the tolerance limit.
To check how much imbalance is left:
• Select the FINE key
, (21,Fig. 5-25).
Note: The operator should decide if applying
the stated weight is necessary.
5.8.3 Results recalculation
After spinning a wheel it is possible to enter new rim
data or select
another weight mode. The results are
recalculated automatically, if possible.
Selecting another weight mode
• Between NORMAL, ALU and STATIC: no additional
steps required.
To have a recalculation done:
• Select the prefered Weight Mode. Check and/or
edit rim or plane data when necessary.
• Rotate the wheel to the left plane WAP position and
apply the weight.
• Rotate the wheel to the right plane WAP position
and apply the weight.
• Perform a check spin.


 To Next Page
 Loading...