4
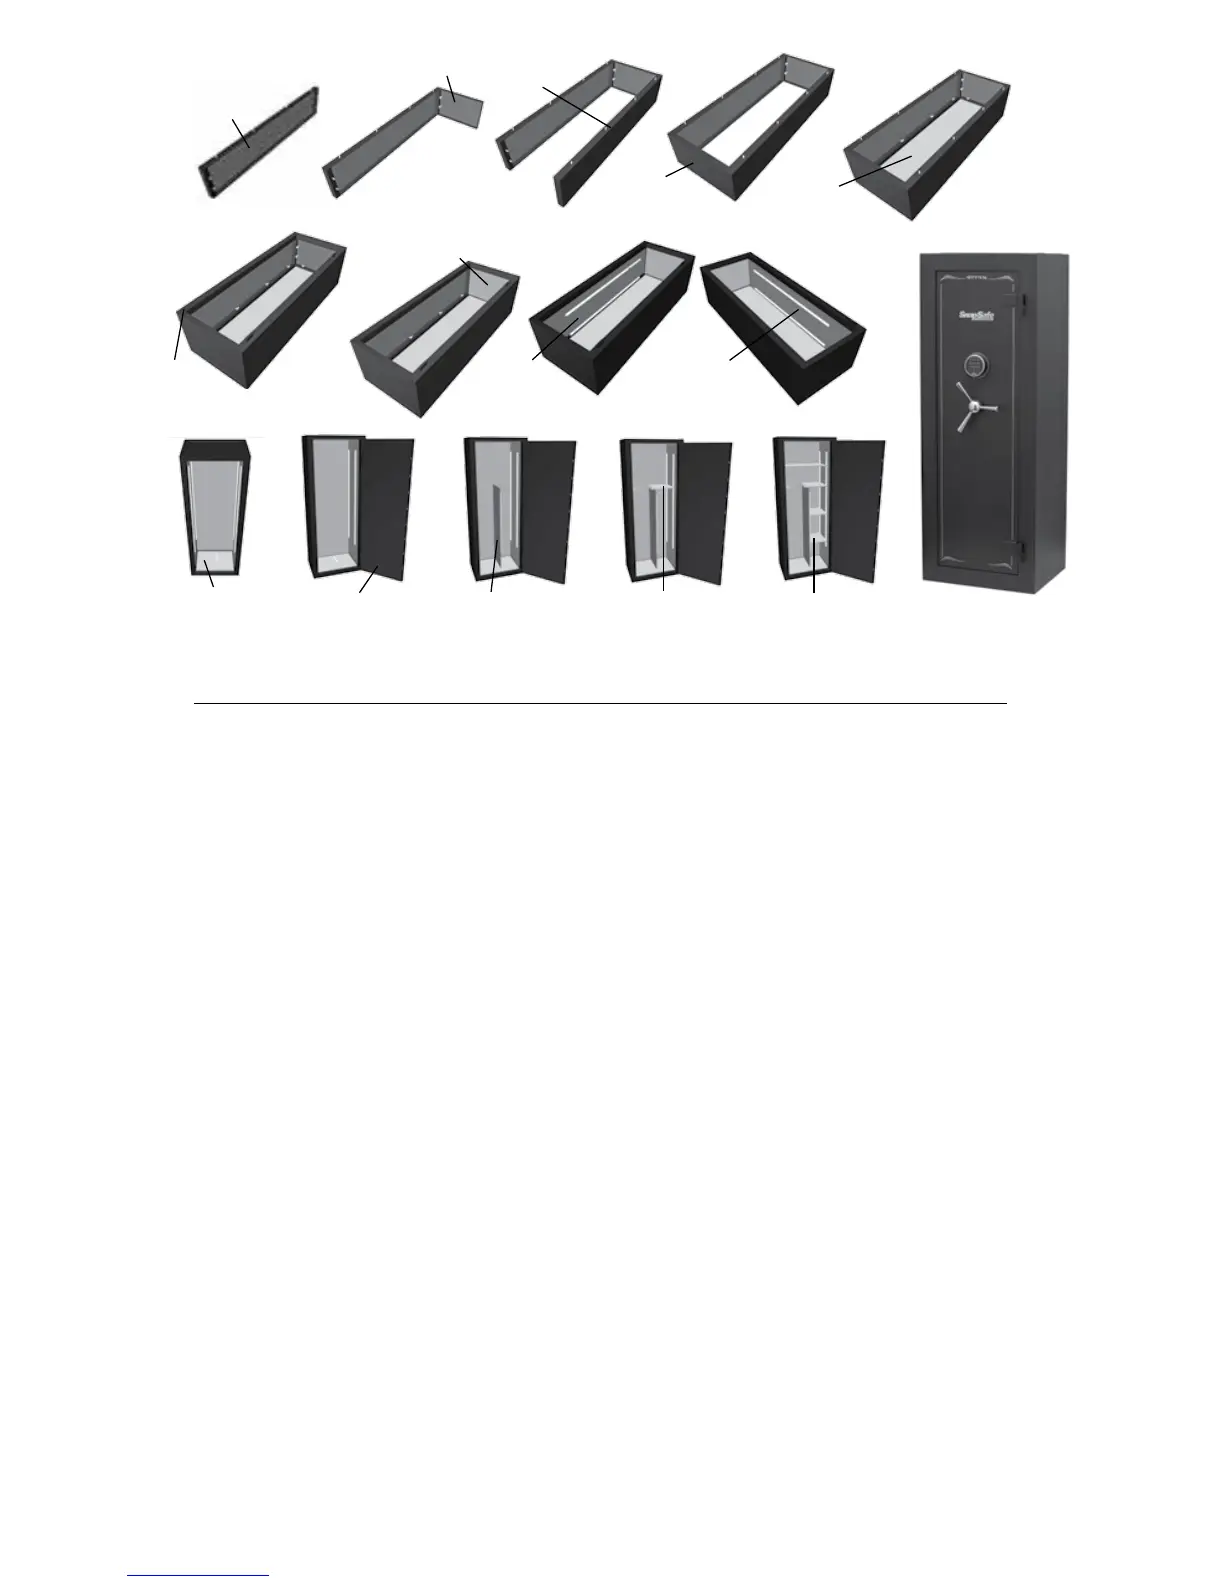
ASSEMBLING YOUR SNAPSAFE TITAN
1. Unpack and lay out all parts.
2. Thread DOOR HANDLE SPOKES (Part #11) onto the hub on DOOR (Part #12).
3. Install a fresh high-quality 9V battery in the Entry Keypad (see pages 8 and 9).
4. Important – Remove temporary door hinge bolts from door hinges.
5. Enter the factory combination code and open the DOOR, then lift it off the
DOOR FRAME (Part #6) and set aside.
6. Assemble Top, Bottom and Sides (Parts #1 through #4) first. Then bolt the
entire assembly onto the BACK (Part #5).
7. For additional help watch our “Live Action Assembly Video” on the “Features”
page at www.snapsafe.com.
Notes:
1. Each part is marked with an assembly number, orientation and instructions.
2. Each part’s orientation: TOP, BOTTOM, FRONT, etc. matches its orientation in
the assembled vault. LEFT and RIGHT are as you face the front of the vault.
3. For easier assembly, remove the FIRESHIELD blankets from the TOP, BOTTOM
and SIDEWALLS and then stuff them back into place before interior assembly.
4. Screw on nuts loosely at first. Once all Exterior Panels are aligned and
seated tighten the nuts.
5. The INTERIOR SIDE PANELS are designed to fit snuggly. Insert them through
the door opening bottom-to-top and then slide into final position front-to-back.
6. Insert the INTERIOR BOTTOM PANEL through the door opening between
the front and back shelf strips and then drop into position front-to-back.
Door
Frame
Left Side
Top
Right Side
Bottom
Back
Top Interior
Panel
Left
Interior
Panel
Right
Interior
Panel
Bottom
Interior Panel
Stand Safe Upright
And Hang Door
Divider Gun Rack
Divider Top
Shelves
 Loading...