SETTINGS
24 ∙ settings settings ∙ 25
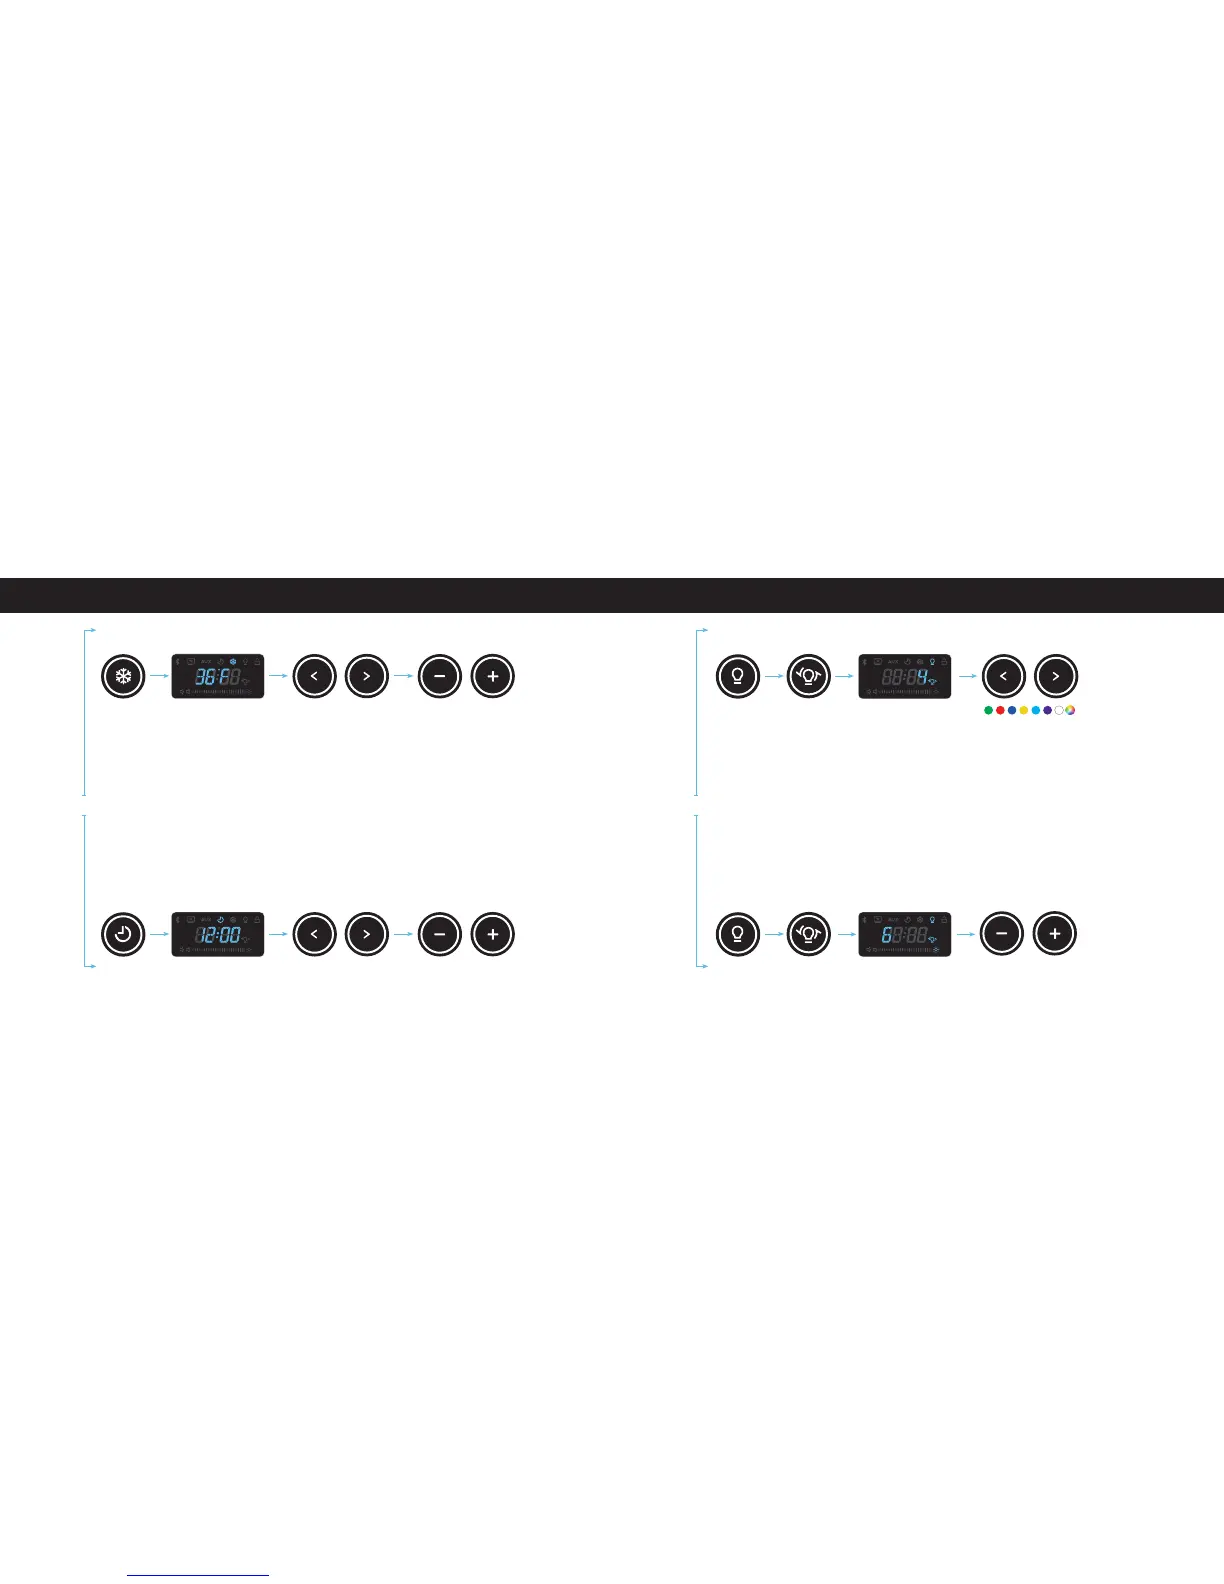
Setting the Temperature:
The Sobro must be powered on and unlocked before
changing the settings. Press and hold the “Temp.” button
to change the temperature settings. The “Temp.” icon
will light up on the display. Use the “Previous” or “Next”
button to switch the temperature between “Degrees
Celsius” and “Degrees Fahrenheit”. Adjust the
temperature level by pressing the “+” or “-” button to
increase or decrease the temperature of the refrigerator.
Note: press the “Temp.” button again to save the settings.
The settings will also be saved automatically if not
changed after 5 seconds.
Setting the Time:
The Sobro must be powered on and unlocked before
changing the settings. Press and hold the “Time” button
to change the time. The “Time” icon on the display
screen will light up. 12:00 p.m. is the default time when
you enter the time settings. Press the “Time” button
again until the display icon ashes. Use the “Previous”
or “Next” buttons to adjust the hours. Press the “+” or
“-” icons to adjust the minutes. Press the “Time” button
again to exit the Time menu and save your settings or
wait 5 seconds and the Sobro table will save your time
settings automatically.
Press Icon Lights Up Select
(Fº) (Cº)
Adjust Temp
Press Icon Lights Up Adjust Hour Adjust Minute
SETTINGS
Control the LED Color:
The Sobro must be powered on and unlocked before
changing the settings. First press the “LED Lighting
Power” button and then press the “LED Lighting Adjust”
button. Once the “LED Lighting Adjust” button is pressed
the light bulb icon on the display will illuminate. This
means you can now adjust the color. Press the “Previous”
button to change the color of the lights. There are 8 color
choices. Press the “Next” button to determine if your
selected color is continuous or pulses. The program will
automatically exit in 5 seconds and save your settings.
Control the LED Brightness:
The Sobro must be powered on and unlocked before
changing the settings. First press the “LED Lighting
Power” button and then press the “LED Lighting Adjust”
button. Once the “LED Lighting Adjust” button is pressed
the light adjust icon on the display will illuminate. This
means you can now adjust the color. Use the “+” or “-”
icons to increase or decrease the brightness level of the
lights. The program will automatically exit in 5 seconds and
save your settings.
Press
Press
Press
Press
Display Shows Color
Numbers 1–8
Display Shows LED
Brightness
Select Color
Select
Continuous
or Pulsing
Adjust Brightness
 Loading...