Softing Industrial Automation GmbH Richard-Reitzner-Allee 6 Tel. +49 89 4 56 56-0
Email: info.automation@softing.com
Stand: V2.1 85540 Haar bei München Fax +49 89 4 56 56-399
http://industrial.softing.com
Configuration
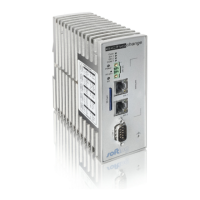
Step 1: Echochange Installation
˃ Connect echochange device with the network, where the PLC is accessible.
˃ Power on the device.
NOTE:
The provided SD-card must be present in the device during the first power-on!
Step 2: Installation of the NetCon Configuration Software
˃ Insert the CD-ROM in your CD drive and choose your preferred language and the product.
˃ Select the ‘Installation NetCon echo’ installation.
˃ You will be automatically guided through the installation process.
Step 4: Register echochange in the Network(s)
˃ If you want to use both Ethernet interfaces of the echochange, this procedure has to be accomplished for
both network interface cards.
˃ Start the NetCon configuration software. Select the desired method of configuration.
˃ The Select a Station in Your Network dialog box appears. The new echo device is displayed together with
its MAC address.
˃ From the MAC address, you can determine the station to be configured. Double-click the station or select it
and then click OK.
˃ The Station Parameters dialog box appears. Edit the settings and confirm your entries with OK.
Step 6: PLC Configuration
˃ Create memory blocks for data exchange in both PLCs.
˃ Set up the master PLC (Siemens or Modbus) to control the flow of the data.
Step 7: Device Configuration
˃ In NetCon, Select the echocollect device, you want to configure.
˃ Define the PLCs connections, using “New Connection” in the main NetCon window.
˃ Configure the echochange Conversion Table in the menu “Settings”
˃ For additional help please use the product manual or the integrated NetCon help.
 Loading...