Do you have a question about the Solar Charge IT 4501 and is the answer not in the manual?
Read all instructions, save for future reference, and follow manufacturer guidelines to reduce risk.
Lead-acid batteries produce explosive hydrogen gas; avoid sparks, flames, smoking, and static electricity.
Wear eye protection, protective clothing, and safety gear. Avoid touching eyes when working near batteries.
Store clamps separately and away from conductors to prevent hazardous short circuits.
Use extreme care in engine compartments due to moving parts; follow vehicle manual safety instructions.
Batteries contain hazardous liquid acids that are dangerous if spilled.
Equipment complies with FCC Class B limits for reasonable protection against harmful interference in residential installations.
Ensure someone is within range and have water/soap ready for potential battery acid contact.
Wear protection, avoid touching eyes. Wash skin or flush eyes immediately if acid contacts them.
Never smoke or allow sparks or flames in the vicinity of batteries or engines to prevent explosion.
Be cautious when handling metal tools near batteries to avoid sparks or short circuits that could cause explosion.
Remove metal jewelry like rings and watches to prevent severe burns from short-circuit currents.
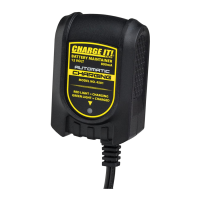
Use charger for lead-acid batteries only; do not use for dry-cell batteries as they may burst.
Never attempt to charge a frozen battery, as it can cause damage or explosion.
If removing battery, disconnect the grounded terminal first and ensure vehicle accessories are off.
Ensure the charging area is well-ventilated. Use a fan to disperse gases if necessary.
Clean battery terminals with a baking soda and hot water mixture, taking care to avoid eye contact.
Add distilled water to each cell to the specified level, but do not overfill, especially for maintenance-free batteries.
Study battery manufacturer's specific precautions, including cell cap removal and recommended charging rates.
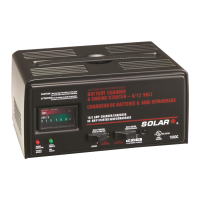
Determine battery voltage from the vehicle manual and ensure it matches the charger's output voltage.
Position the charger as far from the battery as the DC cables allow for optimal safety and ventilation.
Never place the charger directly above the battery to prevent corrosion from battery gases.
Avoid allowing battery acid to drip onto the charger when checking specific gravity or filling the battery.
Do not operate the charger in a closed or poorly ventilated area.
Do not place a battery on top of the charger to prevent potential damage or obstruction.
Position the charger at least 18 inches above the floor for safety and ventilation.
Avoid placing the charger where rain, snow, or other moisture could drip onto it.
Connect and disconnect DC clips only after switches are OFF and AC cord is removed. Never allow clips to touch each other.
Attach one clip to the battery and the other to a point away from it. Do not connect the charger until all sections are read.
Always make battery connections before plugging the charger into the AC outlet.
Twist or rock clips to ensure a good connection and reduce the risk of slipping and sparking.
Marine batteries must be removed and charged on shore; onboard charging requires specialized equipment.
Caution: A spark near a battery can cause explosion. Follow guidelines to reduce spark risk.
Position AC and DC cords to minimize risk of damage from vehicle components like hoods or doors.
Stay clear of moving engine parts like fan blades, belts, and pulleys to avoid injury.
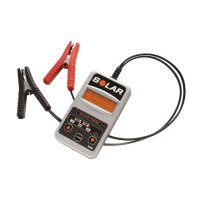
Identify battery posts by polarity; the POSITIVE post typically has a larger diameter than the NEGATIVE post.
Determine which battery post is grounded to the vehicle chassis to ensure correct connection.
For negative-grounded vehicles, connect the POSITIVE charger clip to the POSITIVE battery post.
For positive-grounded vehicles, connect the NEGATIVE charger clip to the NEGATIVE battery post.
Connect the remaining clip to a heavy gauge metal part of the chassis or engine block, away from the battery.
Disconnect the AC cord, then the chassis clip, and finally the battery terminal clip.
Marine batteries must be removed and charged on shore; onboard charging requires specialized equipment.
Caution: A spark near a battery can cause explosion. Follow guidelines to reduce spark risk.
Identify battery posts by polarity; the POSITIVE post typically has a larger diameter than the NEGATIVE post.
Attach at least a 24" long, #6 gauge insulated cable to the NEGATIVE battery post.
Connect the POSITIVE (RED) charger clip to the POSITIVE (POS, P, +) post of the battery.
Position yourself and the free end of the cable away from the battery, then connect the NEGATIVE charger clip.
Disconnect charger in reverse sequence, breaking the first connection as far from the battery as practical.
Choose clamp set, ring terminal set, or 12V adapter based on your needs.
Make a proper battery connection using the chosen output option (see sections F or G).
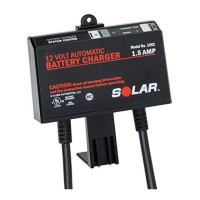
Solid red LED: charging. Solid green LED: fully charged. Blinking red LED: reverse polarity.
Charger executes a multi-step process, automatically bringing the battery to full charge (indicated by solid green LED).
Blinking red ERROR LED indicates a fault or shorted cell. Disconnect and test battery.
Disconnect AC power cord, then DC leads from battery/vehicle in reverse sequence.
Ensure charger is unplugged from electrical outlet before performing any maintenance.
Clean clamps after each use to prevent corrosion from battery fluid. Neutralize fluid with baking soda solution.
Wipe the charger case clean with a soft cloth if needed.
The charger contains no user-serviceable parts inside.
Contact Technical Service for information concerning use, applications, or service.
Product is warranted free from defects for one year from the date of original end user purchase.
Warranty is void if product is abused, altered, misused, or improperly packaged and damaged.
The buyer's sole and exclusive remedy is repair or replacement. Implied warranties are limited to the express warranty.
Manufacturer is not liable for incidental or consequential damages. Liability never exceeds purchase price.
Return product to dealer for exchange with a dated sales receipt within the warranty period.
Contact Clore Automotive Technical Service for questions, out-of-warranty service, or warranty information.
Register your purchase online at cloreregistration.com for best service and product updates.
| Brand | Solar |
|---|---|
| Model | Charge IT 4501 |
| Category | Battery Charger |
| Language | English |