16
ASSEMBLY & INSTALLATION
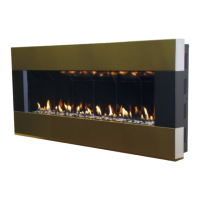
UNPACKING AND INSTALLING THE SOLAS LINEAR WALL MOUNT FIREPLACE
The fireplace components are shipped in three cartons. By
now, you will have opened the top of the first carton, removed
the glass protector and this manual. You will also have found
the Left and Right decorative panels. Note that the right panel
has a touch pad control panel and cable attached. Use spe-
cial care when unpacking and handling this panel to avoid
damaging the cable or pad. The second carton contains the
vent starter pipe, vent cap insulation, vent pass through heat
shields and air and exhaust restrictors. The third carton con-
tains the fireplace surround.
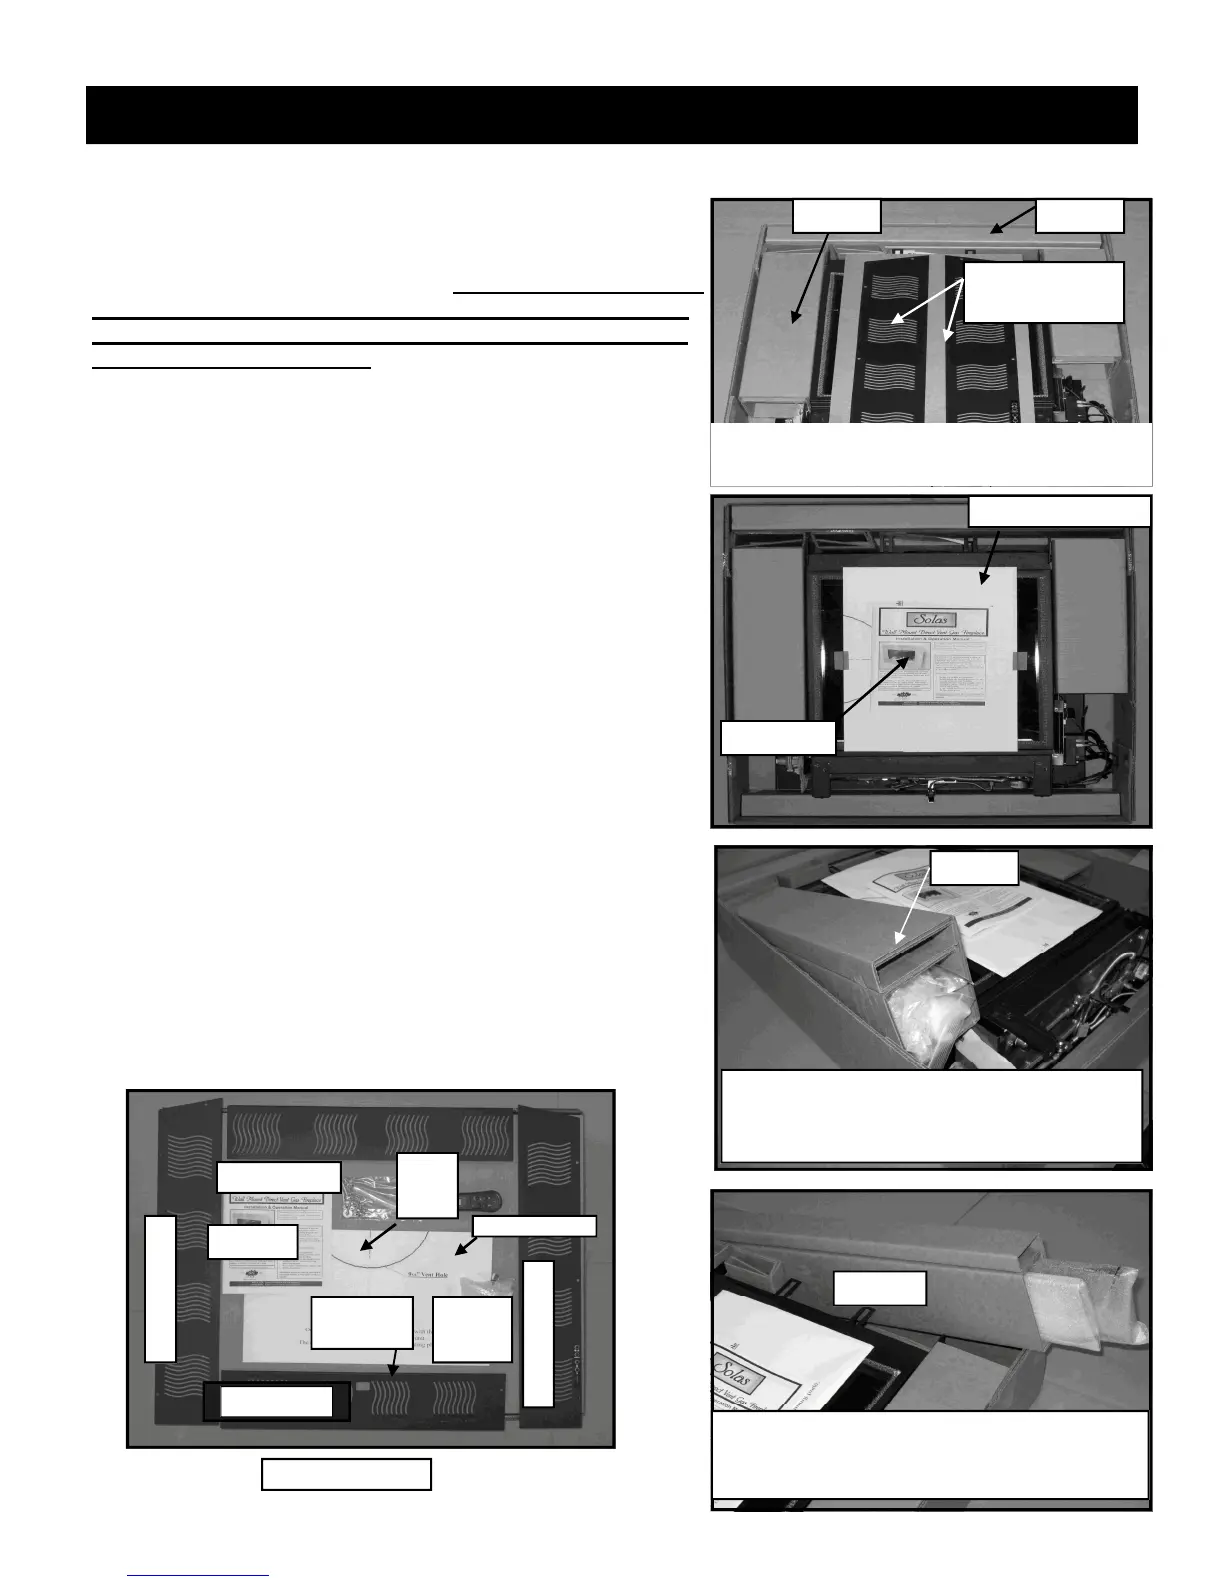
1. Using the adjacent illustrations as a guide, first lift and re-
move Tube 1 from the carton containing the firebox. Care-
fully unpack the contents of the tube and set aside. This
should include the bag of glass burner media, the remote
control handset, a hardware bag and relief door with gasket.
2. Next lift and remove Tube 2 from the carton. Carefully re-
move the contents of the tube. This includes the Top &
Bottom decorative panels that will be attached to the fire-
place during assembly.
3. Next, remove all remaining packaging materials from the
carton.
4. Lift the firebox and the fireplace mounting plate as a unit
up and out of the carton. The best place to lift is at sides.
Remove the fireplace mounting template from the face of
the fireplace. You should now have all of the parts as
shown in the illustration below.
5. Next, unpack the vent starter pipe (with attached gasket),
vent cap insulation, the inner and outer telescoping vent
heat shields and the air and exhaust restrictors from the sec-
ond carton and set aside for later use.
6. Finally, unpack the fireplace surround from the third carton
and set aside on a soft surface for later use.
Left & Right Side
Panels
TUBE 1 TUBE 2
MANUAL
WALL TEMPLATE
TUBE 1
LIFT AND REMOVE “TUBE 1” FROM CARTON.
REMOVE THE FOLLOWING ITEMS FROM TUBE:
1. GLASS BURNER MEDIA 2. REMOTE CONTROL
3. HARDWARE BAG 4. RELIEF DOOR W/GASKET
TUBE 2
LIFT AND REMOVE “TUBE 2” FROM CARTON.
REMOVE THE DECORATIVE PANELS FROM TUBE:
1. TOP DECORATIVE PANEL 2. BOTTOM DECORATIVE
PANEL.
MANUAL
WALL
TEMPLATE
TOP PANEL
BOTTOM PANEL
RIGHT PANEL
LEFT PANEL
GLASS
BURNER
MEDIA
HARD-
WARE
PACK
REMOTE CONTROL
Use care not to damage the touch pad cable attached
to the underside of the Right Side Panel
Relief Doors