Meter & WiFi Connection
614.00871.00
Installation Steps
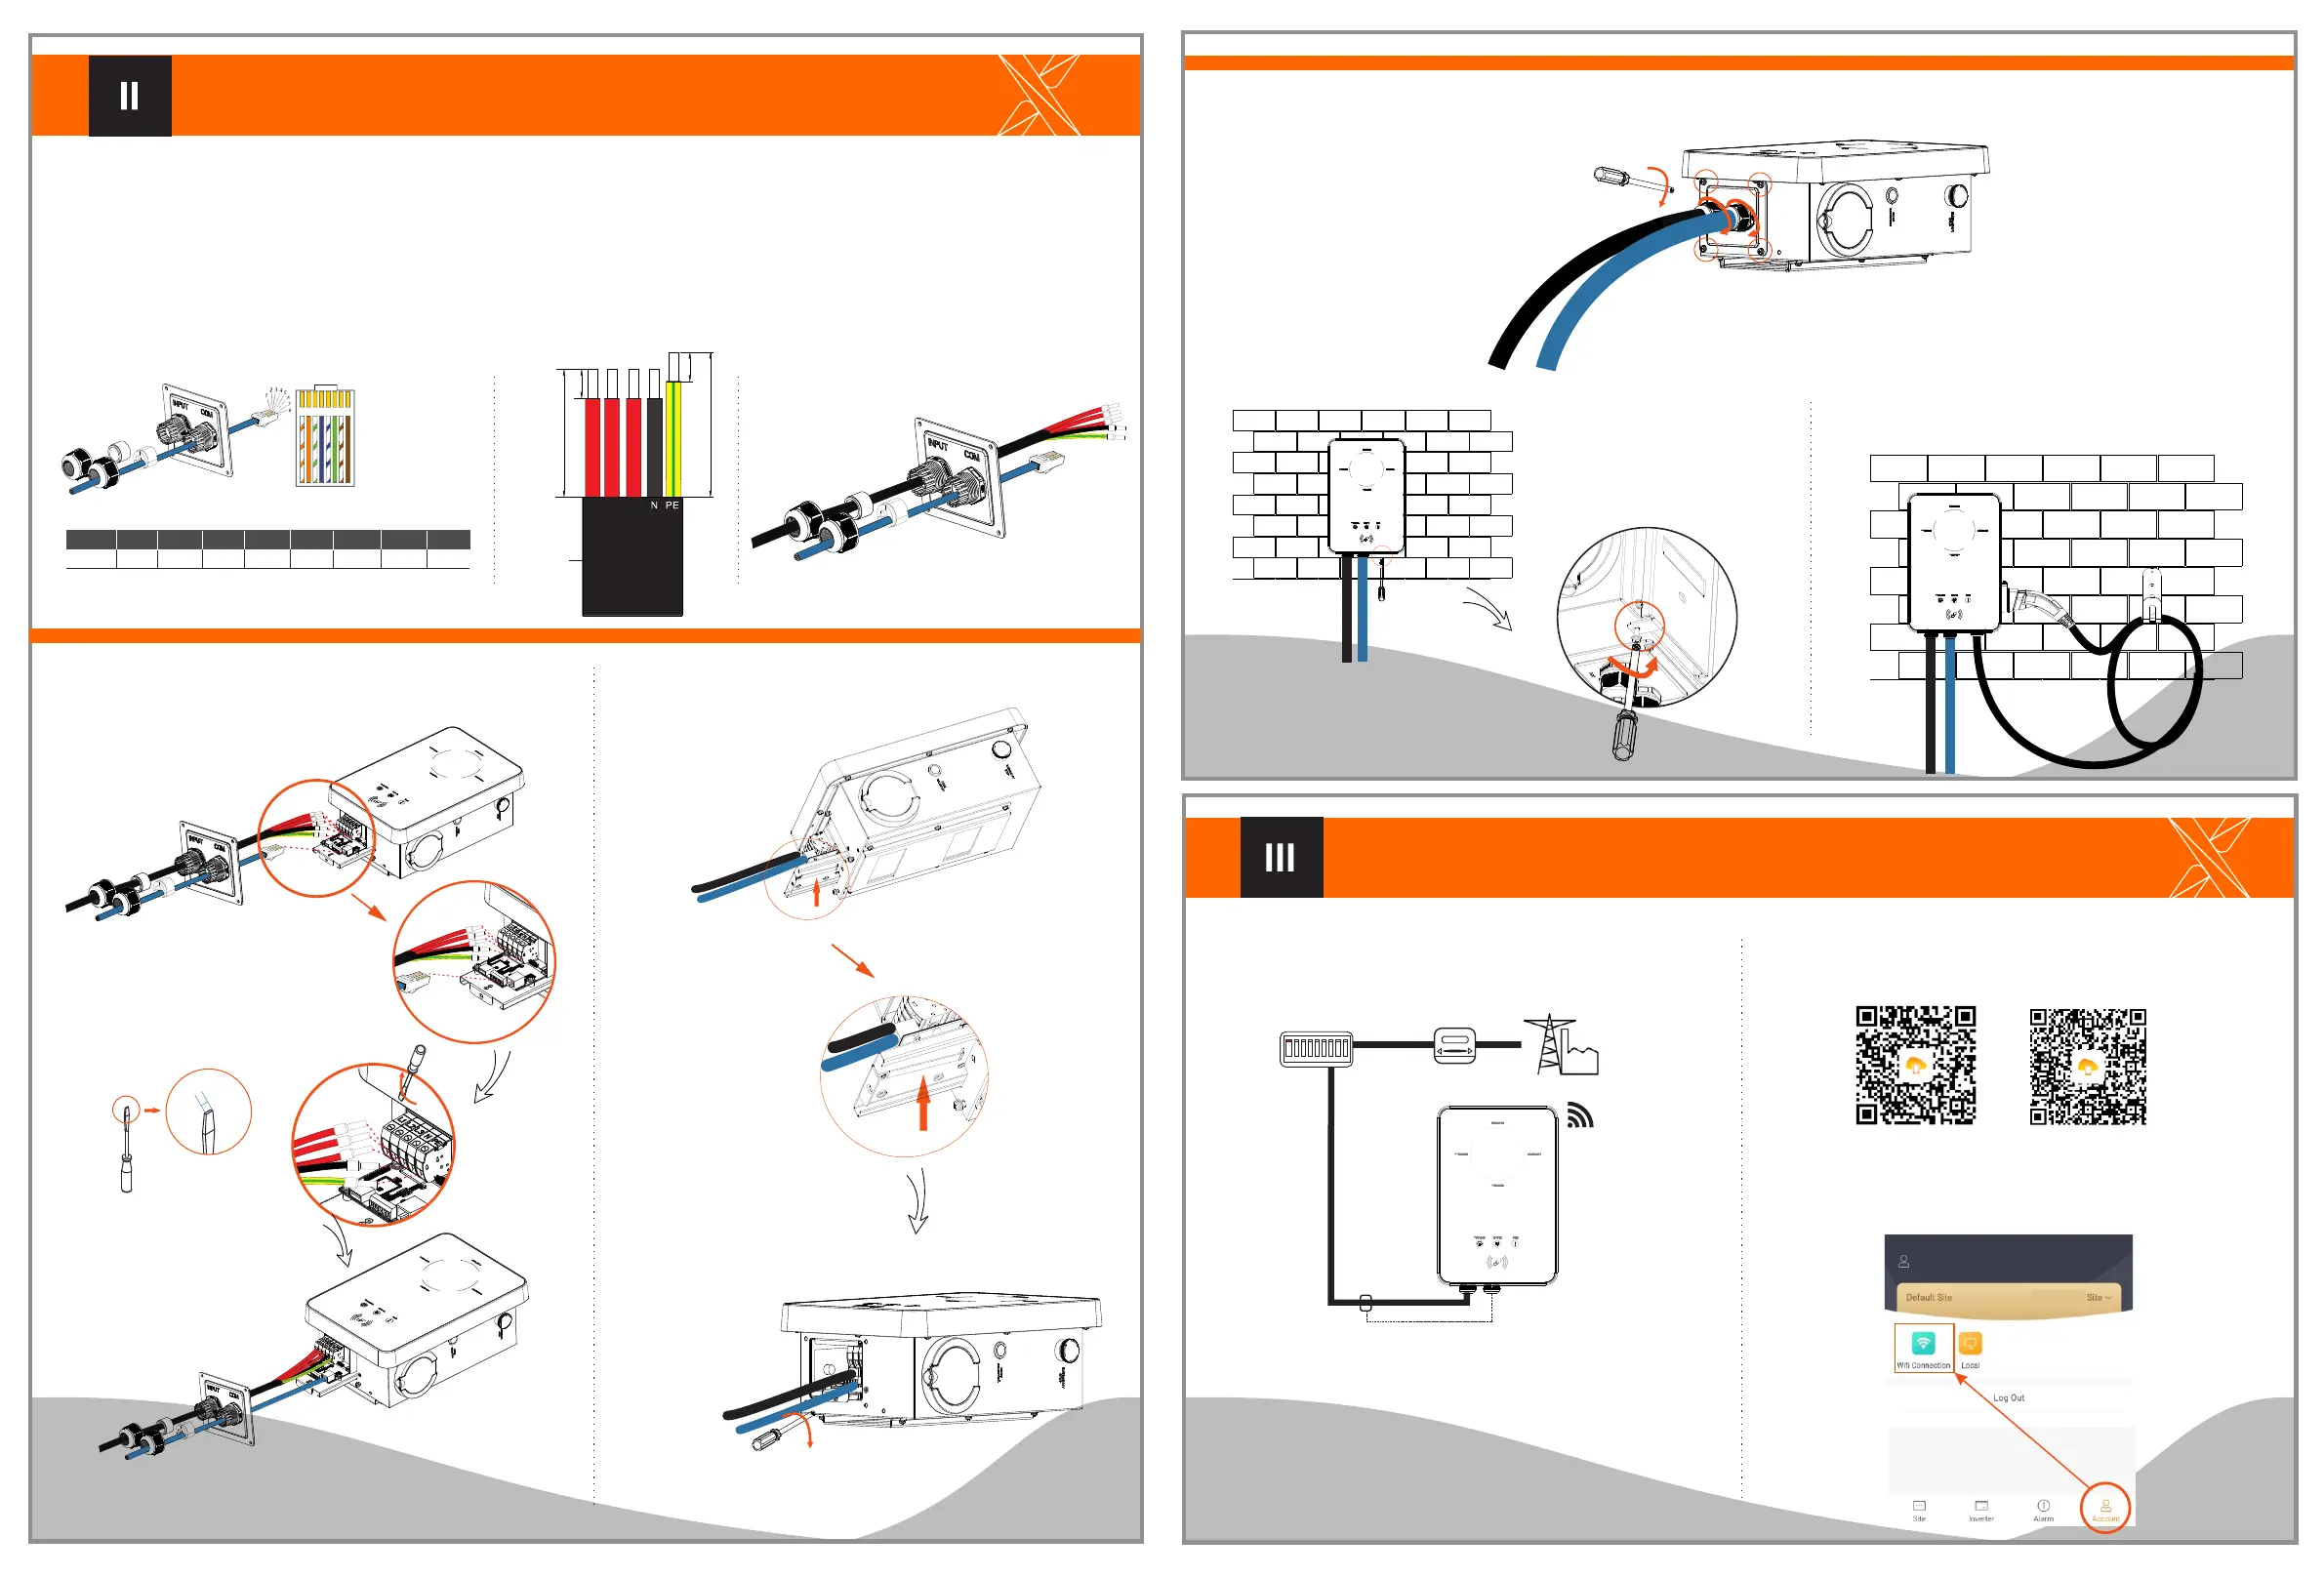
STEP 6: In the “Private Charger” Insert the communication cable of the meter through the waterproof connector in sequence as shown below. (
scenarios, the meter is not necessary.)
STEP 7: Strip the outer sheath of the input cable as below, ensuring all the wires can reach the terminal blocks with a little excessive length. Use
the stripping pliers to strip approx. 12 mm of insulation from the end of all the coloured wires as below. Then crimp the European terminal with
the wire crimper.
STEP 8: Insert the input cable through the waterproof connector in sequence as shown below.
①
③
②
strip length
STEP 9: Insert the wires into the appropriate holes of the terminal
blocks, then block the terminals with the straight screwdriver.
STEP 10: Press the spring upward and push the base plate of
communication board in. Then screw the countersunk screw.
Diagram:
STEP 11: Push the rear cover to appropriate position of the cables and screw the self tapping screws with the cross screwdriver. Then tighten the
waterproof fastening heads.
STEP 12: Hang the EV-Charger up carefully and steady the EV-Charger with the self tapping screw and the cross screwdriver.
For Plug Type, connect the charging connector with the
EV-Charger and hang the connecting cable on the hook.
► Meter Connection ► WiFi Connection
Step 1: Use your smart phone to scan below QR code or search for
the keyword “SolaXCloud” in browser to download the Monitoring
App.
Step 2: Create a new account on the Monitoring App.
Step 3: Login and turn to Account page in the app. Then click “Wi-Fi
Connection” and follow the instructions to complete the process.
IOS
Google
1 2
3
4
5
6 7 8
1) White with orange stripes
2) Orange
3) White with green stripes
4) Blue
5) White with blue stripes
6) Green
7) White with brown stripes
8) Brown
①
③
②
(torque: 2~2.5 N·m)
XXX
Ver s i on:Vx x x x.xx.x x
(torque: 2~2.5 N·m)
L1 L2
L3
60-70 mm
75-80 mm
Ou t e r Sheath
12 mm
12 mm
<
4 m
m
(torque:1.5~1.8 N·m)
L1
L2
L3
N
PE
(torque:0.8~1.5 N·m)
Electrical
grid
Meter*
Electricity meter,
bidirectional
AC distribution box
OCPP1.6
Note: Please refer to the Quick Installation Guide of the meter for details.
PIN
Definition
1 2 3 4 5 6 7 8
A1
B1
X X X X X X
* In the “Private Charger” scenarios, the meter is not necessary.

 Loading...