Instructions for use and safety
*Characteristics:
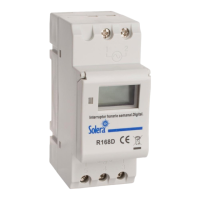
-DIN RAIL Installation. -Advanced pre-setting one week before -Digital electronics general purpose time switch with daily and weekly programs -Repeat programs
with 16ON/OFF settings, 18 times pulse programs, and setting on/off manually. -Lithium battery power reserve when electric supply cut off
-Present time (ON OFF position). Auto
time error correction ±30 sec, weekly.
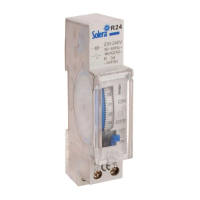
General view:
3
1
2
4
ENGLISH
Connection & technical data: LOAD
Regulation: -Meets UNE EN
60730-2-7
regulations
- Follow instructions to compliance with the R.D. 842/2002.
-
Installation, service and maintenance of the
electrical equipment may be carried out by anauthorized person only
.-It complies with the WEEE directive.
●Voltage rating: AC220V 50/60HZ
●Hysteresis: ≤2 sec/day(25ºC)
●ON/OFF operation: 16 ON & OFF, 18 times pulse
●Power consumption: 7.5VA( max)
●Minimum interval: 1 minute
●Count down: 1 sec - 99 min 59 sec
●Pulse: 1 sec - 59min 59 sec
●Load capacity: Resistive load: 16A/250V AC
Lagging load: 8A/250V AC
Lamp load: 2000 W
● Power reserve: 3 years (lithium battery)
● Ambient temperature: -10~+40ºC
5
1.First time use this timer switch, please input power and let battery charge. After then press reset Key. 2.At first time, the timer switch is in 24h mode.If you want
change to 12h mode please press on“”Key 5 sec, and LCD will display AM If you want recharge to 24h mode ,and press on""key 5 sec to return.
3.Programming: set on&off same time, have 30 seconds to control bell.
Instructions:
Press
Setting 1 ON time(display 1 on)
Select days of week. Same everyday, MO - FR,MO -SA,SA-SU,MO-WE,TH-
SA,MO WE FR, TU TH SA, different everyday.(If same everyday, not press
Press
Setting 1 off time ,display 1 off
If you want same set in every day,you need not press this key
4. PULSE setting:(“ ” displays at bottom - left corner of LCD).
*If need not 18 pulse press“”key to the end.
*If need not 16 pulse press“”key to the end.
Set ting pulse time range 1 sec - 59min 59sec
Into setting 1 on time( display 1 on)
6 Press D+
Select days of week. Same everyday, MO -FR,MO -SA,SA -SU,MO -WE,TH -
SA,MO WE FR, TU -TH-SA, different everyday.(If same everyday, not press
5. Count down:(“d” displays at bottom-left corner of LCD)
Return to start count down
6. Pause
Neither needn’t the timer work nor delete the set program. You could just pressand “MANUAL” for 3.
Seconds at the same time to make the timer “AUTO OFF” permanently (only can access when “ON
AUTO”), in that case, the timer can not be changeover, “┌” displays at the bottom-left corner of LCD,
press and “MANUAL” to restore “AUTO OFF”, and the timer turn to work normally.
7. Auto time error correction, weekly:(“7d” displays at
bottom-left corner of LCD)
8. Timing
8.1 Press and press D+ repeatedly go to today
8.2 Press and press H+/M+ to change hr/min
9. Having operated items mentioned above, please be sure to reset the ON and OFF according to the current time, press
“MANUAL” in order to display at the bottom line of the LCD
10. Check time: press “ ” to check whether the time is set correctly or not
Press “MANUAL” and then reset the time and week
Press ““ to finish checking and setting, and the time will be display
afterwards
11. Press “MANUAL” to turn on or off at will, except 5
12. Press “D+” and “H+” for 3 seconds to turn off, but the setting will lost.
13. Press “RESET” to reset, but the settings can not be restored
NOTE
●Time setting should according to the time sequence, couldn’t be set crossly
●System with quit automatically if there’s no operating within 10 seconds, and no
data is saved. It will quit when setting finished.
●Function 3,4,5, can not be used simultaneously
Safety and usage tips.
Technical information: -GWT 850ºC. Product maintenance: -
Clean with a dry cloth.
Product recycling: -Contact the point of sale, local authorities or the manufacturer.
6
7
8
9
10
Halogen Free
Information related to the WEEE II directive:
Do not throw them in the trash, recycle them.Treatment of electrical and electronic equipment at the end of its useful life.This product is marked
with the symbol to denote conformity with the European Directive 2012/19/EU on Waste Electrical and Electronic Equipment (WEEE II). This symbol on
the equipment or on its packaging indicates that the present product cannot be treated as normal household waste. It must be disposed in an electrical
and electronic collection point (free of charge).By ensuring that this equipment is disposed of correctly, you help prevent the potentially negative
consequences for the environment and human health that could result from improper disposal of it.
-3-
Mode d'emploi et de sécurité
FRANÇAIS
Présentation:
1
 Loading...