ENGLISH 3
6.5 Work clothing /personal protection
equipment (PPE)
Suitable and approved protective clothing
that protects all body parts from contact with
the spray solution must be worn.
x Wear firm shoes with good gripping soles.
x Wear protective gloves with a slip-proof
palm.
x Use facial protection (e.g. protective
goggles).
x Always wear a breathing mask. when
working in dense, tall plants, greenhouses,
troughs or trenches and when using
dangerous spraying agents.
6.6 Before and during work
x Before starting work, always check the entire
device for operational safety according to
chap. 10.1.
x The sprayer must only be operated by one
person. There must be no other person within a
radius of 15m [approx. 16 yards].
x Always ensure sufficient air exchange in dense
plant growth, in greenhouses, troughs or
trenches.
x Always stay within calling distance from other
persons that may provide help in emergency.
x Take regular working breaks to prevent fatigue.
x Do not smoke at the workplace.
6.7 Maintenance, repair and storage
Only perform maintenance and repair work yourself
that is described in these original instructions. All
other work must be carried out by an authorised
specialist workshop.
x Do not service, repair or store the sprayer near
open fire.
x Before doing any maintenance work or repairs
and before opening the spraying agent tank,
depressurise the device by pulling on the
pressure relief valve (Fig. 3).
Before pulling on the pressure relief valve (d),
the device must always be in an upright position.
Attention: Keep the device away from your face!
x The pressure hose, hand valve, spray wand and
nozzle assembly must only be unscrewed when
the sprayer is depressurised.
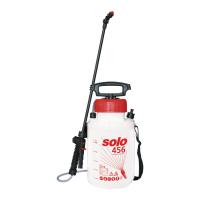
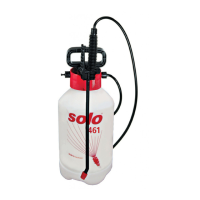
7 Work preparation
Fig. 1:
(shown as example, fittings depending on model)
Hint:
The model 458 has a base.
a Spraying agent tank
b Flange housing
c Pump handle
d Pressure relief valve
e Shut-off valve
f Spray tube
g Nozzle attachment
h Carrying strap
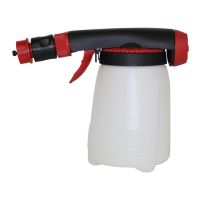
7.1 Assembly
Fig. 2:
x Firmly screw the nozzle attachment (g) with the
O-Ring (10x2 mm) hand-tight onto the spray
tube. Do not use any tools!
x Fasten the threaded collar (k) on straight and
firmly screw the spray tube (f) with O-ring
(16x3 mm) hand-tight onto the shut-off valve (e).
Do not use any tools!
Fig. 1:
When your work is completed, the spray tube
should be fitted into the holding clamp at the pump
handle (c).
Please put the nozzle attachment (g) completely
up.
7.2 Filter
The nozzle assembly (g) includes a filter insert in
front of the nozzle.
The nozzle filter must always be used when
working with the pressure sprayer.
7.3 Carrying strap
Use the sliding clip to adjust the carrying strap to
the required length.
7.4 Test run
Before its initial use, the sprayer should be tested
according to chapter 10.2.