Solo ST Style DIY Electric Guitar Kit
Copyright © 2017 Solo Music Gear. All rights reserved | v2.0
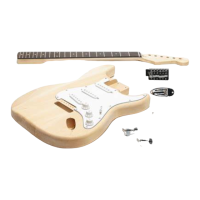
FINISHING THE BODY AND NECK
Before you start finishing the neck, please inspect the frets and the fingerboard. Even though all wood is kiln-
dried it may still shrink a little so you may get sharp fret edges.
In this case you need to use a fine needle file (Emory boards for finger nails can be used instead) to remove all
sharp edges: first make all fret edges flat with the fretboard edges on both sides, than use masking tape on
the top of the fretboard to protect it, and work on each fret’s edge to smooth it by slightly rounding it. Before
removing the masking tape, consider polishing the frets with fine steel wool.
STEP 1 – The body and neck have been coated with a poly resin sealant. They need to be sanded before
finishing. DO NOT SAND THE FINGERBOARD.
For sanding both neck and body, use a flat sanding block for all flat surfaces and by hand for edges and
rounded/curved surfaces. Start with 180 grit sandpaper, continue with 240 and finish with 320, always
moving along the grain only. Before the final sanding, wipe the wood with a damp cloth and let it dry to raise
the wood grain.
STEP 2 – There are many different ways to apply finish to your guitar. Do a little research to decide which
type of finish you want to use. One good starting point is to review tutorials and videos on YouTube
STEP 3 - For any type of spraying finish (lacquer or paint) you will need to mask three areas with masking
tape: neck pocket on the body, neck’s fingerboard and truss rod nut. Press the tape tightly to the wood, not
allowing any gaps at the edges, to completely prevent the finish leaking to these areas.
STEP 4 - You will also need to make hangers for both the body and neck (if you want to apply any spraying
finish). Make them from a strong metal wire (wire dress/coat hanger can be used for it).
STEP 5 – Apply the finish by following the manufacturer instructions. Remember that spraying the finish is not
an easy process as it requires certain skill and experience – you might want to practice first on some scrap
wood. Always remember your safety – work only in a well ventilated area, away from any open fire and wear
a respirator mask and safety glasses.
STEP 6 – Final polishing for high gloss finishes can be done manually or using a power drill with a foam
polishing pad. The finishing tools and materials are readily available in many automotive/hardware supplies
stores.
TIP: Consider an oil rubbed finish (sometimes called “wipe-on oil finish”) as a good and safe alternative.
Tru-Oil® (known as a “Gun Stock Finish”, based on Linseed Oil) or Waterlox® (Processed Tung Oil) is highly
recommended. Oil finishing takes longer, but it is very safe and easy to apply and a high quality finish can
be achieved, even by a novice.
 Loading...