EasyManua.ls Logo

Solowave Big Backyard PINE RIDGE IV User Manual

Solowave Big Backyard PINE RIDGE IV
28 pages
To Next Page IconTo Next Page
Page #1 background imageLoading...
Page #1 background image
ASSEMBLY INSTRUCTIONS
North America
Solowave Design
375 Sligo Rd. West PO Box 10
Mount Forest, Ontario Canada
N0G 2L1
General Inquiries:
Toll Free: 1-877-966-3738
Email: support@solowavedesign.com
United Kingdom
General Inquiries:
Toll Free: 0870 145 2145
Email: info@selwoodproducts.co.uk
Other Countries:
Please refer to label affixed to outside of carton.
The 1-877 number on the Owners Manual &
Safety Instructions is for North America only.
For questions, assembly help or assistance with missing or defective parts:
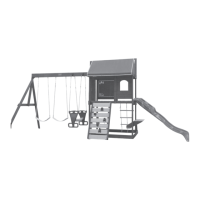
PINE RIDGE IV PLAY SYSTEM
20 ft
11 ft
ashford
Aspen Lodge 2
Savanah
lynwood
Bayside
Pine Ridge 3
17½ ft
10 ft
20' 6"
12ft
12ft
20'- 6"
4'-4"
5'-11"
8' 0"
20' 6"
Play System dimension with
safety allowance: 32’6” x 20’
8-10 Hrs
Prior to assembly, you MUST read the Owner’s Manual for important safety warnings and details on installing a shock absorbing surface.
This unit’s maximum fall height is 7.5 feet and is intended for a maximum of 7 users, ages 3 to 10 (110 lbs. per child).
3403230
F23230
Effective June 26/09
Question and Answer IconNeed help?

Do you have a question about the Solowave Big Backyard PINE RIDGE IV and is the answer not in the manual?

Solowave Big Backyard PINE RIDGE IV Specifications

General IconGeneral
CategoryPlay Sets & Playground Equipment
MaterialWood
Product NameSolowave Big Backyard PINE RIDGE IV
Recommended Age3-10 years
Assembly RequiredYes
Warranty1-year limited warranty on parts, 5-year limited warranty on wood
Age Range3 to 10 Years
Maximum Occupancy9

Summary

Helpful Assembly Hints

Swing Hanger Installation

Describes correct installation to prevent injury.

Hardware Identification

Step 1: Swing & Slide Wall Assembly

Step 2A: Front Wall Assembly

Step 2B: Attach Back Top and Floor Back

Step 3: Fort Floor Assembly

Step 4: Wall and Window Assembly

Step 5: Panel and Chalk Wall Assembly

Step 6A: Rock Sides and Rails Assembly

Step 6B: Rock Boards Attachment

Step 6C: Center Rock Wall Installation

Step 7A: Gusset Attachment

Step 7B: Roof and SW Mount Attachment

Step 8A: Swing End Assembly

Step 8B: Swing and Glider Hanger Attachment

Step 8C: Final Tightening and Positioning

Step 9A: Roof and Wall Assembly

Step 9B: Canopy Installation

Step 10: Rope Ladder Installation

Step 11A: Seat/Table Supports Attachment

Step 11B: CE Table Top Installation

Step 12: Slide Mounting

Step 13: Stakes Installation

Step 14: Glider Assembly and Attachment

Related product manuals