EasyManua.ls Logo

Sony a6400 - User Manual

Sony a6400
6 pages
Print Icon
To Next Page IconTo Next Page
Loading...
ExpoDisc Custom White Balance Procedures
Sony Cameras
Sony A7 R IV
1.
Install the ExpoDisc and set the camera to Manual Focus mode.
2.
Allow the camera to set an automatic exposure using the “P”, “S” or “A”
modes or set the correct manual exposure in “M” mode.
3.
From the MENU navigate to the Camera Settings1 screen and select White
Balance and then select Custom 1 - Custom 3, and then press the right side
of the control wheel.
4.
Select Set and then press the center of the control wheel.
5.
Aim the camera in the appropriate direction for the given lighting condition
and press the center of the control wheel. See the ExpoDisc Instruction
Manual for more information on where to aim the camera.
6.
After the shutter sound beeps, the calibrated values (ColorTemperature and
Color filter) are displayed.
7.
Press the center of the control button again. The monitor returns to the menu
display with the memorized white balance retained. The custom white
balance setting registered in this operation is effective until a new setting is
registered.
8.
If you get the message “Custom WB error” this indicates that you need to
adjust your exposure and reattempt to set your white balance.
9.
From the White Balance menu, select Custom 1 (or whichever Custom setting
you selected in Step 3).
10.
Remove the ExpoDisc, return the camera to auto focus if desired and start
shooting.
Sony A7 R III
1.
Install the ExpoDisc and set the camera to Manual Focus mode.
2.
Allow the camera to set an automatic exposure using the “P”, “S” or “A”
modes or set the correct manual exposure in “M” mode.
3.
From the MENU navigate to the Camera Settings1 screen and select White
Balance and then Custom Setup.
4.
Aim the camera in the appropriate direction for the given lighting condition
and press the center of the control wheel. See the ExpoDisc Instruction
Manual for more information on where to aim the camera.
5.
After the shutter sound beeps, the calibrated values (ColorTemperature and
Color filter) are displayed.
6.
Press the center of the control button again. The monitor returns to the
recording information display with the memorized white balance retained.
The custom white balance setting registered in this operation is effective until
Copyright, 2020 ExpoImaging, Inc.
“Sony” and the Sony camera models listed are trademarks of Sony, Inc.

Other manuals for Sony a6400

Question and Answer IconNeed help?

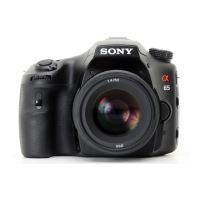
Do you have a question about the Sony a6400 and is the answer not in the manual?

Summary

Sony A7 R IV Custom White Balance Procedure

Step 1: Install ExpoDisc and Set Manual Focus

Install the ExpoDisc and set the camera to Manual Focus mode.

Step 2: Set Camera Exposure

Allow automatic exposure or set correct manual exposure.

Step 3: Navigate to White Balance Settings

Navigate to Camera Settings1, select White Balance, then Custom 1-3.

Step 4: Confirm Custom White Balance Setting

Select 'Set' and press the center of the control wheel.

Step 5: Aim Camera for Calibration

Aim the camera in the appropriate direction for the lighting condition.

Step 6: View Calibrated Values

After shutter sound, calibrated values (ColorTemperature, Color filter) are displayed.

Step 7: Retain White Balance Setting

Press center button to retain memorized white balance setting.

Step 8: Handle Custom WB error

Troubleshoot 'Custom WB error' by adjusting exposure.

Step 9: Select Custom White Balance

From White Balance menu, select the registered Custom setting.

Step 10: Finalize and Shoot

Remove ExpoDisc, return camera to auto focus, and start shooting.

Sony A7 R III Custom White Balance Procedure

Step 1: Install ExpoDisc and Set Manual Focus

Install the ExpoDisc and set the camera to Manual Focus mode.

Step 2: Set Camera Exposure

Allow automatic exposure or set correct manual exposure.

Step 3: Navigate to White Balance Custom Setup

Navigate to Camera Settings1, select White Balance, then Custom Setup.

Step 4: Aim Camera for Calibration

Aim the camera in the appropriate direction for the lighting condition.

Step 5: View Calibrated Values

After shutter sound, calibrated values (ColorTemperature, Color filter) are displayed.

Step 6: Retain White Balance Setting

Press center button to retain memorized custom white balance setting.

Step 7: Handle Custom WB error

Troubleshoot 'Custom WB error' by adjusting exposure.

Step 8: Select Registered Custom White Balance

From White Balance menu, select the registered Custom setting.

Step 9: Finalize and Shoot

Remove ExpoDisc, return camera to auto focus, and start shooting.

Sony A7 R II Custom White Balance Procedure

Step 1: Install ExpoDisc and Set Manual Focus

Install the ExpoDisc and set the camera to Manual Focus mode.

Step 2: Set Camera Exposure

Allow automatic exposure or set correct manual exposure.

Step 3: Navigate to White Balance Custom Setup

Navigate to Camera Settings1, select White Balance, then Custom Setup.

Step 4: Aim Camera for Calibration

Aim the camera in the appropriate direction for the lighting condition.

Step 5: View Calibrated Values

After shutter sound, calibrated values (ColorTemperature, Color filter) are displayed.

Step 6: Select Registration Number

Select a registration number (1-3) to save the custom white balance.

Step 7: Handle Custom WB error

Troubleshoot 'Custom WB error' by adjusting exposure.

Step 8: Select Registered Custom White Balance

From White Balance menu, select the registered Custom setting.

Step 9: Finalize and Shoot

Remove ExpoDisc, return camera to auto focus, and start shooting.

Sony A77 Custom White Balance Procedure

Step 1: Install ExpoDisc and Set Manual Focus

Install the ExpoDisc and set the camera to Manual Focus mode.

Step 2: Set Camera Exposure

Allow automatic exposure or set correct manual exposure.

Step 3: Access White Balance Settings

Press WB button, select SET, then press center of Multi-Selector.

Step 4: Aim Camera for Calibration

Aim the camera in the appropriate direction for the lighting condition.

Step 5: View Calibrated Values

Shutter clicks, calibrated values (ColorTemperature, Color filter) displayed.

Step 6: Save Custom White Balance Setting

Select a register using multi-selector, then press center to save.

Step 7: Retain White Balance Setting

Monitor returns to display, memorized white balance retained.

Step 8: Handle Custom WB error

Troubleshoot 'Custom WB error' by adjusting exposure.

Step 9: Finalize and Shoot

Remove ExpoDisc, return camera to auto focus, and start shooting.

Sony A100 Custom White Balance Procedure

Step 1: Install ExpoDisc and Set Manual Focus

Install the ExpoDisc and set the camera to Manual Focus mode.

Step 2: Set Camera Exposure

Allow automatic exposure or set correct manual exposure.

Step 3: Select WB Mode

Rotate function dial to WB, press Fn button to display WB mode screen.

Step 4: Select Custom White Balance Icon

Use controller pad to select custom white balance icon and press.

Step 5: Aim Camera for Calibration

Aim the camera in the appropriate direction for the lighting condition.

Step 6: Initiate Calibration

Select SET, press center button. Message prompts to press shutter.

Step 7: View Calibrated Values

Shutter clicks, calibrated values (ColorTemperature, Color filter) displayed.

Step 8: Store White Balance

Press center button on controller to store the white balance recorded.

Step 9: Finalize and Shoot

Remove ExpoDisc, place camera in shooting mode, and start shooting.

Sony A200; A300; A350 Custom White Balance Procedure

Step 1: Install ExpoDisc and Set Manual Focus

Install the ExpoDisc and set the camera to Manual Focus mode.

Step 2: Set Camera Exposure

Allow automatic exposure or set correct manual exposure.

Step 3: Select White Balance Icon

Press Fn button to select the White Balance icon.

Step 4: Select SET Option

Select SET with the left/right buttons on the controller.

Step 5: Aim Camera for Calibration

Aim the camera in the appropriate direction for the lighting condition.

Step 6: Store Custom White Balance

Press center of controller; monitor returns with memorized setting retained.

Step 7: Handle Custom WB error

Troubleshoot 'Custom WB error' by adjusting exposure.

Step 8: Finalize and Shoot

Remove ExpoDisc, return camera to auto focus, and start shooting.

Sony A700 Custom White Balance Procedure

Step 1: Install ExpoDisc and Set Manual Focus

Install the ExpoDisc and set the camera to Manual Focus mode.

Step 2: Set Camera Exposure

Allow automatic exposure or set correct manual exposure.

Step 3: Access White Balance Mode Screen

Press WB Button to display White Balance mode screen.

Step 4: Select Custom White Balance Item

Use multi-selector to select custom white balance item.

Step 5: Select SET and Register

Select SET, press center of multi-selector to display register screen.

Step 6: Aim Camera for Calibration

Aim the camera in the appropriate direction for the lighting condition.

Step 7: Select Memory Number

Select a memory number (1-3) to save custom white balance references.

Step 8: Verify White Balance Mode

Ensure registered number matches the White Balance mode screen.

Step 9: Handle Custom WB error

Troubleshoot 'Custom WB error' by adjusting exposure.

Step 10: Finalize and Shoot

Remove ExpoDisc, return camera to auto focus, and start shooting.

Sony A900 Custom White Balance Procedure

Step 1: Install ExpoDisc and Set Manual Focus

Install the ExpoDisc and set the camera to Manual Focus mode.

Step 2: Set Camera Exposure

Allow automatic exposure or set correct manual exposure.

Step 3: Access White Balance Mode Screen

Press WB Button to display White Balance mode screen.

Step 4: Select Custom White Balance Item

Use multi-selector to select custom white balance item.

Step 5: Select SET and Register

Select SET, press center of multi-selector to display register screen.

Step 6: Aim Camera for Calibration

Aim the camera in the appropriate direction for the lighting condition.

Step 7: View Calibrated Values

Shutter clicks, calibrated values (ColorTemperature, Color filter) displayed.

Step 8: Select Memory Number

Select a memory number (1-3) to save custom white balance references.

Step 9: Verify White Balance Mode

Ensure registered number matches the White Balance mode screen.

Step 10: Handle Custom WB error

Troubleshoot 'Custom WB error' by adjusting exposure.

Step 11: Finalize and Shoot

Remove ExpoDisc, return camera to auto focus, and start shooting.

Sony A6400 Custom White Balance Procedure

Step 1: Install ExpoDisc and Set Manual Focus

Install the ExpoDisc and set the camera to Manual Focus mode.

Step 2: Set Camera Exposure

Allow automatic exposure or set correct manual exposure.

Step 3: Navigate to White Balance Settings

Navigate to Camera Settings1, select White Balance, then Custom 1-3.

Step 4: Confirm Custom White Balance Setting

Select 'SET' and press the center of the control wheel.

Step 5: Aim Camera for Calibration

Aim the camera in the appropriate direction for the lighting condition.

Step 6: View Calibrated Values

After shutter sound, calibrated values (ColorTemperature, Color filter) displayed.

Step 7: Retain White Balance Setting

Press center button to retain memorized white balance setting.

Step 8: Handle Custom WB error

Troubleshoot 'Custom WB error' by adjusting exposure.

Step 9: Select Registered Custom White Balance

From White Balance menu, select the registered Custom setting.

Step 10: Finalize and Shoot

Remove ExpoDisc, return camera to auto focus, and start shooting.

Sony DSC-F828 Custom White Balance Procedure

Step 1: Install ExpoDisc and Set Manual Focus

Install the ExpoDisc and set the camera to Manual Focus mode.

Step 2: Set Camera Exposure

Allow automatic exposure or set correct manual exposure.

Step 3: Set Standard Color Mode and Access Menu

Set to Standard Color mode, press Menu, select Color, then Standard.

Step 4: Select WB Set

Press WB Button, hold, and select WB Set with Command Dial.

Step 5: Aim Camera for Calibration

Aim the camera in the appropriate direction for the lighting condition.

Step 6: Initiate Calibration and Await Storage

Press center of Multi-Selector. Do not shake camera while WB indicator flashes.

Step 7: Confirm White Balance Storage

WB indicator lights up when custom white balance has been adjusted and stored.

Step 8: Handle Slow WB Indicator Flash

Slow flash indicates WB not set; adjust exposure and recalibrate.

Step 9: Finalize and Shoot

Remove ExpoDisc, place camera in desired shooting mode, and start shooting.

Overview

The ExpoDisc is a photographic accessory designed to assist photographers in achieving accurate custom white balance settings across various Sony camera models. By providing a standardized method for capturing incident light, the ExpoDisc helps cameras interpret colors more faithfully, leading to more natural and consistent image rendering under diverse lighting conditions.

Function Description

The primary function of the ExpoDisc is to facilitate the creation of a custom white balance preset within a camera. Instead of relying on the camera's automatic white balance or predefined presets, which can sometimes misinterpret complex lighting, the ExpoDisc allows the camera to measure the actual color temperature of the light falling on the subject. This measurement is then used to establish a precise white balance reference, ensuring that white objects appear truly white in the final image, and all other colors are rendered accurately in relation to that white point.

The process typically involves attaching the ExpoDisc to the front of the camera lens. The photographer then aims the camera, with the ExpoDisc attached, towards the light source illuminating the subject. The ExpoDisc acts as a neutral diffuser, allowing only the incident light to pass through to the camera's sensor, effectively "telling" the camera what true white looks like under those specific lighting conditions. Once the measurement is taken, the camera stores this custom white balance setting, which can then be applied to subsequent photos taken in the same lighting environment. This method is particularly beneficial in mixed lighting, challenging artificial light, or situations where color accuracy is critical, such as product photography or portraiture.

Usage Features

The ExpoDisc is designed for straightforward integration into a photographer's workflow, with specific steps tailored to different Sony camera models.

  • Manual Focus Mode Requirement: For most Sony cameras, the initial step involves setting the camera to Manual Focus mode. This ensures that the camera's autofocus system does not interfere with the white balance measurement process, which relies on capturing a uniform light reading through the ExpoDisc.

  • Exposure Setting Flexibility: Users can set the camera's exposure either automatically using "P," "S," or "A" modes, or manually in "M" mode. This flexibility allows photographers to maintain their preferred exposure control while still utilizing the ExpoDisc for white balance calibration. The key is to ensure an appropriate exposure for the white balance measurement itself, as an underexposed or overexposed reading can lead to inaccurate results.

  • Menu Navigation for Custom White Balance: The procedure involves navigating through the camera's menu system to access the "White Balance" settings. Depending on the Sony model, this might involve selecting "Custom Setup," "Custom 1 - Custom 3," or a dedicated "WB" button. The ExpoDisc guides the camera to create a new custom white balance preset within one of these available slots.

  • Targeting the Light Source: A crucial step is to aim the camera, with the ExpoDisc attached, in the appropriate direction for the given lighting condition. This means pointing the ExpoDisc towards the primary light source illuminating the subject, ensuring that the camera measures the light that will actually fall on the scene. The ExpoDisc Instruction Manual provides detailed guidance on optimal aiming techniques for various lighting scenarios.

  • Calibration Confirmation: After initiating the white balance measurement (often by pressing the center of the control wheel or the shutter release button), the camera typically provides feedback. This can include a shutter sound beep, the display of calibrated values (Color Temperature and Color filter), or a visual confirmation that the white balance has been successfully registered. This immediate feedback helps users confirm the success of the calibration.

  • Error Handling: The system includes an error message, "Custom WB error," which indicates that the white balance could not be set accurately. This usually points to an issue with the exposure during the measurement. Users are prompted to adjust their exposure and reattempt the white balance setting, ensuring that the camera receives sufficient light through the ExpoDisc for a proper reading.

  • Memory and Retention: Once a custom white balance setting is registered, it is memorized by the camera and remains effective until a new setting is registered in the same custom slot. Some Sony models allow for saving multiple custom white balance references (e.g., Custom 1, 2, or 3), providing flexibility for photographers working in environments with different lighting setups.

  • Post-Calibration Workflow: After successfully setting the custom white balance and removing the ExpoDisc, users can return the camera to autofocus mode (if desired) and begin shooting. The camera will then apply the precisely calibrated white balance to all subsequent images, ensuring consistent and accurate color rendition.

Maintenance Features

The ExpoDisc itself is a passive device with minimal maintenance requirements, focusing primarily on ensuring its optical clarity and physical integrity.

  • Cleaning: As an optical accessory, the ExpoDisc should be kept clean to ensure accurate light transmission. Dust, fingerprints, or smudges on its surface can interfere with the light measurement, leading to inaccurate white balance readings. Regular cleaning with a soft, lint-free cloth, such as a microfiber lens cloth, is recommended. For more stubborn marks, a specialized lens cleaning solution can be used sparingly.

  • Storage: Proper storage is essential to protect the ExpoDisc from damage and contamination. It should be stored in a protective pouch or case when not in use, shielding it from dust, scratches, and impacts. Avoiding extreme temperatures and humidity will also help preserve its material integrity over time.

  • Handling: The ExpoDisc should be handled with care to prevent physical damage. Dropping it or subjecting it to excessive force could crack or deform the diffuser element, compromising its ability to accurately measure incident light. Attaching and detaching it from the lens should be done gently to avoid scratching the lens or the ExpoDisc itself.

  • No Electronic Components: Since the ExpoDisc is a non-electronic device, it does not require batteries, firmware updates, or complex troubleshooting related to electronic malfunctions. This simplifies its maintenance and ensures long-term reliability as a photographic tool. Its durability is primarily dependent on the user's care in handling and storage.

In summary, the ExpoDisc is a simple yet powerful tool for achieving precise custom white balance, enhancing color accuracy and consistency in photographs taken with Sony cameras. Its ease of use, coupled with minimal maintenance, makes it a valuable accessory for photographers seeking professional-grade color rendition.

Sony a6400 Specifications

General IconGeneral
SensorAPS-C CMOS
Megapixels24.2 MP
ISO Range100-32000 (expandable to 102400)
Continuous Shooting Speed11 fps
ConnectivityWi-Fi, NFC, Bluetooth
Image ProcessorBIONZ X
BatteryNP-FW50
Weight403 g (body only)
Autofocus Points425 phase-detection / 425 contrast-detection points
Video Resolution4K up to 30p
Viewfinder2.36 million-dot OLED electronic viewfinder
Screen3.0-inch tilting touchscreen LCD
Dimensions120.0 x 66.9 x 59.7 mm
Battery LifeApprox. 360 shots (LCD monitor)

Videos

How to Transfer Photos from Sony A6400 to iPhone or Android | Sony A6400 WiFi Setup

How To Connect Sony A6400 Camera to Phone

How To Connect Sony A6400 to iPhone/iPad

How To Connect Sony A6400 to WiFi

How to Record 4K Video with Sony A6400

How to Use Eye Autofocus on Sony A6400

Related product manuals