Do you have a question about the Sony a7R IVA and is the answer not in the manual?
Access the online manual for in-depth instructions and latest camera information.
Verify the camera and all included accessories are present and in good condition.
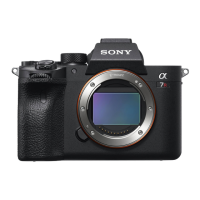
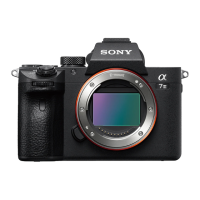
Familiarize yourself with the external components and controls of the camera body and lens mount.
Identifies controls and features located on the front of the camera body and lens mount.
Details the buttons, monitor, and viewfinder on the back of the camera.
Locates and describes the dials, buttons, and shoe on the top of the camera.
Identifies terminals and jacks on the left and right sides of the camera.
Shows the battery compartment, lock lever, and tripod socket on the camera's base.
Learn fundamental camera controls like the control wheel and multi-selector.
Explains how to navigate menus and adjust settings using the camera's control wheel.
Details how to precisely manipulate focus areas and menus with the multi-selector.
Customize quick access to frequently used functions via the Function menu.
Learn to use the Quick Navi screen for direct control of shooting settings.
Step-by-step instructions for initial camera setup, including charging and basic operations.
Guide on how to properly charge the camera's battery pack using the supplied charger.
Instructions for correctly installing the charged battery pack into the camera.
Guide on how to insert an SD memory card into the camera's slot.
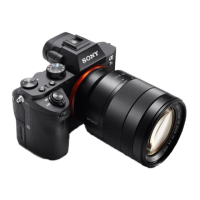
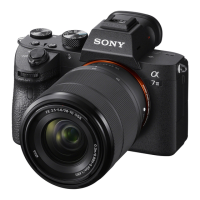
Procedures for safely mounting and dismounting lenses onto the camera body.
Configure initial camera settings like language, date, and time.
Learn to take your first photos using the camera's automatic shooting modes.
Understand different autofocus modes and techniques for sharp images.
Selects the focus method (AF-S, AF-A, AF-C, DMF, MF) to match subject movement.
Covers selecting focus areas and their behavior for automatic focusing.
Step-by-step guide for manually adjusting focus for precise sharpness.
Combines autofocus with manual fine-tuning for quick and precise focusing.
Captures a rapid sequence of images by holding down the shutter button.
Explores touch operations for focusing, tracking, and menu navigation.
Choose file formats, JPEG quality, and image dimensions for still photos.
Configure recording size for still images and movies, enabling APS-C lenses.
Settings and procedures for recording high-quality video.
Selects the movie file format (XAVC S 4K, XAVC S HD, AVCHD).
Sets frame rate and bit-rate for movie recording based on file format.
Connects the camera to smartphones and computers wirelessly for image transfer and control.
Enables image saving, smartphone control, and location info transfer via wireless connections.
Guide to installing the necessary mobile app for camera connectivity.
Adds GPS location data from a smartphone to your photos.
Instructions for uploading images directly to an FTP server.
Step-by-step guide to connect the camera to a Wi-Fi network.
Connects the camera to a computer for transferring images and using software.
Procedures for establishing a USB connection between the camera and a computer.
Safely disconnects the camera from the computer to prevent data corruption.
Information on Sony software like Imaging Edge Desktop and PlayMemories Home.
Important precautions for safe and proper handling of the camera and its components.
Information regarding pixel behavior and potential visual symptoms when using the viewfinder.
Warnings about potential discomfort from screen flashing during continuous shooting.
Precautions for extended recording sessions, including heat and low-temperature burns.
Legal disclaimer regarding unauthorized recording of copyrighted materials.
How sharing location-tagged images can reveal sensitive data.
Steps to protect private information before selling or disposing of the camera.
Recommendations for securely deleting data from memory cards before reuse.
Warnings about potential unauthorized access to the camera via network environments.
Instructions for disabling wireless features, e.g., during air travel.
Explains how to navigate and change camera settings through the menu system.
Accesses settings related to image quality, file formats, and shooting modes.
Configure file format, RAW type, JPEG quality, image size, and aspect ratio.
Selects shooting modes like continuous shooting or self-timer.
Contains settings for movie recording, slow-motion, and AF adjustments.
Selects the movie file format (XAVC S 4K, XAVC S HD, AVCHD).
Sets frame rate and bit-rate for movie recording based on file format.
Manages wireless connections like Wi-Fi, NFC, and Bluetooth for data transfer.
Configure Wi-Fi access points for network connectivity.
Options for viewing, managing, and protecting recorded images.
Prevents accidental deletion of important recorded images.
Permanently removes selected images from the memory card.
Adjusts camera display, power saving, and touch operation settings.
Enables or disables touch screen functionality for camera controls.
Customize and organize frequently used menu items for quick access.
Explains the various icons displayed during the shooting process.
Identifies icons that appear when reviewing recorded images and movies.
Technical details including camera system, sensor, exposure, shutter, and recording formats.
Lists registered trademarks associated with the camera and its technologies.
| Sensor Resolution | 61.0 MP |
|---|---|
| Autofocus Points | 567 phase-detection points |
| Continuous Shooting | 10 fps |
| Shutter Speed | 1/8000 to 30 sec |
| Battery | NP-FZ100 |
| Dimensions | 128.9 x 96.4 x 77.5 mm |
| Weather Sealing | Yes |
| Sensor Type | CMOS |
| ISO Sensitivity | ISO 100-32000 (expandable to ISO 50-102400) |
| Viewfinder | 5.76-million-dot OLED |
| Screen | 3.0-type (7.5 cm) type TFT LCD, approx. 1, 440, 000 dots |
| Image Stabilization | 5-axis image stabilization |
| Video Recording | 4K up to 30p |
| Connectivity | Wi-Fi, Bluetooth |
| Battery Life | Approx. 670 shots (LCD monitor) |
| Storage Media | Dual SD/SDHC/SDXC slots |
| Weight | 665 g (with battery and memory card) |