ILCE-7SM3
5-060-467-41(1)
EN
4
\\Win-473\camera\CX85000(OT)UUD_IM\Multi\04_Compose\5060467411_14lang\5060467411ILCE7SM3CEC\01EN-ILCE7SM3CEC\020PRE.indd
DTP data saved: 2023/12/27 17:47
PDF file created: 2024/01/19 12:00
2: Preparing the battery pack
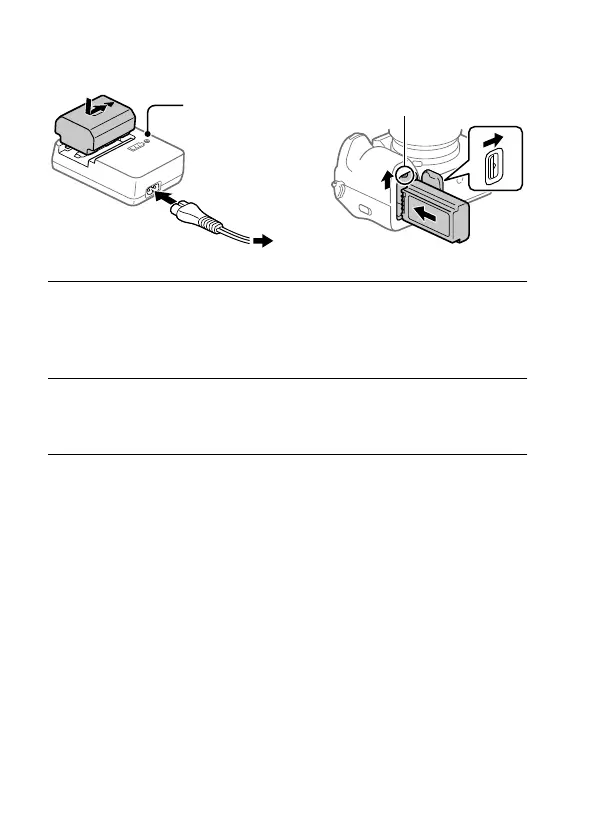
To a wall outlet (wall socket)
Lock lever
CHARGE lamp
Lit: Charging
Off: Charging finished
1
Insert the battery pack into the battery charger, and connect it
to a wall outlet (wall socket) using the power cord (supplied).
• Place the battery pack on the battery charger in the direction of .
Slide the battery pack in the direction of the arrow as far as it will go.
2
Insert the battery pack into the camera.
• Open the battery cover, and then insert the battery pack while
pressing the lock lever.
This camera is compatible with USB-PD (USB Power Delivery). When a
device compatible with USB-PD is connected to the camera, fast charging
is possible. We recommend using a USB-PD device that is compatible with
an output of 9 V/3 A or 9 V/2 A.