19
Getting started
GB
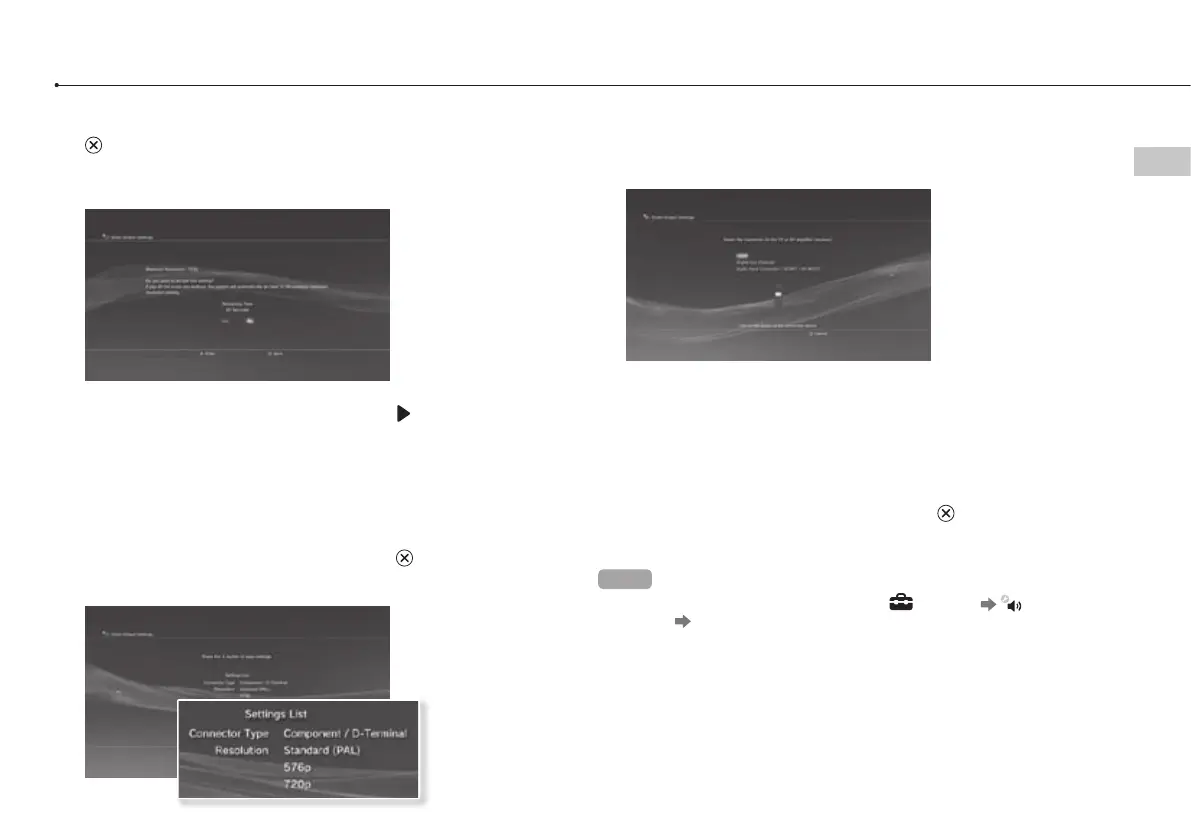
6 Confirm the settings, select [Yes], and then press the
button.
Depending on the connector selected in step 2 and the resolutions
selected in step 5, this screen may not be displayed.
7 Select the type of TV, and then press the button.
If you selected [Standard (PAL)] or [576p] in step 5, a screen for selecting the
TV screen size will be displayed. Adjust the setting to match the TV in use.
If you selected [720p] or a higher resolution in step 5, the TV type will
automatically be set to 16:9 and the screen for selecting the TV screen size
will not be displayed.
8 Confirm the settings, and then press the button.
The video output settings will be saved on the system.
9 Adjust audio output settings.
Continue on to adjust audio output settings. Adjust settings to match the TV
or audio device in use.
If you select [HDMI], you will have the option to choose [Automatic] or
[Manual] on the next screen. In most cases, select [Automatic].
If using a cable other than an HDMI cable to output audio from the TV,
select [Audio Input Connector / SCART / AV MULTI]. If using an optical
digital cable to output audio, select [Digital Out (Optical)] and choose the
output format on the next screen.
10 Confirm the settings, and then press the button.
The audio output settings will be saved on the system.
Hints
• You can adjust audio output settings under (Settings) (Sound
Settings) [Audio Output Settings].
• If the TV in use supports 3D Stereoscopic display, a screen for setting the
TV’s screen resolution will be displayed after step 2. Follow the on-screen
instructions to adjust the settings. Connect the PS3™ system to a TV that
supports 3D Stereoscopic display using an HDMI cable.
 Loading...