19
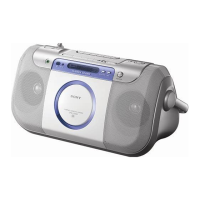
CFD-E100/E100L
RF LEVEL CHECK
Procedure:
1. Connect the oscilloscope to TP (RF) and TP (VREF) on the
CD board.
2. Set the CD test mode.
3. Press the u button twice to display “A–”.
Note: If this check is performed continuously after the TRAVERSE
CHECK, press the u button once.
4. Confirm that the oscilloscope waveform is as shown in the
figure below. (eye pattern)
A good eye pattern means that the diamond shape (◊) in the
center of the waveform can be clearly distinguished.
• RF signal reference waveform (eye pattern)
Connecting Location:
CD SECTION
Perform all CD section check in the test mode.
ENTERING THE CD TEST MODE
Procedure:
1. Insert the test disc (YEDS-18 (part No. 3-702-101-01)).
2. Press the [POWER] button to turn the power on.
3. While pressing the [DISPLAY, ENTER] and [VOLUME +] buttons,
open and close the CD lid, and release two buttons.
4. If the CD test mode is activated, all segments of the LCD light
up.
5. To release this mode, press the [POWER]] button to turn the
power off.
TRAVERSE CHECK
Procedure:
1. Connect an oscilloscope to TP (TE) and TP (VREF) on the
CD board.
2. Set the CD test mode.
3. Press the u button twice to display “FC”.
4. Confirm that the center of the oscilloscope waveform is at 0 V.
5. Confirm that the oscilloscope waveform Vp-p value is at 1 ±
0.5 V.
VOLT/DIV: 0.2 V (with the 10: 1 probe in use.)
TIME/DIV: 500 ns
1.1
±
0.2 V
When observing the eye pattern, set the oscilloscope
for AC range and raise vertical sensitivity.
VOLT/DIV: 0.2 V (with the 10:1 probe in use)
TIME/DIV: 1 ms
0 V
A
B
A=B
Vp-p=A+