EasyManua.ls Logo

Sony DCR-DVD105 Nero Express 6 User Manual

Sony DCR-DVD105 Nero Express 6
156 pages
To Next Page IconTo Next Page
Page #1 background imageLoading...
Page #1 background image
2-661-370-11(1)
Operating Guide
DCR-DVD105/DVD205/DVD305/
DVD605/DVD705/DVD755
© 2006 Sony Corporation
Enjoying with your
DVD Handycam
14
Getting Started
20
Easy
Handycam
34
Recording
/Playback
42
Playback on DVD devices
56
Using the Recorded disc
63
Using the Setup items
66
Editing on DVD Handycam
87
Dubbing, Printing
96
Using a Computer
103
Troubleshooting
109
Additional Information
132
Glossary, Index
146

Table of Contents

Question and Answer IconNeed help?

Do you have a question about the Sony DCR-DVD105 Nero Express 6 and is the answer not in the manual?

Sony DCR-DVD105 Nero Express 6 Specifications

General IconGeneral
Camcorder Media TypeDVD
Optical Sensor TypeCCD
Digital Zoom800 x
Image StabilizerElectronic
USB InterfaceYes
Optical Sensor Size1/6 inch
Display Size2.5 inch
MicrophoneBuilt-in
TypeCamcorder
Recording MediaDVD-R, DVD-RW, DVD+RW
Video FormatMPEG2
Battery TypeInfoLithium

Summary

WARNING

IMPORTANT SAFEGUARDS

Use

Key operational aspects and precautions for using the camcorder.

Read this first

CAUTION

Important warnings and precautions for safe operation.

Troubleshooting

Glossary, Index

Reference section for terms and alphabetical listing.

Enjoying with your DVD Handycam

What you can do with your DVD Handycam

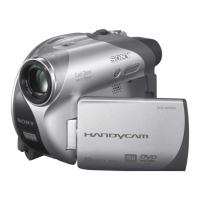
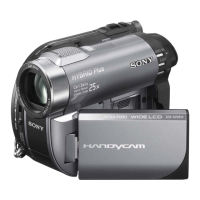
Overview of camcorder capabilities and features.

Choosing a disc

Using your DVD Handycam

1 Preparing

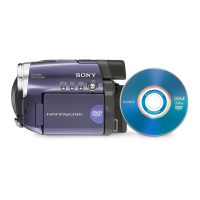
Steps to select and prepare the appropriate disc for use.

Getting Started

Step 1: Checking supplied items

Verification of all components included in the camcorder package.

Getting Started

Step 2: Charging the battery pack

Instructions for charging the camcorder's battery pack.

Getting Started

Step 3: Turning the power on, and holding your camcorder

Procedures for powering on and correctly holding the camcorder.

Getting Started

Step 4: Adjusting the LCD screen and viewfinder

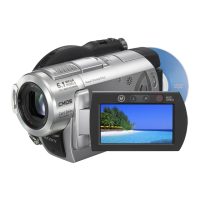
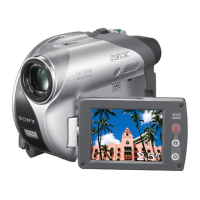
Guidance on optimizing viewing angles and clarity.

Getting Started

Step 5: Using the touch panel

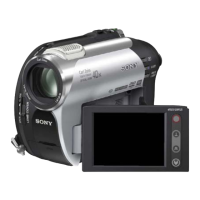
How to interact with the camcorder's touch-sensitive screen.

Getting Started

Step 6: Setting the date and time

Initial setup for accurate date and time recording.

Getting Started

Step 7: Inserting a disc or a “Memory Stick Duo”

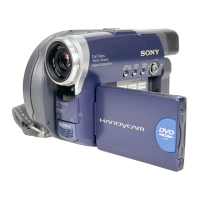
Instructions for loading recording media into the camcorder.

Getting Started

Step 8: Selecting the aspect ratio (16:9 or 4:3) of the recording picture

Choosing the picture format for optimal viewing on different TVs.

Easy Handycam - using your camcorder with automatic settings

Using Easy Handycam operation

Explanation of the camcorder's automatic shooting mode for ease of use.

Easy Handycam

Recording with ease

Simple instructions for recording movies in Easy Handycam mode.

Easy Handycam

Playing back with ease

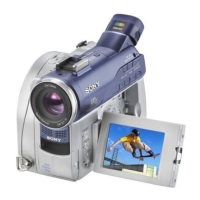
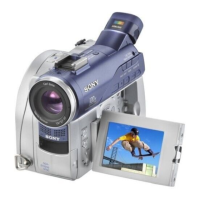
Straightforward playback of recorded movies and images.

Enjoying with your DVD Handycam

Preparation for playing back on a DVD player (Finalizing)

Steps to make discs playable on external DVD devices.

Recording/Playback

Recording

Detailed procedures for recording video and still images.

Recording/Playback

Playback

Instructions for reviewing recorded content on the camcorder.

Functions used for recording/playback, etc.

Recording

Advanced recording functions like zoom and surround sound.

Recording/Playback

Checking/Deleting the last scene (Review/Review deleting)

How to review and delete the most recent recording.

Recording/Playback

Indicators displayed during recording/playback

Explanation of icons and status indicators on the screen.

Recording/Playback

Remote Commander (DCR-DVD305/DVD755)

Description of the camcorder's remote control functions.

Recording/Playback

Playing the picture on a TV

Connecting the camcorder to a television for viewing.

Playback on DVD devices

Making the disc compatible with playback on DVD devices or DVD drives (Finalizing)

Process to ensure discs are playable on external DVD players.

Playback on DVD devices

Playing back a disc on a computer with a DVD drive installed

Viewing recorded content on a computer using a DVD drive.

Using the Recorded disc (DVD-RW/DVD+RW)

Recording additional scenes after finalizing

Adding new footage to discs that have already been finalized.

Using the Recorded disc (DVD-RW/DVD+RW)

Deleting all of the scenes on the disc (Formatting)

Erasing all data from a disc to restore it for reuse.

Using the Setup items

Using the Setup items

Guide to camcorder settings and customization options.

Using the Setup items

CAMERA SET

Adjusting camera settings for optimal recording conditions.

Using the Setup items

STEADYSHOT

Function to stabilize images during recording.

Using the Setup items

PICT.APPLI.

Applying visual effects to recorded pictures.

Using the Setup items

DISC SET / MEDIA SET

Settings related to discs and memory cards.

Using the Setup items

STANDARD SET

Basic settings for recording and playback.

Using the Setup items

Customizing Personal Menu

Adding, deleting, and arranging custom menu items.

Editing on DVD Handycam

Copying the still images (DCR-DVD305/DVD755)

Transferring still images between memory cards and discs.

Editing on DVD Handycam

Deleting still images from the “Memory Stick Duo” (DCR-DVD305/DVD755)

Removing unwanted still images from memory cards.

Editing on DVD Handycam

Editing the original data

Modifying recorded movies by deleting or dividing scenes.

Editing on DVD Handycam

Creating the Playlist

Compiling favorite scenes into a custom playback list.

Dubbing, Printing

Dubbing to VCR/DVD devices

Copying recorded content to external devices like VCRs or DVD recorders.

Dubbing, Printing

Recording images from a TV or VCR/DVD device (DCR-DVD305/DVD755)

Capturing external video sources onto the camcorder's media.

Dubbing, Printing

Printing recorded still images (PictBridge compliant printer) (DCR-DVD305/DVD755)

Printing still images directly from the camcorder to a PictBridge printer.

Using a Computer (DCR-DVD305/DVD755)

Before referring to the “First Step Guide” on your computer

Introduction to computer connectivity and software usage.

Using a Computer (DCR-DVD305/DVD755)

Installing software and “First Step Guide”

Guide to installing camcorder software and the digital manual.

Troubleshooting

Overall operations/Easy Handycam

Common issues and solutions for general camcorder operation.

Troubleshooting

Batteries/Power sources

Problems related to battery charging and power supply.

Troubleshooting

Disc

Problems related to disc insertion, recognition, and recording.

Troubleshooting

Adjusting the image during recording

Solutions for image quality issues during the recording process.

Troubleshooting

Remote Commander (DCR-DVD305/DVD755)

Troubleshooting the camcorder's remote control.

Playing back a disc on your camcorder

Issues encountered during disc playback on the camcorder.

Troubleshooting

Playing back a disc on other devices

Problems with discs played on external devices.

Setup items

Issues with camcorder settings being unavailable or grayed out.

Warning indicators and messages

Self-diagnosis display/Warning indicators

Explanations of error codes and warning symbols displayed by the camcorder.

Additional Information

Using your camcorder abroad

Information relevant to using the camcorder in different countries.

Additional Information

About the disc

Details on disc types, handling, and care.

Additional Information

About the “InfoLITHIUM” battery pack

Details on the camcorder's battery pack and its usage.

Maintenance and precautions

On use and care

Guidelines for operating and maintaining the camcorder safely.

Maintenance and precautions

On the LCD screen

Care and handling of the camcorder's LCD screen.

Maintenance and precautions

On the pickup lens

Instructions for cleaning and caring for the camcorder's lens.

Specifications

On trademarks

Notes on the License

Legal information and licensing details related to the product.

Related product manuals