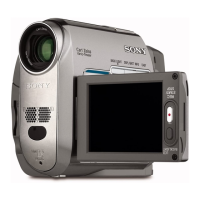
Do you have a question about the Sony DCR-HC42 and is the answer not in the manual?
Lists and describes the various input and output connectors available on the camera models.
Covers general specifications like power requirements, operating temperature, dimensions, and mass.
Details specifications for the AC adaptor, including power requirements and operating conditions.
Provides specifications for the rechargeable battery pack, including voltage, capacity, and operating temperature.
Lists and defines abbreviations used for model destinations.
Explains characteristics of unleaded solder and precautions for its use.
Introduces the self-diagnosis function that displays error codes on the viewfinder or LCD screen.
Shows the step-by-step procedure for disassembling the camera mechanism.
Presents the first part of the overall block diagram, illustrating system interconnections.
Contains detailed schematic diagrams for individual circuit boards and flexible boards.
Provides exploded views of the camera's mechanical sections for parts identification.
Explains how the self-diagnosis function works and displays error information on the viewfinder or LCD.
Details the format of the self-diagnosis display, including 'repaired by', 'block', and 'detailed code'.
Shows the step-by-step procedure for disassembling the camera mechanism.
Illustrates the physical location of various circuit boards within the camera.
Presents the first part of the overall block diagram, illustrating system interconnections.
Shows the first part of the power block diagram, detailing power distribution.
Provides the schematic diagram for the CD-534 board, which houses the CCD imager.
Offers the schematic diagram for the PD-238 board, responsible for LCD drive and backlight.
Illustrates how to connect test equipment and pattern boxes for schematic diagram checks.
Provides critical precautions for safely replacing the CCD imager, emphasizing static electricity handling.
Lists the CD-534 board and its function as a CCD imager.
Lists the PD-238 board and its function for LCD drive and backlight.
Lists the SI-042 board and its function for remote commander receiver and sensors.
Shows the physical layout of components on side A of the CD-534 board.
Shows the physical layout of components on side B of the CD-534 board.
Provides exploded views of the camera's mechanical sections for parts identification.
Lists electrical components with their part numbers and descriptions.
Shows an exploded view of the entire camera assembly for parts identification.
Shows an exploded view of the lens block for parts identification.
Indicates the target models for the accessory list, covering E Model to J Model.
Lists additional accessories provided with the camera, including manuals and software.
Explains how to navigate between pages using the page navigation controls.
Covers preliminary steps and considerations before performing any adjustments.
Details adjustments related to the camera section, including initialization and specific camera settings.
Outlines adjustments required for the mechanism section of the device.
Details the initialization process for various page data, crucial for camera adjustments.
Covers adjustments and procedures related to the camera's mechanism section.
Outlines adjustments for the video system, including S VIDEO output levels and automatic adjustments.
Details audio adjustments specific to models except DCR-HC39E, covering distortion, noise, and separation.
Describes how to access emergency memory addresses in the camera section for diagnostics.
Details the first procedure for rewriting EVR data when replacing a board, involving saving and downloading.
Explains the second procedure for rewriting EVR data, involving removing and installing the EEPROM.
Outlines the third procedure for EVR data rewriting when EEPROM access is not possible, using data from a similar model.
Details the initialization procedure for specific page data (A, B, D, 1A, 1B), crucial for camera adjustments.
Outlines the initialization process for pages 8, C, 18, and 1C, essential for camera adjustments.
Describes the initialization steps for pages E, F, 14, 19, 1E, and 1F, required for camera adjustments.
Lists service tools and preparations required before performing camera section adjustments.
Lists essential service tools required for camera adjustments, including oscilloscopes and adapters.
Details precautions to take before performing adjustments, including switch settings and order of operations.
Details the initialization steps for specific page data (A, B, D, 1A, 1B), crucial for camera adjustments.
Explains how to modify specific page data after initialization, using manual input.
Details the initialization process for pages 8, C, 18, and 1C, essential for system control adjustments.
Explains how to modify specific page data after initialization, using manual input.
Details the initialization process for pages E, F, 14, 19, 1E, and 1F, crucial for system control adjustments.
Explains how to modify specific page data after initialization, using manual input.
Checks the clock frequency for synchronization, crucial for stable video output.
Adjusts hall sensor gain and offset for detecting lens iris and ND filter position.
Performs automatic adjustment of the inner focus lens MR for accurate focusing.
Details the first part of flange back adjustment using a minipattern box or jig.
Checks the flange back adjustment by observing the image on a monitor TV.
Details the first part of flange back adjustment using a minipattern box or jig.
Checks the flange back adjustment by observing the image on a monitor TV.
Explains how to reset the picture frame settings after adjustment, returning zoom and focus to default.
Details the steps to be performed after completing the color reproduction adjustment process.
Provides a method to reset zoom and focus if they deviate, ensuring proper operation.
Warns about replacing sensors with correct types to avoid image vibration issues.
Advises careful handling of the angular velocity sensor due to its precision oscillator to prevent damage.
Details automatic adjustments for the Electronic Viewfinder, including VCO and Contrast.
Describes automatic adjustments for the LCD, including VCO and Contrast, requiring specific switch settings.
Provides instructions to enter record mode without a cassette, enabling specific mechanism tests.
Explains how to enter playback mode without a cassette for mechanism testing.
Details the preparation and procedure for adjusting the tape path, including cleaning and alignment.
Lists required measuring instruments and alignment tapes for video section adjustments.
Specifies input/output levels and impedance for video and audio signals used in adjustments.
Details the initialization process for various page data, crucial for system control adjustments.
Describes the calibration procedure for the touch panel, ensuring accurate input.
Adjusts CAP FG duty cycle to ensure proper capstan servo operation and prevent noise.
Adjusts switching position to ensure correct operation of the EVEN and ODD channels.
Checks for errors in tape path and data transmission, identifying potential issues in channels.
Adjusts the Y signal level for S VIDEO output to meet specified mVp-p values.
Adjusts the Cr and Cb signal levels for S VIDEO output to specified mVp-p values.
Checks the playback signal level against specified values using an alignment tape and audio meter.
Checks audio level characteristics during recording and playback, ensuring specified dB values.
Explains how to use the adjustment remote commander for changing coefficients and performing bi-directional communication.
Advises caution when using the remote commander to prevent accidental erasure of adjustment data.
Details the procedure for setting the unit to various test modes for adjustment purposes.
Explains how to access and manage emergency memory addresses for error logging and diagnostics.
Details the removal and attachment procedures for the cassette compartment and damper assembly.
Explains the procedure for cleaning the rotary drum to maintain performance.
Provides instructions for cleaning the tape path components like guides, drum, and pinch roller.
Describes the manual test mode for powering the mechanism deck motor manually.
Explains the step test mode to confirm mechanical status changes based on sensor information.
Details the auto test mode for verifying mechanism deck operation against stored status transition tables.
Provides instructions for powering on the Mode Selector II by pressing the SEL button.
Explains how to power off the Mode Selector II by pressing RVS and FF buttons simultaneously.
Provides a flowchart to guide the process of replacing mechanical parts.
Details the removal and attachment procedures for the drum assembly.
Details the gear phase adjustment process required during re-assembly.
Describes how to match the phase of gears and arms during re-assembly for correct operation.
Details the procedure for adjusting the FWD position of the TG2 arm block or band adjuster.
Explains how to check reel torque for both FWD and RVS modes, ensuring proper tension.
Outlines preparations for tape path adjustment, including cleaning and connecting equipment.
Specifies the necessary steps to perform after completing tape path adjustment or check.
Details the procedure for adjusting FWD back tension by modifying spring tension.
Checks the RF waveform amplitude and flatness for tracking accuracy in different modes.
Checks RF waveform pitch spacing and amplitude in CUE/REV modes for proper tape path operation.
Provides an exploded view of the overall mechanism deck (Z100) for parts identification.