Do you have a question about the Sony DCR-SR300 and is the answer not in the manual?
Important notes and precautions for using the camcorder.
Details on compatible Memory Stick types and usage.
Guidelines for handling the camcorder during operation.
Information about menu items, LCD screen, and lens care.
Guidance on initial recording procedures and tips.
Instructions for changing the on-screen display language.
Notes about illustrations and specifications in the manual.
Information about the camcorder's Carl Zeiss lens quality.
Precautions for using the camcorder's hard disk drive.
Recommendations for backing up recorded image data.
Warnings against physical shock and vibration to protect the device.
Explanation of the drop sensor function and its effects.
Important notes regarding battery pack and AC adaptor usage.
Precautions regarding operating the camcorder in extreme temperatures.
Specific notes for camcorder connection to a computer.
Caution for operating the camcorder at high altitudes.
Guidance on proper disposal or transfer of the camcorder.
Troubleshooting step for image recording/playback issues using format.
Examples of shooting scenarios and recommended settings.
Step-by-step guide for camcorder operation from start to delete.
Explains the usage of HOME and OPTION menus for camcorder operations.
Lists categories and items available within the HOME MENU.
Step-by-step guide to navigate and use the HOME MENU interface.
How to access and use functions via the OPTION MENU.
List of items included with the camcorder and their quantities.
Detailed instructions for charging the camcorder's battery pack.
Notes on charging, removing, storing, and using battery packs and AC adaptors.
Information on playback time, battery usage, and charging/recording times.
Guide to initial power-on and setting the camcorder's date and time.
Instructions on how to change the camcorder's display language.
Steps to prepare the camcorder for recording, including lens and LCD adjustments.
How to manually open the lens cover on specific models.
Instructions for adjusting the camcorder's LCD panel for optimal viewing.
How to properly fasten and use the camcorder's grip belt.
Guide to using the camcorder's simplified automatic operation mode.
Steps for recording movies using the camcorder.
Steps for capturing still images with the camcorder.
How to playback recorded movie and still image files.
Steps to exit the Easy Handycam operation mode.
Notes on menu settings availability during Easy Handycam operation.
Information on buttons/functions unavailable in Easy Handycam mode.
General information and notes related to the recording process.
How to use the zoom function for recording.
Capturing audio using 5.1ch surround sound technology.
How to use the built-in flash for specific camcorder models.
Method to capture still images while recording a movie.
How to change media to record still images on a Memory Stick Duo.
Using NightShot modes for recording in low-light conditions.
How to adjust exposure for subjects in backlight conditions.
Explanation of the mirror mode feature.
How to set the aspect ratio for recorded images.
Capturing fast actions in slow-motion video.
General guide to playing back recorded media.
How to playback movie files.
How to playback still images.
Switching playback modes via the HOME menu.
Adjusting the audio volume during movie playback.
Magnifying still images during playback.
Efficiently finding images using the date index feature.
Playing back still images as an automated slideshow.
Connecting the camcorder to a TV for playback.
Specific connection instructions when using a VCR.
Adjusting aspect ratio settings based on the connected TV type.
Notes for connecting to monaural TVs.
Using the 21-pin adaptor for TV/VCR connection.
Overview of methods for saving recorded images.
Methods for saving images to a computer or DVD via PC.
How to save images by connecting to external recording devices.
Instructions for deleting recorded movies and still images.
Detailed steps for deleting images from the camcorder's hard disk.
Steps for deleting still images from a Memory Stick Duo.
How to split a movie file into multiple segments.
Instructions for copying still images to a Memory Stick Duo.
Batch copying of still images recorded on the same date.
How to create and manage playlists of movies.
Batch adding movies recorded on the same date to a playlist.
How to playback movies from a created playlist.
Removing unwanted images from a playlist.
Transferring recorded video to external devices like VCRs or recorders.
Printing still images directly from the camcorder to a PictBridge printer.
Steps for connecting the camcorder to a printer for direct printing.
Detailed procedure for printing still images.
Steps to complete the printing process.
Procedures for formatting the camcorder's hard disk and Memory Stick Duo.
Steps to format the Memory Stick Duo media.
How to view the camcorder's hard disk capacity and free space.
How to securely erase data to prevent recovery before disposal or transfer.
Overview of settings adjustable via the HOME MENU's SETTINGS category.
Guide to navigating and using the HOME MENU.
Comprehensive list of all settings available in the SETTINGS category.
Settings related to recording movies, including recording modes and times.
Adjusting the infrared light for NightShot modes.
Selecting the aspect ratio for movies.
How to use digital zoom for increased magnification.
Image stabilization feature to reduce camera shake.
Automatic slow shutter function for low-light shooting.
Using guide frames for composition assistance.
Zebra pattern for exposure monitoring.
Displaying remaining recording time.
Settings related to recording still images, including image size and quality.
Adjusting the resolution and file size for still images.
Setting the image quality level for still images (Fine/Standard).
How file numbering is managed for recorded images.
Adjusting the infrared light for NightShot modes.
Image stabilization feature for specific models.
Guide frames for composition on specific models.
Zebra pattern for exposure monitoring on specific models.
Adjusting the intensity of the flash.
Red-eye reduction feature for flash photography.
Setting the recording media for still images.
Settings for customizing the display of images.
Displaying recorded data codes (date, time, settings) during playback.
Adjusting thumbnail display options on the VISUAL INDEX screen.
Settings for audio feedback (beep) and screen adjustments.
Adjusting the camcorder's audio volume.
Enabling or disabling audio feedback for operations.
Adjusting the brightness of the LCD screen backlight.
Adjusting the brightness of the LCD screen's backlight.
Adjusting the color tint of the LCD screen.
Settings for connecting the camcorder to external devices like TVs.
Selecting TV aspect ratio (16:9/4:3) for proper playback display.
Controlling where display information (time code) appears (LCD or TV).
Setting the clock and selecting the display language.
Setting the camcorder's date and time.
Adjusting for time zone differences when traveling.
Enabling or disabling daylight saving time.
Changing the on-screen display language.
Various general settings for camcorder operation.
Activating or deactivating the camcorder's demonstration mode.
Setting the automatic power-off feature to save battery.
Enabling or disabling the remote commander function.
Managing the drop sensor to protect the hard disk.
Guide to accessing and using the OPTION MENU for various functions.
Lists recording-related functions accessible via the OPTION MENU.
Lists playback/viewing-related functions accessible via the OPTION MENU.
Manually adjusting the camcorder's focus for sharp images.
Focusing on a specific subject area not in the center.
Special mode for shooting small subjects with blurred backgrounds.
Manually adjusting image brightness for better exposure.
Adjusting exposure based on a specific subject's brightness.
Selecting preset scene modes for various shooting conditions.
Adjusting color balance to match ambient lighting conditions.
Using slow shutter for brighter images in dark scenes.
Enhanced low-light recording mode for specific models.
Enhanced low-light recording mode for specific models.
Adding transition effects (fades) between scenes.
Applying digital effects to images during recording or playback.
Applying special visual effects to images.
Adjusting the microphone input level for recording sound.
Using the self-timer to capture images after a delay.
Setting the flash mode for external flashes on specific models.
Overview of operations possible with the computer software.
How to access software help documentation.
Hardware and software requirements for using the computer software.
Step-by-step guide for installing the camcorder software on a computer.
Simple method to burn recorded images onto a DVD using the Handycam Station.
Correct procedure for safely disconnecting the USB cable.
Steps and recommendations after DVD creation is complete.
Initiating disc burning from the camcorder's USB SELECT screen.
Performing One Touch Disc Burn using the computer utility.
Overview of importing images from camcorder to PC.
Importing all images at once using Easy PC Back-up.
Importing specific images using Media File Import.
Importing still images directly from Memory Stick using a computer's slot.
Importing still images from Memory Stick via USB cable.
Deleting camcorder images using the computer software.
Browsing imported images on the computer by folder or date.
Enlarging images within the image viewer.
Playing back images as a continuous slideshow.
Removing unwanted images from the computer.
Overview of editing capabilities for imported images.
Cutting and trimming movie clips.
Various editing options for still images.
Creating DVDs with selected images and menus.
Burning playlists of movies onto a DVD.
Copying content from one DVD to another.
Various ways to manipulate still images after import.
Printing still images directly or with date information.
Attaching and sending still images via email.
Using external applications to view images.
Troubleshooting common operational issues with the camcorder and remote.
Steps to resolve issues where the camcorder does not power on.
Troubleshooting steps for when the camcorder fails to operate after powering on.
Issues related to unresponsive buttons or functions.
Reasons why the OPTION button/menu might not be available.
Explains automatic reset of settings, especially in Easy Handycam mode.
Normal operation causes for camcorder warmth.
Troubleshooting for the remote commander not working.
Potential conflicts with DVD devices and remote commander.
Diagnosing and fixing issues with the camcorder shutting off unexpectedly.
Troubleshooting power-related issues, battery charging, and AC adapter.
Troubleshooting the charging indicator lamp not illuminating.
Troubleshooting the CHG lamp flashing during charging.
Issues with the battery level indicator showing incorrect time.
Diagnosing rapid battery discharge issues.
Notes on touch panel behavior, grayed-out menu items, and LCD screen issues.
Resolving issues where recording functions fail.
Steps to take when unable to capture still images.
Understanding the ACCESS lamp status after stopping recording.
Explains potential variations in recording angle.
Troubleshooting flash functionality issues on specific models.
Reasons for shorter than expected movie recording times.
Addressing issues where recording unexpectedly stops.
Explains slight timing discrepancies in recording start/stop.
Troubleshooting autofocus system failures.
Resolving issues with the SteadyShot image stabilization.
Troubleshooting the backlight function.
Explanation of potential crooked subjects due to focal plane phenomenon.
Explains tiny pixel spots appearing on screen during specific modes.
Troubleshooting incorrect image color display.
Addressing bright screen issues where the subject is not visible.
Explains vertical bands caused by high contrast in low light.
Explains flicker caused by fluorescent/sodium lamps.
Issues with operating specific features like NightShot or Color Slow Shutter.
Conditions under which LCD backlight level cannot be adjusted.
Reasons why still images on Memory Stick Duo may not play back.
Troubleshooting sound issues during playback.
Notes on limitations regarding editing images on the camcorder.
Reasons why movies cannot be added to playlists or divided.
Issues with copying images and connecting to devices/computers.
Troubleshooting computer recognition and connection issues.
Issues with software compatibility, One Touch Disc Burn, and computer connections.
Troubleshooting viewing images on PC and playback quality problems.
Troubleshooting paused, distorted, or different playback screens.
Displaying file extensions and resolving disk space errors during backup.
Lists combinations of functions that cannot be used together.
Explains various warning indicators and error messages displayed on the LCD screen.
Detailed explanations of specific warning messages and their meanings.
Handling damaged management files, buffer overflows, and full Memory Stick folders.
Troubleshooting data recovery, saving pictures, and PictBridge printer problems.
Other limitations and issues like selection limits, data protection, and dividing short movies.
Information for using the camcorder internationally, including power and TV systems.
How to set the camcorder's clock to local time for international use.
A chart showing time differences for various global locations.
Explanation of the camcorder's file and folder organization on the hard disk.
General maintenance advice and precautions for the camcorder and accessories.
Information regarding Memory Stick media compatibility and usage.
Using the write-protect tab to prevent accidental data erasure.
Important notes regarding potential data loss or damage.
Precautions for handling Memory Stick Duo media.
Locations to avoid using the camcorder and Memory Stick Duo.
How to use the Memory Stick Duo adaptor.
Information on using Memory Stick PRO Duo media.
Notes on image file compatibility with the camcorder.
Information about the InfoLITHIUM battery pack and its features.
Tips for maximizing battery life and performance.
Understanding the battery level indicator and its accuracy.
Guidance on storing battery packs for long periods.
Information on battery capacity degradation and replacement.
General guidelines for camcorder usage and care.
Important precautions and advice for handling the camcorder.
Instructions for storing the camcorder when not in use.
Explains moisture condensation and how to prevent or resolve it.
Methods to prevent moisture condensation inside the camcorder.
Notes and precautions regarding the LCD screen.
Instructions for cleaning the LCD screen.
Calibrating the touch panel for accurate operation.
How to clean and care for the camcorder's exterior casing.
Instructions for cleaning and storing the camcorder lens.
Information on charging the internal battery for settings retention.
List of trademarks and registered trademarks mentioned in the manual.
Legal information and licensing details for the product.
Information on included open-source software licenses.
Diagrams identifying all external parts and controls of the camcorder.
Details on the remote commander's buttons and operation.
Instructions for replacing the remote commander's battery.
Explains all on-screen indicators during recording and playback modes.
Identifies indicators shown during movie playback.
Identifies indicators shown during still image playback.
Explains indicators that appear when specific settings are changed.
Explains how recording date and time are captured.
Definitions of technical terms and abbreviations used in the manual.
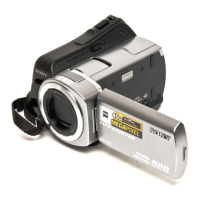
| Recording Media | HDD |
|---|---|
| Video Format | MPEG-2 |
| Optical Zoom | 25x |
| Digital Zoom | 2000x |
| Image Sensor | CCD |
| Still Image Capture | Yes |
| Microphone | Built-in |
| Image Stabilization | Electronic |
| Type | Digital Camcorder |
| LCD Screen Size | 2.7 in |
| Optical Sensor Resolution | 1.07 MP |
| Interface | USB |



 Loading...