EasyManua.ls Logo

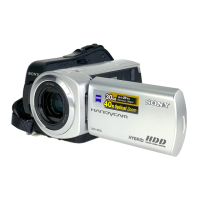
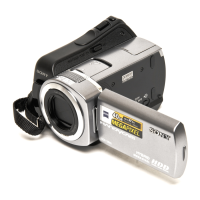
Sony Handycam DCR-SR30E User Manual

Sony Handycam DCR-SR30E
35 pages
To Next Page IconTo Next Page
Page #1 background imageLoading...
Page #1 background image
2-887-135-11(1)
Printed in Japan
Operating Guide
DCR-SR30E/SR40E/SR50E/
SR60E/SR70E/SR80E
© 2006 Sony Corporation
Printed on 100% recycled paper using
VOC (Volatile Organic Compound)-free
vegetable oil based ink.
Additional information on this product and
answers to frequently asked questions can be
found at our Customer Support Website.
Also refer to “Handycam Handbook” (PDF)
By referring to “Handycam Handbook” (PDF)
contained in the supplied CD-ROM, you can find
more detailed information on how to use the
camcorder.
GB
Downloaded From VideoCamera-Manual.com Manuals
Other manuals for Sony Handycam DCR-SR30E

Questions and Answers:

Sony Handycam DCR-SR30E Specifications

General IconGeneral
TypeCamcorder
Digital Zoom2000x
Weight400 g
Image FormatJPEG
Recording MediaHDD
Video FormatMPEG-2
Image SensorCCD
Optical Sensor Resolution1.07 MP
LCD Screen Size2.7"

Summary

Read this first

General Safety Precautions

Covers fire/shock hazards and battery replacement warnings.

UK AC Adaptor Information

Details on the supplied AC adaptor and fuse replacement for UK users.

European Equipment Disposal

Guidelines for proper disposal of electrical and electronic equipment in the EU.

Static Electricity Handling

Advice on static electricity affecting data transfer.

Notes on Use and Operation

Recording Tips and Data Backup

Guidelines for recording, including testing, data backup, and copyright.

Operational Handling and Environment

Covers shock, vibration, drop sensor, and operational temperatures.

Connectivity and Disposal Advice

Information on connecting to computers and using the camcorder in highlands or for disposal.

Manual Clarifications

Explanations regarding manual images, illustrations, and language settings.

Step 1: Checking Supplied Items

Camcorder Accessories Included

Lists and describes the items supplied with the camcorder.

Remote Commander Usage

Initial Remote Commander Setup

Initial setup for the remote commander, including insulation sheet removal.

Replacing the Remote Battery

Procedures for changing the battery in the remote commander.

Step 2: Charging the Battery Pack

Charging Procedure with Handycam Station

Step-by-step guide for charging the battery pack using the AC adaptor and Handycam Station.

Battery Pack Removal Steps

Instructions on how to safely remove the battery pack from the camcorder.

Battery Charging and Performance Details

Alternative Battery Charging Method

Instructions for charging the battery pack using only the AC adaptor.

Battery Running Time Information

Details on approximate charging and recording/playback times for the NP-FP50 battery.

Step 3: Power On and Date/Time Setup

First Time Power-Up and Configuration

Guide to turning on the camcorder and setting the date, time, and geographical area.

Step 4: Pre-Recording Adjustments

Screen and Grip Adjustments for Recording

Steps to prepare the camcorder for recording, including screen adjustment and grip belt use.

Recording Movies and Still Images

Starting and Stopping Movie Recording

How to start and stop recording movie clips.

Capturing Still Photographs

Procedure for taking still photographs with the camcorder.

Playback of Recorded Content

Navigating and Playing Back Media

Steps to select and play back recorded movies and still images.

Adjusting Playback Audio Volume

How to adjust the audio volume during playback.

Camcorder Parts and Functions Overview

Recording Controls and Indicators

Explanation of controls and lamps used during recording, like NIGHTSHOT, zoom lever, and recording lamp.

Playback Controls and LCD Screen

Description of playback controls, zoom buttons, and the LCD screen.

Additional Camcorder Features

Accessory Buttons and Operation

Details on shoulder belt hook, backlight button, reset, display, and easy operation buttons.

Connecting External Devices

Explains jacks and connectors for external devices like AC adaptor, TV, and computer.

Understanding On-Screen Indicators

Recording Mode Indicators

Explains indicators shown on the screen during movie and still image recording.

Playback Mode Indicators

Explains indicators shown on the screen during movie and still image playback.

Interpreting LCD Screen Indicators

Center and Upper Screen Indicators

Meanings of indicators displayed in the center and upper sections of the LCD screen.

Bottom Screen Indicators and Data Code

Meanings of bottom screen indicators and the recording date/time data display.

Managing and Playing Images

Deleting Specific Images

Steps to delete individual movies or still images.

Deleting Images by Date

How to delete images based on the recording date.

Deleting the Most Recent Scene

Method to check and delete the most recently recorded movie or still image.

TV Playback Connection

Instructions for connecting the camcorder to a TV for playback.

Computer Connectivity and Software

Viewing the Digital Handbook

Guide to viewing the PDF handbook, including Adobe Reader installation.

Installing ImageMixer Software

Instructions for installing the ImageMixer software for Windows users.

Software Installation Requirements

System Requirements for ImageMixer

Outlines the necessary hardware and software specifications for installing the ImageMixer software.

ImageMixer Software Installation Steps

Detailed step-by-step guide for installing the ImageMixer software on a Windows computer.

Completing Software Setup

DirectX and Software Installation

Instructions for installing Microsoft DirectX 9.0c and completing ImageMixer installation.

Finalizing Software Installation

Final steps for completing the ImageMixer installation and restarting the computer.

Customizing Camcorder Settings

Using Personal Menu Shortcuts

How to access and use frequently used setup items via the Personal Menu.

Accessing and Changing Setup Options

Steps to change various camcorder settings not available in the Personal Menu.

Setup During Easy Operation Mode

How to access setup options during Easy Handycam operation.

Detailed Setup Item Explanations

Camera Settings Explained

Explains various settings related to exposure, focus, zoom, and image stabilization.

Still Image Recording Settings

Details on settings for recording still images, such as burst mode and quality.

Picture Application Settings Guide

Options for picture effects, faders, recording control, and demo mode.

Advanced Setup Options

Hard Disk Drive Settings

Options for initializing the hard disk, checking space, and managing data protection.

Standard Operational Settings

Covers recording mode, volume, display, USB speed, and remote control settings.

Time, Language, and Display Settings

Options for setting clock, time zone, summer time, and language.

Troubleshooting Common Issues

Problem Resolution Guide

A guide to resolving common problems with the camcorder.

Camcorder Power and Responsiveness

Solutions for when the camcorder does not turn on or respond.

Button and Power Interruption Issues

Addresses unresponsive buttons and abrupt power shut-off.

Troubleshooting Recording and Setup

Recording Function Failures

Solutions for problems with recording movies or still images.

Recording Interruption Causes

Reasons and solutions for the recording process stopping unexpectedly.

Unavailable Setup Items and Beeps

Explains why setup items may be unavailable and troubleshooting for beep sounds.

Interpreting Warning Indicators

Self-Diagnosis Error Codes

Explains error codes (C:xx, E:xx) and their meanings for self-diagnosis.

File, Hard Disk, and Battery Warnings

Interprets indicators for file damage, hard disk errors, and low battery.

Temperature Warning Indicators

Explains indicators for high and low temperature conditions.

Camera Shake and Warning Melodies

Camera Shake Warning Indicator

Explains the warning indicator for camera shake and tips to mitigate it.

Important Precautions for Use

General Handling and Care Guidelines

Guidelines for safe operation, cleaning, and storage to prevent damage.

LCD Screen Care and Protection

Advice on handling the LCD screen to avoid damage or display issues.

Cleaning the LCD Screen Safely

Instructions on how to clean the LCD screen using optional cleaning kits.

Camcorder and Lens Maintenance

Casing Cleaning and Protection

Procedures for cleaning and maintaining the camcorder's exterior casing.

Lens Care and Storage

Guidelines for cleaning and storing the camera lens properly.

Pre-installed Battery Functionality

Information about the function of the pre-installed battery for retaining settings.

Technical Specifications Overview

System and Recording Specifications

Technical details on video format, hard disk capacity, recording formats, and times.

Image Device and Lens Details

Specifications for image sensors, zoom, aperture, and focal length.

Color Temperature and Illumination Specs

Specifications for color temperature settings and minimum illumination levels.

Connector and General Specifications

Input/Output Connector Details

Details on audio/video and USB connectors for various models and the Handycam Station.

General Camcorder Specifications

Information on power requirements, consumption, operating temperature, and pixel count.

Adaptor, Battery, and Legal Information

AC Adaptor and Battery Pack Specs

Technical details for the AC adaptor and rechargeable battery pack.

Trademarks and Licensing Notes

Lists trademarks used and notes on MPEG-2 licensing.

Related product manuals