12
DRX-820UL-T
2-680-628-11 (1)
masterpage:Left
F:\SuzukiA\#5120839_DRX-820UL-T\2680628111\2680628111_DRX820UL-T_OI\GB05SET.fm
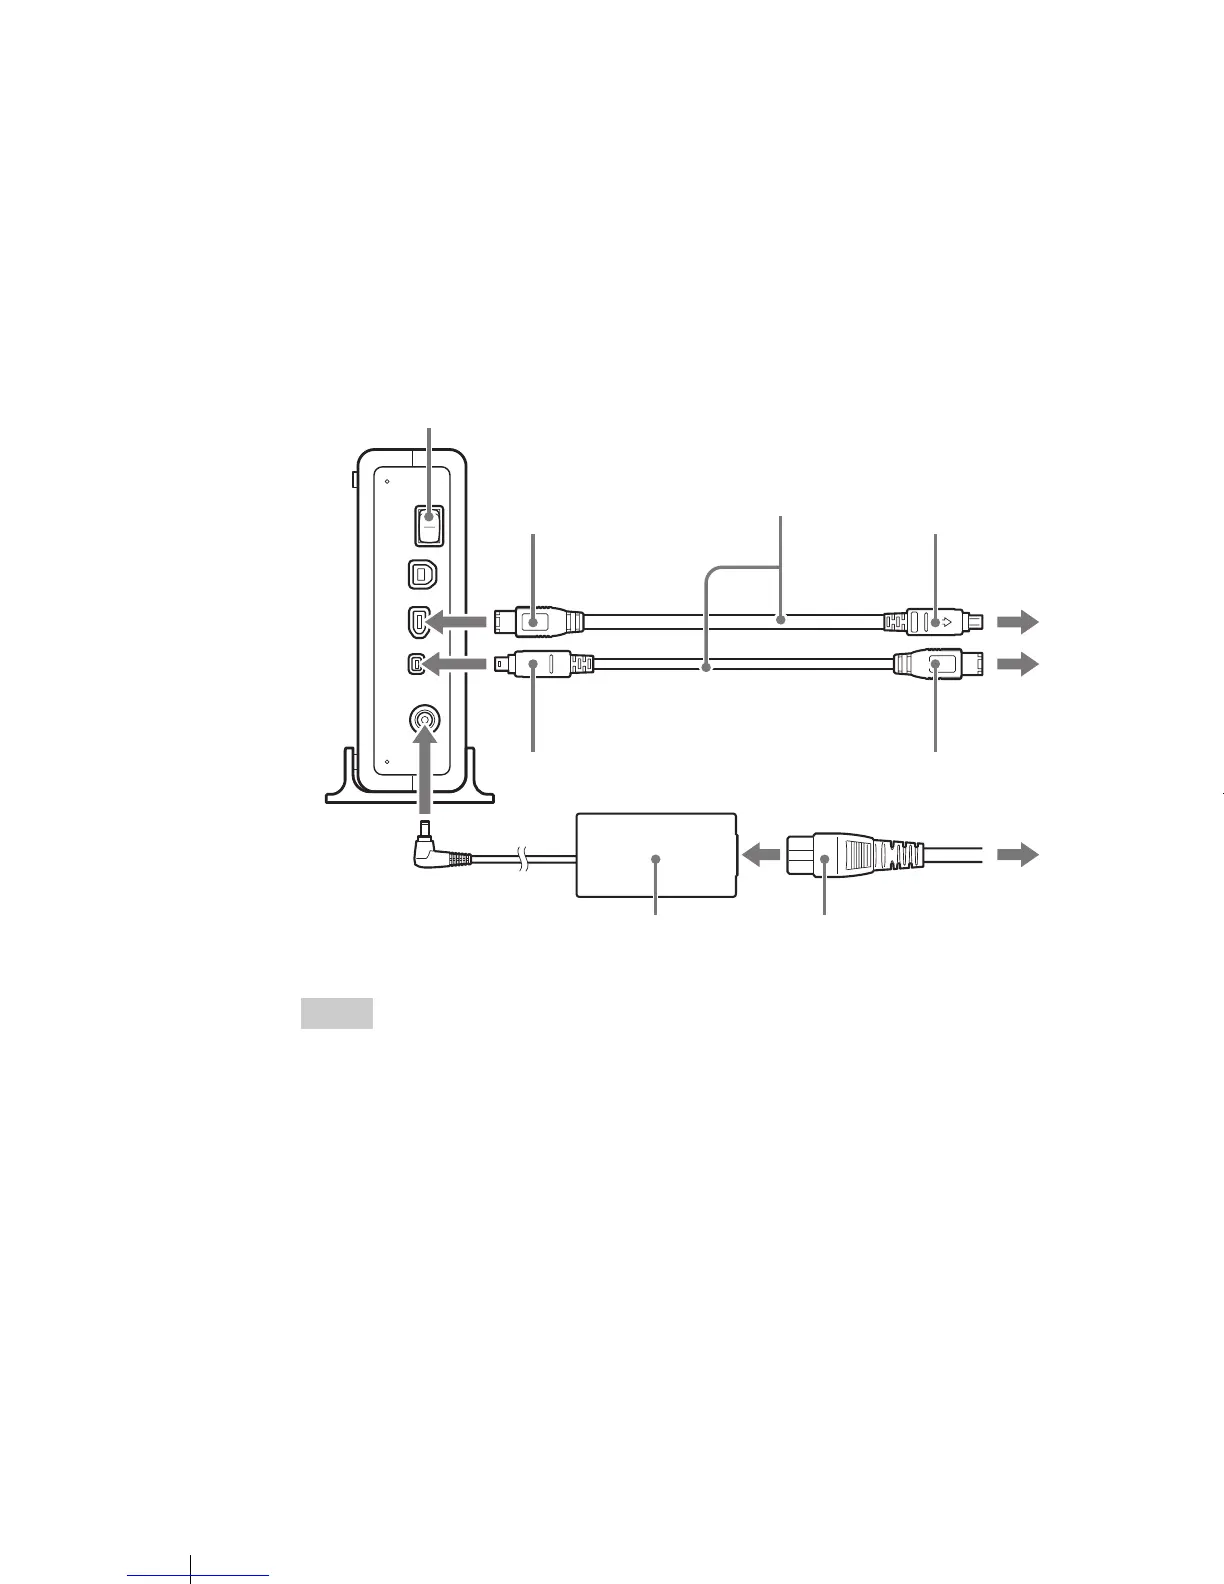
1 Start your computer.
2 Connect the necessary cables, then turn on the drive.
• Connect the i.LINK cable to the 6-pin i.LINK connector on the drive.
− For a computer’s 4-pin i.LINK connector: connect to the 6-pin i.LINK
connector on the drive.
− For a computer’s 6-pin i.LINK connector: connect to the 4-pin i.LINK
connector on the drive.
• Connect the supplied AC power cord to the supplied AC adapter. Then
connect the AC adapter to the drive’s DC IN jack, and connect the power
cord to the power outlet.
Hint
The i.LINK cable may be connected to either of the two i.LINK connectors on the back
of the drive.
Power Switch
i.LINK Cable
AC adapter
AC power cord
4-pin
4-pin
6-pin
6-pin
or
GB01COV1.book Page 12 Friday, January 13, 2006 3:49 PM

 Loading...