DSX-A40UE/A40UI/A42UI
4
NOTE OF REPLACING THE COMPLETE MAIN BOARD
OR SYSTEM CONTROLLER (IC101)
When the complete MAIN board or system controller (IC101) is
replaced, the destination setting is necessary.
1. Destination Setting
Set destination according to the procedure below.
1-1. Setting the Destination Code
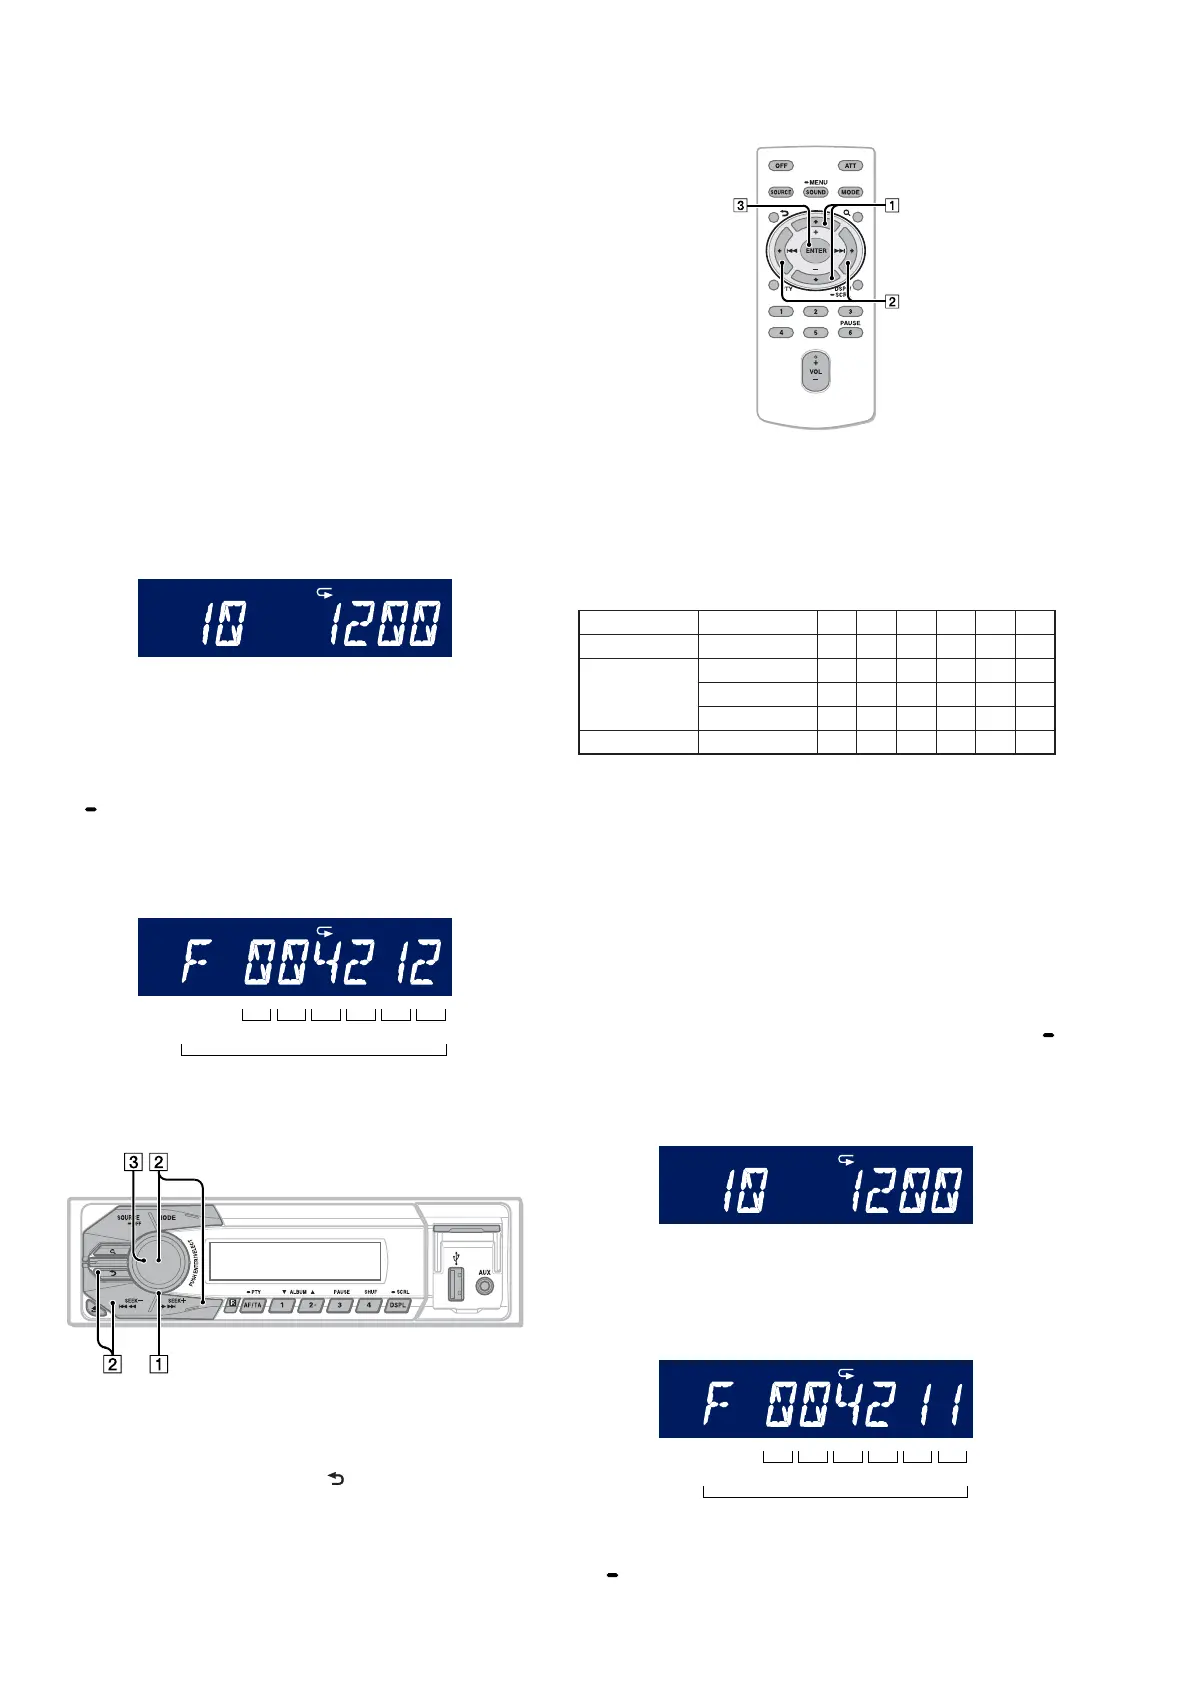
1. In the state of source off (the clock is displayed), enter the
test mode by pressing the buttons on the remote commander in
order of the [4] t [5] t [6] (press only the [6] button for two
seconds).
2. In the state in which the system controller version is displayed
on the liquid crystal display (refer to following fi gure), enter
the destination setting mode by pressing the buttons on the
main unit in order of the [SEEK+
M >] t [SEEK– .
m] t [PUSH ENTER/SELECT].
(Displayed characters/values in the following fi gure are ex-
ample)
SHUF
System controller version
3. Input the alphanumeric character of 8 digits of “F XXXXXX”
displayed on the liquid crystal display, and execute the destina-
tion setting.
Note: Refer to following “1-3. Entering the Destination Code” for opera-
tion method.
4. The resetting operation is executed by pressing the [SOURCE
OFF] button for 1 second after the setting ends, and the unit
returns to the normal condition.
1-2. Display in Destination Setting Mode
Destination code
8 digit
OP5 OP4 OP3 OP2 OP1 OP0
SHUF
1-3. Entering the Destination Code
• Method of operation by main unit
1. Rotate the control dial, and select the alphanumeric character
of “0 to F”.
2. The digit advances by pressing the [PUSH ENTER/SELECT]
or [SEEK+ M >] button.
The digit returns by pressing the [ ] or [SEEK– . m] but-
ton.
3. The setting is completed by pressing the [PUSH ENTER/SE-
LECT] button, and the initialization operation is done.
• Method of operation by remote commander
1. Press the [
V
] or [
v
] button, and select the alphanumeric char-
acter of “0 to F”.
2. The digit advances by pressing the [
b
] button.
The digit returns by pressing the [
B
] button.
3. The setting is completed by pressing the [ENTER] button, and
the initialization operation is done.
1-4. Destination Code
Model Destination OP5 OP4 OP3 OP2 OP1 OP0
DSX-A40UE Russian 0 0 6 2 2 7
DSX-A40UI
US, Canadian 0 0 4 2 1 2
AEP, UK 0 0 4 2 1 1
Russian 0 0 6 2 1 1
DSX-A42UI AEP, UK 0 0 4 2 3 1
2. Confi rmation After Destination Setting
Execute the following operation after completing the destination
setting, and confi rm a correct destination was set.
Destination setting checking method:
1. In the state of source off (the clock is displayed on the liquid
crystal display), enter the test mode by pressing the buttons on
the remote commander in order of the [4] t [5] t [6] (press
only the [6] button for two seconds).
2. In the state in which the system controller version is displayed
on the liquid crystal display (refer to following fi gure), enter
the destination setting value display mode by pressing the [
SCRL DSPL] button on the main unit twice.
(Displayed characters/values in the following fi gure are ex-
ample)
SHUF
System controller version
3. Confi rm the alphanumeric character of 8 digits of in liquid
crystal display is an value correctly input.
(Displayed characters/values in the following fi gure are ex-
ample)
Destination code
8 digit
OP5 OP4 OP3 OP2 OP1 OP0
SHUF
4. The resetting operation is executed by pressing the [SOURCE
OFF] button on the main unit for 1 second after the confi rm-
ing ends, and the unit returns to the normal condition.
Ver. 1.1
 Loading...