DSX-GS80/M80
5
Sony CONFIDENTIAL
For Authorized Servicer
NOTE OF REPLACING THE MAIN BOARD
When replacing the MAIN board, there are point to notes and neces-
sary to perform a few work. Be sure to refer to the following.
Required works:
• Destination setting
(Refer to “DESTINATION SETTING METHOD” on the right)
• Initializing
(Refer to “INITIALIZATION METHOD” on page 8)
Operation check works:
• BLUETOOTH FUNCTION CHECKING METHOD USING A
SMARTPHONE OR CELLULAR PHONE (page 10)
• OPERATION CHECK OF THE USB (page 11)
DESTINATION SETTING METHOD
When the MAIN board is replaced, the destination setting is neces-
sary. Set destination according to the procedure below.
Note 1: The liquid crystal display is an example of DSX-GS80. The liquid
crystal display of DSX-M80 will be black characters on a white
background.
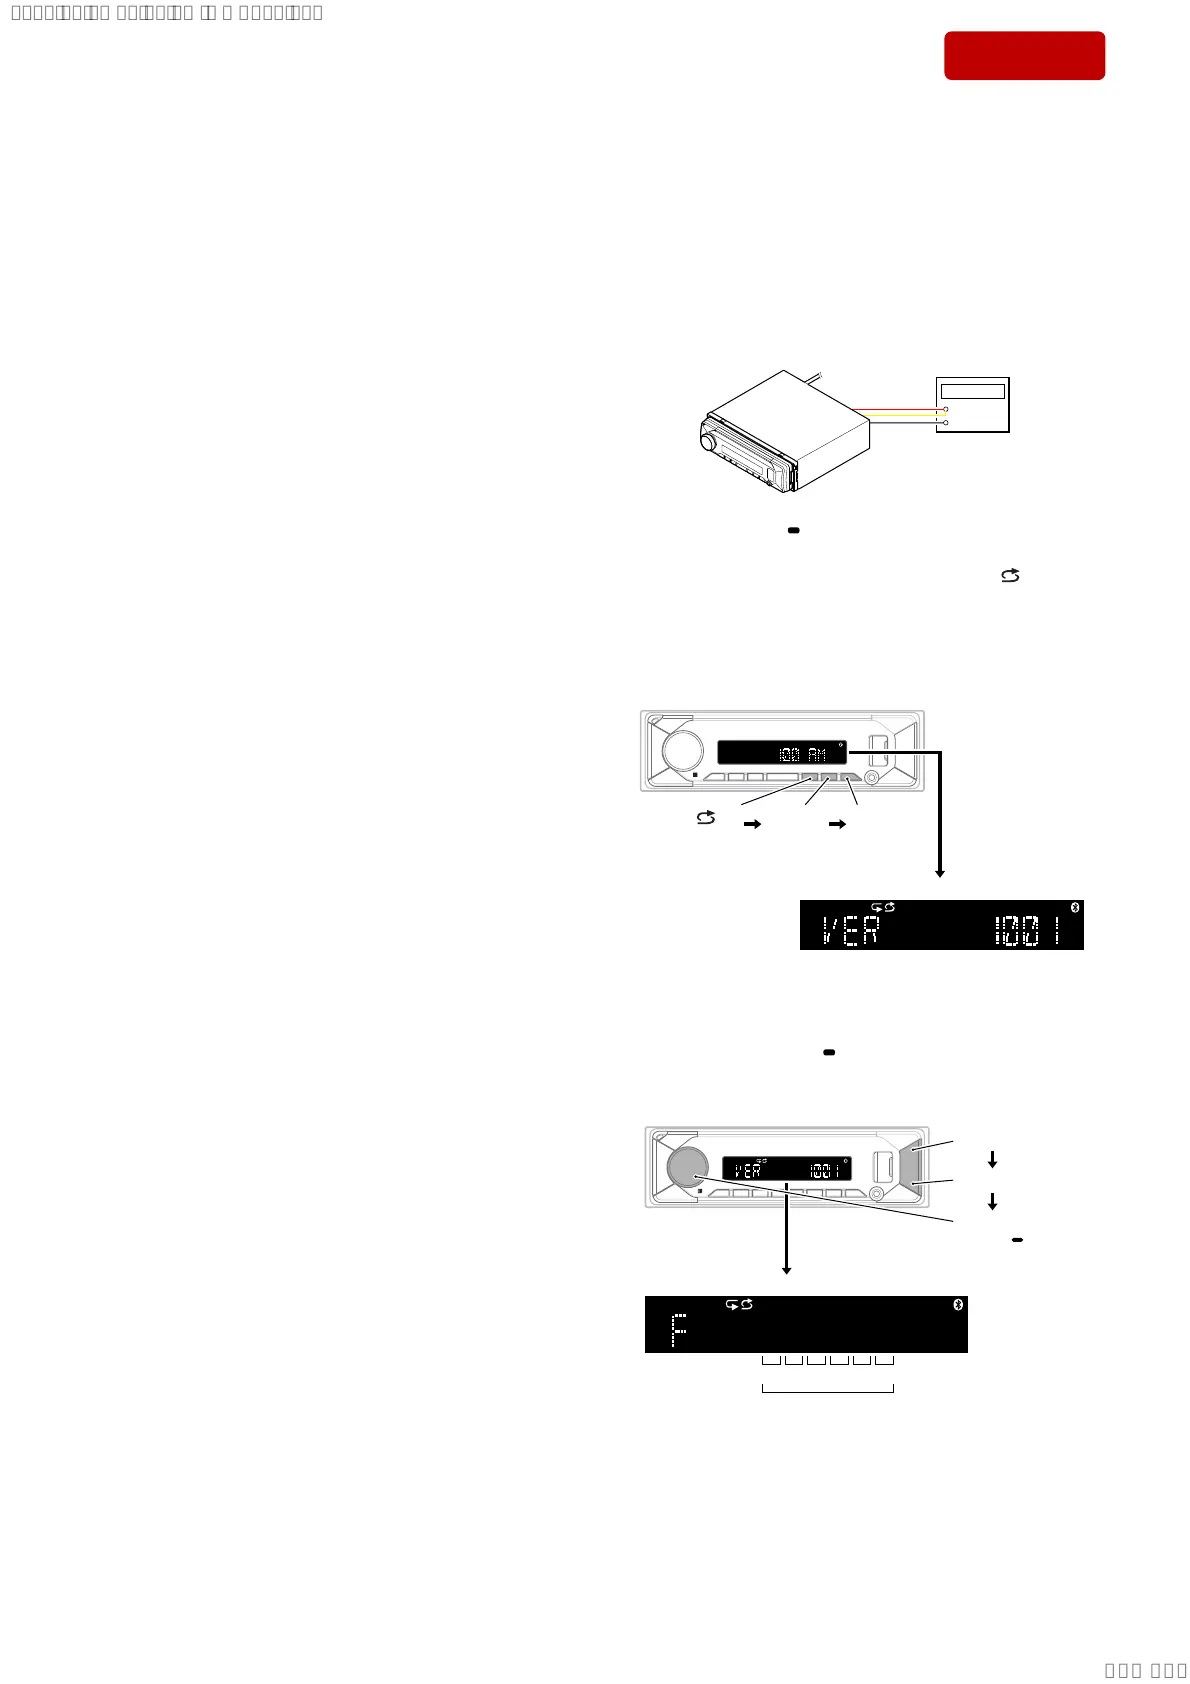
Setting procedure:
1. Connect the power cord to the regulated DC power supply, and
turn the power on of this unit.
+
–
Regulated DC
power supply
2. Press and hold the [ OFF SRC] button to the state of source off
(the clock is displayed on the liquid crystal display), enter the
test mode by pressing the buttons in order of the [
4] → [MIC
5] → [
u 6] (press only the [u 6] button for 2 seconds) and
display the software main version.
(Displayed characters/values in the following fi gure are exam-
ple)
Note 2: There is not displayed “AM”, depending on the destination.
[ 4]
press
[MIC 5]
press
[u 6]
press for
2 seconds
Software main version
3. In the state in which the software main version is displayed on
the liquid crystal display, enter the destination setting mode by
pressing the buttons in order of the [> M] → [m .] →
[PUSH ENTER MENU/ VOICE].
(Displayed characters/values in the following fi gure are exam-
ple)
(“XXXXXX” is
displayed with
alphanumeric
characters)
XXXXXX
Destination code
OP0OP1OP2OP3OP4OP5
6 digits
[PUSH ENTER
MENU/ VOICE]
press
[m .] press
[> M] press
– Continued on next page –
SYSSET
2019/10/1721:47:35(GMT+09:00)
 Loading...