Do you have a question about the Sony HDR-CX220 "Handycam and is the answer not in the manual?
Main section title for operational search functions.
Allows searching for camcorder functions and settings by operation.
Explains navigation, search, and notation within the user guide.
Provides details and differences across various camcorder models.
Identifies physical buttons, ports, and on-screen icons of the camcorder.
Lists all components included with the camcorder.
Instructions for charging the camcorder's battery pack using different methods.
Steps to power on the camcorder and configure basic date/time settings.
Guidance on selecting and inserting memory cards or using internal memory.
Basic steps and media used for recording video footage.
Basic steps for capturing still images with the camcorder.
Explains icons and symbols displayed on the screen while recording.
Details advanced features for enhancing image recording quality.
General overview of playing back recorded movies and photos.
Creating and enjoying digest versions of recorded movies.
Instructions for projecting recorded content directly from the camcorder.
Connecting the camcorder to HD TVs for viewing.
Connecting the camcorder to standard definition TVs.
Using TV remote control for camcorder playback via HDMI.
Importing and managing media using Sony's software.
Transferring recorded content to external storage.
Copying recorded content to discs.
Overview of accessing and using camcorder menu settings.
Selecting between movie and photo recording modes.
Adjusting various camera and microphone settings for optimal shooting.
Settings for recording resolution, frame rate, and photo dimensions.
Options for managing and viewing recorded content.
Functions for editing, copying, protecting, and deleting recorded media.
General configuration settings for the camcorder.
General guide for diagnosing and resolving camcorder issues.
Interpreting error codes and warning messages displayed on the screen.
General advice on cleaning, handling, and care of the camcorder.
Explanation of the AVCHD video compression format.
Information on compatible memory cards and their usage.
Details about the camcorder's lithium-ion battery pack.
Guidelines for proper use, storage, and care of the camcorder.
Information on battery life and media capacity.
Considerations for using the camcorder in different countries.
List of registered trademarks associated with the product.
Information regarding software licenses and notes.
How to set the camcorder's date and time.
Locating and identifying physical components of the camcorder.
Showing recorded metadata like date and time during playback.
Using Intelligent Auto for automatic scene and subject detection.
Features for capturing clear images of people.
Adjusting recording parameters for specific image quality.
Features to compensate for camera shake.
Methods for manually or automatically adjusting focus.
Settings for shooting in low-light conditions.
Options for improving audio capture quality.
Navigating the user guide by clicking on titles.
Finding information using the search function.
How to navigate back to previously viewed pages.
Instructions for printing pages from the user guide.
Explains symbols and conventions used in the manual.
Table comparing functional differences across camcorder models.
Notes on variations in camcorder equipment based on model.
Identifies parts for specific camcorder series.
Identifies parts for another camcorder series.
Details about the Carl Zeiss and G lens types used.
Description of the lens cover switch.
Information about the camcorder's integrated microphones.
Accesses the camcorder's menu system.
Icon indicating self-timer function is active.
Icon for wide aspect ratio setting.
Icon indicating a fade effect is applied.
Icon for Face Detection status.
Icon for Smile Shutter status.
Icon indicating manual focus mode.
Icon indicating a specific scene mode is active.
Icon indicating white balance setting.
Icon indicating SteadyShot stabilization is off.
Icon indicating Tele Macro mode.
Icon for x.v.Color setting.
Icon related to media destination.
Icon indicating Intelligent Auto mode with detected features.
How to change the camcorder's display language.
How to navigate menus and select items using the LCD.
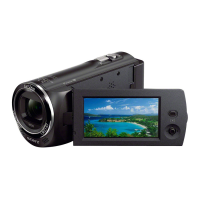
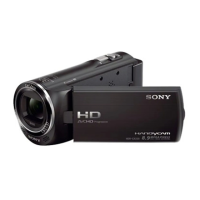
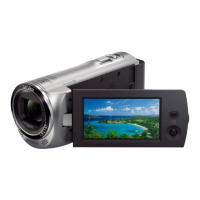
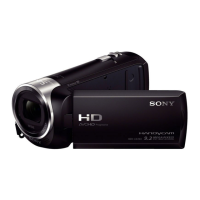
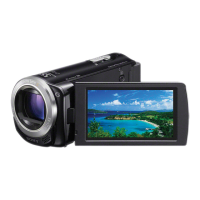
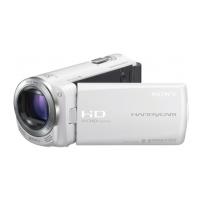
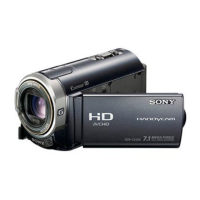
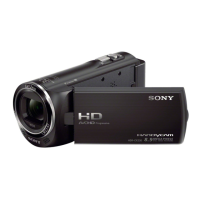
The main camcorder unit.
Power adapter for charging and operating the camcorder.
Cable to connect the AC adapter to a power outlet.
Cable for connecting to high-definition TVs.
Cable for connecting to computers or other USB devices.
Standard capacity battery pack.
Higher capacity battery pack.
The user manual for the camcorder.
Important notes and compatibility information for battery packs and power save.
Charging times for specific models with AC adaptor and USB.
Charging times for specific models with AC adaptor and USB.
Steps to detach the battery pack from the camcorder.
Using the AC adapter for extended operation.
Precautions when using the AC adapter.
Alternative charging method using a separate adapter.
Approximate charging times via USB cable.
How to change the camcorder's display language.
Notes on selecting recording media for movies and photos.
Links to related information on model, indicators, and recording time.
Lists compatible memory card types and capacities.
Notes on memory card compatibility and file systems like exFAT.
How to show or hide interface elements on the LCD.
Notes on closing LCD, continuous recording time, and file creation.
Links to model info, screen indicators, zooming, and image size.
Identifies zoom, start/stop, and photo buttons.
Button to access the camcorder's menu system.
Icons indicating status detected by Intelligent Auto.
Indicators for standby and recording states.
Indicator for AE/AF lock.
Indicator for tracking focus function.
Indicators for zoom level and battery status.
Indicators for time, photo capture, and media status.
Indicators for remaining time, quality, frame rate, mode, and size.
Indicators for photo count, aspect ratio, and size.
Button to cancel tracking focus.
Button to select shooting modes.
Button to activate Intelligent Auto mode.
Button to access recorded images.
Assign custom functions to My Button.
Position of zoom lever for wide-angle view.
Position of zoom lever for telephoto view.
Notes on using the zoom lever and minimum focus distance.
Notes on using Dual Capture and its limitations.
Icons and explanation for face detection.
Icons and explanation for scene detection.
Icons and explanation for camera-shake detection.
Icons and explanation for sound detection.
Notes on Intelligent Auto performance.
Notes on subject detection and face detection settings.
How to use tracking focus for non-human subjects.
Entering playback mode on touch-panel models.
Entering playback mode on multi-selector models.
Notes on movie division, MP4 compatibility, and editing operations.
Notes on saving captured images and data codes.
Information on date/time for captured photos.
Notes on highlight playback scenes, settings, and external device connection.
Setting the start and end dates for highlight playback.
Selecting a theme for the highlight playback.
Selecting background music for highlight playback.
Mixing original sound with selected music.
Setting the duration of the highlight playback segment.
Marking specific points in media for highlight playback.
Notes on music file transfer and related operations.
How to play back saved highlight scenarios.
Notes on viewing scenarios on external devices and camcorder limitations.
How to view saved highlight movies.
How to adjust projector focus.
Notes on projector usage, image size, and projection distance.
Notes on HDMI connection and projector focus operation.
Usage and specifications of the HDMI cable.
Notes on TV manuals, AC adapter usage, and STD quality playback.
Notes on TV manuals, AC adapter, TV type, and cable priority.
Related topic on adjusting aspect ratio.
Notes on BRAVIA Sync operations and settings.
Overview of PlayMemories Home features for Windows.
Notes on internet connection requirements for PlayMemories Home.
Information on using appropriate software for Mac users.
Required operating systems for PlayMemories Home.
Recommended CPU specifications.
Required RAM for PlayMemories Home.
Disk space required for installation.
Minimum display resolution requirements.
Notes on operating environments and compatibility.
Information on installing or updating PlayMemories Home.
Notes on using PlayMemories Home software and file handling.
Devices compatible with Blu-ray discs.
Devices compatible with HD DVDs.
Notes on AVCHD disc compatibility and PlayStation upgrades.
Instructions for creating Blu-ray discs.
Information on Music Transfer software.
Notes on software availability by region.
Notes on USB adaptor cable, AC adapter, and external device manuals.
Notes on media device compatibility, file systems, and scene limits.
Notes on USB adaptor cable and AC adapter usage.
Notes on USB adaptor cable and AC adapter usage for playback.
Playing back HD movies from external media on a computer.
Notes on AC adapter, HDMI cable, analog transfer, and monaural devices.
Items for selecting a shooting mode.
Items for customized shooting.
Items for setting image quality or size.
Items for playback.
Items for editing images like copy or protect.
Other setup items.
Notes on finishing menu settings.
How to quickly find menu items by sub-category.
Automatic white balance adjustment.
White balance setting for outdoor conditions.
White balance setting for indoor conditions.
Manual white balance adjustment using a one-push method.
Notes on white balance settings and scene selection.
Notes on automatic exposure and focus settings.
Notes on automatic exposure settings.
Notes on automatic focus settings.
Automatic exposure adjustment.
Manual adjustment of brightness for exposure.
Automatic focus adjustment.
Manual adjustment of focus.
Tips for adjusting focus using the zoom lever.
Information on focal distance display.
Disables the Low Lux function.
Enables the Low Lux function for dim light recording.
Automatic adjustment of image quality based on scene.
Scene mode for enhancing night shots.
Scene mode for capturing sunsets and sunrises.
Scene mode optimized for fireworks photography.
Scene mode for clear shots of distant subjects.
Scene mode for portraits with soft backgrounds.
Scene mode to prevent overexposure in spotlights.
Disables fade effects between scenes.
Fades scenes in and out with a white effect.
Fades scenes in and out with a black effect.
Cancels the self-timer function.
Activates the self-timer for delayed recording.
Cancels the Tele Macro function.
Enables Tele Macro for close-up shots.
Provides a powerful SteadyShot effect for image stabilization.
Provides a SteadyShot effect for stable recording.
Disables the SteadyShot function.
Enables the SteadyShot function for photos.
Disables the SteadyShot function for photos.
Disables digital zoom.
Digital zoom level for specific models.
Digital zoom level for other specific models.
Automatically adjusts exposure for backlit subjects.
Does not adjust exposure for backlit subjects.
Detects faces without distinction between adults and children.
Gives priority to children's faces for detection.
Gives priority to adult faces for detection.
Disables face detection.
Tips for optimal face detection.
Notes on face detection performance.
Shutter releases automatically during movie recording when a smile is detected.
Shutter releases whenever a smile is detected in recording mode.
Disables smile detection for automatic photo capture.
Notes on Smile Shutter function limitations.
Sets sensitivity to detect a big smile.
Sets sensitivity to detect a normal smile.
Sets sensitivity to detect even a slight smile.
Detects faces and records voices clearly.
Disables clear voice detection and recording.
Notes on Closer Voice function and external microphones.
Disables sound recording following zoom movement.
Enables sound recording that follows zoom movement.
Disables wind noise reduction.
Reduces wind noise input from the built-in microphone.
Disables wind noise reduction.
Enables wind noise reduction.
Records various ambient sounds at an appropriate level.
Records ambient sound faithfully for powerful audio.
Disables the display of grid lines on the screen.
Displays grid lines for composition assistance.
Displays icons/indicators for about 3 seconds.
Always displays icons/indicators.
Details bit-rates and image quality for recording modes.
Image quality settings for NTSC models.
Image quality settings for PAL models.
Standard recording frame rate.
Higher frame rate for clearer images; requires compatible TV.
Records movies in high definition image quality (HD).
Records movies in MP4 format for easy playback and sharing.
Records movies in standard definition image quality (STD).
Records movies to the full screen on a 16:9 TV screen.
Records movies to the full screen on a 4:3 TV screen.
Selects wider color range for x.v.Color compliant TVs.
Records in ordinary color range.
Image size setting affects Dual Capture photos.
Delete individual images by selecting them.
Delete all images from a selected date at once.
How to divide a movie and delete a segment.
Notes on undeletable images and data damage risks.
Protect individual images from accidental deletion.
Protect all images from a selected date at once.
Remove protection from all images in a selected date.
Copy individual images to another media.
Copy all images from a selected date to another media.
Notes on formatting, AC adapter, protected files, and operations to avoid.
How to securely erase data from internal memory before disposal.
Assigns file numbers sequentially across all recordings.
Assigns file numbers sequentially within each media.
Data code is not displayed.
Displays the date and time.
Displays camera setting data.
Select to view movies on a 16:9 (wide) TV.
Select to view movies on a 4:3 TV.
Normal setting, outputs signal according to TV automatically.
Outputs HD/MP4 movies with 1080p signal, STD with 480p*/576p**.
Outputs HD/MP4 movies with 1080i signal, STD with 480i*/576i**.
Outputs HD/MP4 movies with 720p signal, STD with 480p*/576p**.
Outputs the 480p*/576p** signal.
Outputs the 480i*/576i** signal.
Operates camcorder using the TV’s Remote Commander.
Does not operate camcorder using the TV’s Remote Commander.
Automatically selects USB transfer mode based on connected device.
USB transfer mode compatible with certain computers.
USB transfer mode compatible with many USB devices.
Setting for ordinary operations.
Setting for when connection to external device fails.
Plays a melody for operation sounds.
Cancels the operation melody.
Normal setting for LCD brightness.
Increases LCD screen brightness when needed.
Turns power on/off by opening/closing LCD screen.
Disables power on/off by LCD screen action.
Notes on touch panel calibration and proper tools.
Sets automatic LCD dimming and camcorder power off.
Aggressively dims LCD and powers off camcorder.
Disables automatic dimming and power off.
Makes settings for demonstration movie playback.
The demonstration does not appear.
Select one of four date and time formats.
Adjusts clock forward by one hour for summer time.
Set to the area where you are living.
Set to another place for area setting.
Notes on contact, initialization, and data backup for repair.
Troubleshooting steps when the camcorder does not power on.
Troubleshooting steps for non-responsive camcorder.
Reasons why menu settings might change automatically.
Explanation for camcorder warmth during operation.
Explanation for internal lens noise.
Conditions under which Intelligent Auto function is canceled.
Troubleshooting steps when the camcorder unexpectedly turns off.
Troubleshooting steps for charging lamp issues.
Troubleshooting steps for flashing charging lamp.
Troubleshooting steps for inaccurate battery indicators.
Troubleshooting steps for rapid battery discharge.
Reasons why menu items may be unavailable for selection.
Troubleshooting steps for missing buttons on the LCD.
Troubleshooting steps for unresponsive touch panel buttons.
Troubleshooting steps for disappearing LCD screen buttons.
Explanation for normal manufacturing artifacts on the screen.
Explanation for LCD backlight turning off automatically.
Troubleshooting steps for memory card operation failures.
Reasons why images stored on memory card cannot be deleted.
Troubleshooting for incorrect or flashing data file names.
Troubleshooting steps for unrecognized memory cards or playback issues.
Troubleshooting steps when recording buttons fail.
Explanation for inability to make new recordings.
Troubleshooting steps when the recording media is full.
Reasons why photos cannot be recorded.
Explanation for the access lamp staying lit after recording stops.
Explanation for variations in the imaging field.
Explanation for shorter than expected movie recording times.
Troubleshooting steps for camcorder stopping operation.
Explanation for slight time lag in recording start/stop.
Troubleshooting steps when no image or sound plays on TV.
Explanation for image trimming on connected TVs.
Troubleshooting steps for distorted images on 4:3 TVs.
Explanation for black bands on 4:3 TV screens.
Explanation for images not appearing on LCD when connected to TV.
Troubleshooting steps for incorrect image copying.
Troubleshooting steps for PlayMemories Home installation issues.
Troubleshooting steps for PlayMemories Home not working properly.
Troubleshooting steps when the computer does not recognize the camcorder.
Error codes indicating specific camcorder problems.
Error related to incompatible battery pack.
Error related to high battery pack temperature.
Error related to power source or reset conditions.
Error code indicating to follow 'If you have problems' steps.
Warning indicator for low battery level.
Warning indicator for battery pack temperature issues.
Warning indicators for memory card status.
Instructions for unrecognized internal memory.
Error during reading/writing internal memory, possible shock related.
Explanation for playback issues with external media.
Action for damaged image database file.
Action for missing image database file.
Instructions to repair inconsistent image database files.
Steps to back up and recover data from inconsistent database files.
Explanation of the AVCHD video compression format.
Notes on computer-formatted memory card compatibility.
Information on memory card speed variations.
Cases where memory card data may be damaged or lost.
Precautions against modifying memory cards.
Precautions regarding memory card terminals.
Precautions against physical damage to memory cards.
Prohibition of memory card disassembly or modification.
Warning against exposing memory cards to moisture.
Safety warning regarding memory card storage.
Warning against inserting incorrect memory card sizes.
Unsuitable locations for memory card usage or storage.
Information on using memory card adaptors.
Information on image data file compatibility.
Details on compatible Memory Stick media types.
Compatibility information for InfoLITHIUM V series battery packs.
Explanation of InfoLITHIUM battery pack functions.
Instructions and recommendations for charging the battery pack.
Tips for maximizing battery pack performance and lifespan.
Information on how the remaining battery time indicator works.
Important considerations before starting to record.
General precautions to avoid damage or malfunction.
Information on the LCD screen's manufacturing and pixel quality.
Instructions for cleaning the camcorder body and projector lens.
Information about the Carl Zeiss lens and MTF measurement.
Guidelines for cleaning and storing the camcorder lens.
Explanation of moisture condensation and potential malfunctions.
Conditions that may cause moisture condensation.
Steps to prevent moisture condensation inside the camcorder.
Information on the pre-installed battery's function.
Instructions for charging the internal rechargeable battery.
Recommendation to perform [Empty] for secure data deletion.
Charging times for specific models using AC adaptor and USB.
Charging times for specific models using AC adaptor and USB.
Approximate recording times with different battery packs and modes.
Approximate playing times with different battery packs and modes.
Expected recording times for internal memory in various modes.
Expected recording times for memory cards in various modes.
How to extend zoom capabilities on specific models.
Information on using the camcorder's AC adaptor internationally.
Viewing HD movies on TVs in countries with HD broadcasts.
Viewing STD movies on TVs requiring specific input jacks.
Supported TV signal formats by region.
How to set the camcorder's clock to local time abroad.
Restrictions on MPEG-2 video encoding for commercial use.
AVC license for personal use and non-remunerated activities.
Information on software license agreements and copyright.
Information on GNU GPL/LGPL software included in the camcorder.
| Sensor Type | CMOS |
|---|---|
| Effective Pixels | 2.29 MP |
| Optical Zoom | 27x |
| Digital Zoom | 320x |
| Lens Type | Carl Zeiss Vario-Tessar |
| Max Aperture | F1.8 - F4.0 |
| Screen Size | 2.7 inches |
| Screen Resolution | 230, 000 dots |
| Video Resolution | 1920 x 1080 (Full HD) |
| Recording Format | AVCHD, MP4 |
| Storage Type | Memory Stick PRO Duo, SD/SDHC/SDXC |
| Battery Type | NP-FV30 |
| Weight | 178 g |
| Sensor Size | 1/5.8 inch |
| Image Sensor | Exmor R CMOS |
| Focus | Auto/Manual |
| Microphone | Built-in Zoom Microphone |
| Storage Media | Memory Stick PRO Duo, SD/SDHC/SDXC |
| HDMI Output | Yes (Mini HDMI) |
| USB Interface | Yes (USB 2.0) |
| Image Stabilization | Optical |
| Media Type | Flash memory |
| LCD Screen Resolution | 230, 000 dots |
| Speaker | Built-in |
| Dimensions | 52.5 x 57 x 117 mm |