EasyManua.ls Logo

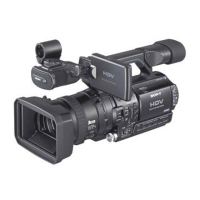
Sony HVR-Z7N User Manual

Sony HVR-Z7N
143 pages
To Next Page IconTo Next Page
Page #1 background imageLoading...
Page #1 background image
3-280-847-11(1)
© 2008 Sony Corporation
http://www.sony.net/
Printed on 70% or more recycled paper
using VOC (Volatile Organic Compound)
-free vegetable oil based ink.
Printed in Japan
US
Digital HD Video Camera Recorder
Digital HD Video
Camera Recorder
Operating Guide
Before operating the unit, please read this manual thoroughly,
and retain it for future reference
HVR-Z7U/Z7N

Table of Contents

Other manuals for Sony HVR-Z7N

Questions and Answers:

Sony HVR-Z7N Specifications

General IconGeneral
BrandSony
ModelHVR-Z7N
CategoryCamcorder
LanguageEnglish

Summary

Read this first

Notes on use

General notes on camcorder usage, including cassette types and HDV format.

Types of cassette you can use in your camcorder

Details on compatible cassette formats like HDV, DVCAM, and DV.

Types of “Memory Stick” you can use in your camcorder

Information on compatible Memory Stick types and limitations.

Using the camcorder

About menu items, LCD panel, viewfinder, and lens

Explains menu item availability and pixel behavior on LCD/viewfinder.

On recording

Pre-recording checks for picture and sound quality.

Important Information

Notes on the icons used in this manual

Explanation of icons used throughout the manual for different formats and connections.

About this manual

Notes on illustrations, on-screen displays, and design changes.

About the Carl Zeiss lens

Details about the specific Carl Zeiss lens used on the camcorder.

Additional Information

Using your camcorder abroad

Guidelines for using the camcorder in different countries.

Maintenance and precautions

General care and safety instructions for the camcorder.

Quick Reference

A section for quick lookups of parts and functions.

Getting Started

Step 1: Checking supplied items

List of items included with the camcorder and notes on what is not included.

Step 2: Attaching the supplied items

Mounting the lens

Instructions for mounting the lens onto the camcorder.

Mounting the Carl Zeiss lens

Specific steps for mounting the Carl Zeiss lens.

Adjusting the flange focal length (for Carl Zeiss lens)

Procedure for adjusting flange focal length for Carl Zeiss lenses.

Step 2: Attaching the supplied items (Continued)

Adjusting the flange focal length automatically

Automatic procedure for setting the flange focal length.

Adjusting the flange focal length manually

Manual procedure for setting the flange focal length.

Step 2: Attaching the supplied items (Continued)

Attaching the supplied microphone

Instructions for connecting and attaching the microphone.

Attaching the lens hood with lens cover

Steps for attaching the lens hood and its cover.

Step 2: Attaching the supplied items (Continued)

Attaching Memory Recording Unit

Instructions for attaching the Memory Recording Unit to the camcorder.

To remove the Memory Recording Unit

Procedure for detaching the Memory Recording Unit.

To attach the Memory Recording Unit to the i.LINK Cradle

Steps for connecting the unit to the i.LINK Cradle.

Step 3: Charging the battery pack

To attach the battery pack

Instructions for attaching the battery pack to the camcorder.

Step 3: Charging the battery pack (Continued)

Recording time

Tables showing recording times for HDV and DVCAM formats.

Playing time

Table showing approximate playing times for different battery packs.

Step 4: Turning the power on and holding your camcorder properly

To turn off the power

Instructions for safely powering down the camcorder.

Step 5: Adjusting the LCD panel and viewfinder

The LCD panel

Instructions for adjusting the LCD panel angle and brightness.

The viewfinder

Instructions for adjusting the viewfinder lens and brightness.

Step 5: Adjusting the LCD panel and viewfinder (Continued)

When the picture in the viewfinder is hard to see

Instructions on using the large eyecup for better viewfinder visibility.

Step 6: Setting the date and time

Tips

Note about battery discharge affecting date/time settings.

Step 7: Inserting a tape or a “Memory Stick Duo”

Cassette tape

Instructions for inserting and ejecting a cassette tape.

“Memory Stick Duo”

Instructions for inserting and ejecting a Memory Stick Duo.

Recording/Playback

Recording

Steps to prepare and start recording movies.

Open the shutter of the lens hood.

Step to open the lens hood shutter before recording.

Slide the POWER switch to CAMERA while pressing the green button.

Instructions for powering on the camcorder in CAMERA mode.

Recording/Playback (Continued)

Press the REC START/STOP button A (or B).

Procedure for starting and stopping movie recording.

Tips

Notes on aspect ratio, screen display, recording lamp, and low angle recording.

Recording/Playback (Continued)

To capture still images

Steps to capture still images and record them on a Memory Stick Duo.

Capacity of the “Memory Stick Duo” (MB) and the number of recordable pictures

Table showing storage capacity and picture count for Memory Stick Duo.

Recording/Playback

Changing the settings of your camcorder recordings

How to adjust various recording settings.

Adjusting the zoom

Instructions on how to adjust the zoom using different methods.

Changing the settings of your camcorder recordings (Continued)

Adjusting the focus manually

Procedures for manual focus adjustment in different modes.

Changing the settings of your camcorder recordings (Continued)

Using automatic focus temporarily (One push auto focus)

Temporary auto focus activation using a button.

Using the expanded focus (Expanded focus)

Using expanded focus for confirmation during manual focusing.

Focusing on a distant subject (Focus infinity)

Setting focus to infinity for distant subjects.

Changing the settings of your camcorder recordings (Continued)

Adjusting the exposure

How to adjust exposure settings.

Adjusting the iris

Manual adjustment of lens aperture (F value).

Adjusting the volume of light (ND filter)

Using ND filters to control light volume in bright conditions.

Changing the settings of your camcorder recordings (Continued)

Adjusting the gain

Manual adjustment of audio gain control.

Adjusting the shutter speed

Manual adjustment of shutter speed for motion effects.

Changing the settings of your camcorder recordings (Continued)

Adjusting to natural color (White balance)

Adjusting white balance for accurate color representation.

Changing the settings of your camcorder recordings (Continued)

Adjusting the black balance

Adjusting black balance for optimal shadow detail.

Customizing the picture quality (Picture profile)

Customizing image quality using picture profiles.

Changing the settings of your camcorder recordings (Continued)

To change the picture profile

Modifying existing picture profile settings.

Changing the settings of your camcorder recordings (Continued)

BLACK LEVEL

Setting the black level for each color channel.

GAMMA

Selecting gamma curves for different tonal characteristics.

BLACK GAMMA

Correcting gamma in low intensity areas.

Changing the settings of your camcorder recordings (Continued)

KNEE

Setting knee point and slope for video signal compression.

COLOR MODE

Setting color type and level.

COLOR LEVEL

Adjusting the overall color level.

COLOR PHASE

Adjusting the color phase.

Changing the settings of your camcorder recordings (Continued)

COLOR DEPTH

Adjusting color depth for each color phase.

COLOR CORRCT

Items for color correction.

Changing the settings of your camcorder recordings (Continued)

WB SHIFT

Shifting white balance settings.

Changing the settings of your camcorder recordings (Continued)

DETAIL

Setting detail level and manual adjustments.

Changing the settings of your camcorder recordings (Continued)

SKINTONE DTL

Adjusting skintone detail to reduce wrinkles.

PROFILE NAME

Naming picture profiles.

COPY

Copying picture profile settings.

RESET

Resetting picture profile to default.

Changing the settings of your camcorder recordings (Continued)

To name the picture profile settings

Procedure for naming picture profiles.

To copy the picture profile setting to other picture profiles

Copying profile settings between profiles.

To reset the picture profile settings

Resetting individual picture profile settings.

Adjusting the volume

Adjusting microphone input volume.

Assigning the functions to the ASSIGN buttons

Functions you can assign to the ASSIGN buttons

List of functions that can be assigned to ASSIGN buttons.

Assigning the functions to the ASSIGN buttons (Continued)

Recording an index signal

How to record an index signal for scene marking.

To cancel the operation

Canceling index signal recording.

Recording/Playback

Reviewing the most recently recorded scenes (Rec review)

Playing back the last few seconds of recorded footage.

Playing back the most recently recorded movies (Last scene review)

Rewinding and playing back the most recent movie.

Using the Shot transition

Items in [SHOT TRANSITION]

Description of settings for shot transition, including time and linking.

Using the Shot transition (Continued)

To store the settings in SHOT-A or SHOT-B

Storing camcorder settings for shot transitions.

To check the shot transition

Previewing stored shot transition settings.

To execute the shot transition

Applying stored shot transition settings during recording.

Recording/Playback

Marking focal point on the screen (Focus marking)

Marking and checking focal points before recording.

Playback

Start playing back.

Basic playback controls using rewind, play, pause, etc.

Playback (Continued)

To search for a scene while viewing a movie

Using search functions to find specific scenes during playback.

To view still images

Viewing still images stored on the Memory Stick Duo.

To delete still images from the “Memory Stick Duo”

Deleting individual still images from the Memory Stick Duo.

Recording/Playback

Changing/checking the settings in your camcorder

How to change and check camcorder settings.

Changing the screen

Turning on/off screen indicators like time code and counter.

Displaying recording data (Data code)

Displaying date, time, and camera data during playback.

Recording/Playback (Continued)

Displaying the settings in your camcorder (Status check)

Checking various camcorder settings like audio, assignments, and camera setup.

Checking the remaining battery (Battery Info)

Displaying remaining battery life and recording capacity.

Recording/Playback

Locating a scene on a tape

Methods for locating specific scenes on a tape.

Searching for a scene by date of recording (Date search)

Finding scenes based on the recording date.

Searching for a recording start point (Index search)

Locating scenes marked with index signals.

Recording/Playback

Playing the picture on a TV

Connecting the camcorder to a TV for playback.

Jacks on your camcorder

Overview of camcorder connection jacks.

Connecting to a high definition TV

Connecting to an HD TV via Component or HDMI.

Playing the picture on a TV (Continued)

Type A: Component video cable

Connecting via component video and A/V cables for signal output.

Type B: HDMI cable

Connecting via HDMI cable for video and audio signals.

Playing the picture on a TV (Continued)

Type C: i.LINK cable

Connecting via i.LINK cable for HDV/DV signals.

Playing the picture on a TV (Continued)

Connecting to a 16:9 (wide) or 4:3 TV

Setting aspect ratio for 16:9 or 4:3 TVs.

Using the Menu

Using the menu items

How to navigate and use the camcorder's menu system.

Set the POWER switch to CAMERA or VCR.

Powering on the camcorder to access menus.

Press the MENU button.

Accessing the main menu screen.

Using the Menu

Menu items

List of available menu items categorized by function.

(CAMERA SET) menu

Settings for adjusting recording conditions like gain and backlight.

Using the Menu

(DISPLAY SET) menu

Settings for display and viewfinder options like zebra and histogram.

(IN/OUT REC) menu

Settings for recording format, video output, and external control.

Using the Menu

(TC/UB SET) menu

Settings for time code and user bits, including presets and synchronization.

(MEMORY SET) menu

Settings for Memory Stick Duo operations like erase and format.

(OTHERS) menu

Various basic settings including quick record, beep, and remote control.

Using the Menu

(CAMERA SET) menu

Settings for adjusting recording conditions like gain and backlight.

GAIN SETUP

Adjusting gain values for different positions (H, M, L).

HYPER GAIN

Increasing gain to its limit, affecting picture quality.

AGC LIMIT

Setting the upper limit for Automatic Gain Control.

Using the Menu

WB TEMP SET

Setting color temperature manually.

ATW SENS

Adjusting auto white balance sensitivity.

AE SHIFT

Adjusting automatic exposure adjustment value.

AE WINDOW

Selecting photometric area for auto exposure.

Using the Menu

AE RESPONSE

Adjusting automatic exposure adjustment speed.

ECS FREQ.

Setting shutter speed to prevent horizontal strips.

FLCKR REDUCE

Reducing flickering under fluorescent lights.

BACK LIGHT

Correcting backlighting.

Using the Menu

SPOTLIGHT

Preventing overexposure of subjects under strong light.

STEADYSHOT

Reducing camera shakes.

FOCUS MACRO

Enabling focus on subjects within 80 cm.

FADER

Adding visual effects to transitions.

Using the Menu

SMTH SLW REC

Recording fast-moving subjects in slow-motion.

INTERVAL REC

Recording scenes at regular intervals.

Using the Menu

DV FRAME REC

Recording stop motion or frame-by-frame animation.

Using the Menu

S.TRANS/F.MARK

Assigning shot transition or focus marking functions.

x.v.Color

Recording with a wider color range.

COLOR BAR

Displaying or recording color bars for adjustment.

Using the Menu

(AUDIO SET) menu

Settings for audio recording, including DV audio modes and XLR settings.

FLANGE BACK

Adjusting flange focal length.

DV AU.MODE

Selecting DV audio recording mode.

AUDIO LIMIT

Setting clipping-noise reduction for audio channels.

Using the Menu

SEPARATE

Separately applying AGC for CH1/CH2.

INPUT1 MIC NR

Reducing microphone noise for input 1.

INPUT1 TRIM

Adjusting input signal level for input 1.

INPUT1 WIND

Reducing wind noise for input 1.

Using the Menu

AUDIO CH SEL

Reproducing CH1 and CH2 sound in respective channels.

DV AUDIO MIX

Monitoring sound from other devices or 4-channel microphones.

Using the Menu

(DISPLAY SET) menu

Settings for display and viewfinder options like zebra and histogram.

ZEBRA

Displaying zebra pattern as a brightness guide.

HISTOGRAM

Displaying histogram to guide iris adjustment.

PEAKING

Displaying enhanced details to aid focus adjustment.

Using the Menu

MARKER

Displaying markers for composition and framing.

CAM LEVELING

Displaying a level meter to check camcorder tilt.

EXP.FOCUS TYPE

Setting the type of expanded focus display.

Using the Menu

CAM DATA DSP

Displaying iris, shutter speed, and gain settings.

AU.LVL DISP

Displaying the audio level meter.

ZOOM DISPLAY

Displaying zoom position.

FOCUS DISP

Displaying focal distance during manual focus.

SHUTTER DISP

Displaying shutter speed in seconds or degrees.

Using the Menu

LCD BRIGHT

Adjusting LCD screen brightness.

LCD COLOR

Adjusting LCD panel color level.

LCD BL LEVEL

Adjusting LCD screen backlight level.

VF B.LIGHT

Adjusting viewfinder brightness.

VF COLOR

Displaying viewfinder images in color or black and white.

VF POWERMODE

Controlling viewfinder power mode.

LETTER SIZE

Adjusting menu text size.

REMAINING

Displaying remaining tape time.

Using the Menu

(IN/OUT REC) menu

Settings for recording format, video output, and external control.

DISP OUTPUT

Selecting output display information to LCD, viewfinder, or composite.

REC FORMAT

Selecting recording format (HDV1080i or DV).

VCR HDV/DV

Selecting output signal type for playback.

Using the Menu

HDV

Playing back only HDV format sections.

DV

Playing back only DVCAM (DV) format sections.

HDV PROGRE.

Selecting HDV recording format (Interlace or Progressive).

SCAN TYPE

Selecting scan type for HDV recording.

Using the Menu

DV PROGRE.

Selecting scan type for DVCAM/DV recording.

DV REC MODE

Selecting DV recording mode (DVCAM or DV SP).

DV WIDE REC

Recording in aspect ratio matching TV (16:9 or 4:3).

VIDEO OUT

Selecting output signals (Component, S Video, Down Convert).

Using the Menu

DV WIDE CONV

Selecting DV widescreen down-convert type.

i.LINK SET

Setting i.LINK connection parameters.

EXT REC CTRL

Controlling external recording units.

Using the Menu

(TC/UB SET) menu

Settings for time code and user bits, including presets and synchronization.

TC PRESET

Presetting the time code.

TC COUNTUP

Incrementing time code hour.

UB PRESET

Presetting the user bit.

Using the Menu

TC FORMAT

Selecting the frame mode (Auto, Drop Frame, Non-Drop Frame).

TC RUN

Selecting how the time code advances.

TC MAKE

Reading last time code and recording new one.

TC LINK

Synchronizing time codes of multiple camcorders.

Using the Menu

UB TIME REC

Saving actual time in user bit code.

UB-DATE/TC-TIME

Saving date and time in user bit and time code.

(MEMORY SET) menu

Settings for Memory Stick Duo operations like erase and format.

ALL ERASE

Deleting all unprotected still images.

Using the Menu

FORMAT

Formatting the Memory Stick Duo.

FILE NO.

Setting file numbering sequence or reset.

NEW FOLDER

Creating new folders on the Memory Stick Duo.

REC FOLDER

Selecting a folder for storing still images.

PB FOLDER

Selecting a folder for viewing still images.

Using the Menu

(OTHERS) menu

Various basic settings including quick record, beep, and remote control.

CAMERA PROF. (Camera profile)

Saving and loading camcorder settings profiles.

To load a camera profile

Loading a saved camera profile.

To save a camera profile

Saving current settings as a camera profile.

Using the Menu

To change the camera profile name

Renaming saved camera profiles.

To delete camera profile settings

Deleting camera profile settings.

To copy a camera profile

Copying camera profiles to Memory Stick Duo.

PB ZOOM (Playback zoom)

Enlarging movie or still images during playback.

QUICK REC

Reducing start point time for resuming recording.

Using the Menu

DATE REC

Superimposing date and time on images.

BEEP

Activating a melody for start/stop recording.

REC LAMP[F]

Turning off the front camera recording lamp.

REC LAMP[R]

Turning off the rear camera recording lamp.

REMOTE CTRL

Enabling use of the supplied Remote Commander.

HOURS METER

Displaying cumulative camcorder operation time.

Dubbing/Editing

Dubbing to VCR, DVD/HDD device, etc.

Connecting camcorder to external devices for dubbing.

Connecting to external devices

Overview of camcorder connection jacks for external devices.

Dubbing to VCR, DVD/HDD device, etc. (Continued)

Using an i.LINK cable (optional)

Notes on using i.LINK cable for dubbing.

Dubbing/Editing

Copy format

Table showing copy formats, camcorder recording format, and menu settings.

Dubbing to VCR, DVD/HDD device, etc. (Continued)

Dubbing to another device

Steps for dubbing to a VCR/DVD device.

Dubbing/Editing

Recording pictures from a VCR

Steps to record movies or still images from a VCR via i.LINK.

Recording movies

Steps to record movies from a VCR via i.LINK.

Recording pictures from a VCR (Continued)

Recording still images

Steps to record still images from a VCR.

Dubbing/Editing

Copying movies on a tape to a computer

Steps to copy movies from tape to a computer using i.LINK.

Notes

Notes on copying movies and required software.

Copying movies on a tape to a computer (Continued)

Notes on connecting to the computer

Precautions for connecting camcorder to computer via i.LINK.

Copying movies on a tape to a computer (Continued)

Troubleshooting

Power sources/LCD screen/Remote Commander

Troubleshooting for power issues, screen, and remote commander.

Troubleshooting (Continued)

Cassette tapes/“Memory Stick Duo”

Troubleshooting for cassette and Memory Stick Duo issues.

Troubleshooting (Continued)

Recording

Troubleshooting for recording problems like no start or handle zoom issues.

Troubleshooting (Continued)

End search or last scene review does not work.

Troubleshooting when search/review functions fail.

Auto focus does not function.

Troubleshooting for auto focus issues.

Menu items are grayed out or do not work.

Reasons why menu items might be unavailable or not function.

Troubleshooting (Continued)

Cannot use Situation

Table of unworkable function combinations.

Troubleshooting (Continued)

Playback

Troubleshooting for playback issues like no sound, picture breaks, or data file errors.

Troubleshooting (Continued)

No sound or only a low sound is heard.

Troubleshooting audio playback issues.

The movies freeze for a while, or the sound breaks off.

Troubleshooting frozen movies or sound breaks.

“---” is displayed on the screen.

Reasons for "---" display indicating missing data.

Noises appear and or is displayed on the screen.

Troubleshooting noise or color system mismatch.

Date Search does not work correctly.

Troubleshooting date search functionality.

No picture appears during End search, Rec review or Last scene review.

Troubleshooting when search/review functions fail to show pictures.

Troubleshooting (Continued)

Connecting to TV

Troubleshooting TV connection issues for picture and sound.

You cannot view the picture on the TV connected with the i.LINK cable.

Troubleshooting i.LINK connection issues with TV picture.

The picture appears distorted on the 4:3 TV.

Troubleshooting picture distortion on 4:3 TVs.

Troubleshooting (Continued)

Connecting to a computer

Troubleshooting computer connection and file transfer issues.

The computer does not recognize your camcorder.

Troubleshooting computer not recognizing camcorder.

You cannot view or copy a movie recorded on a tape to a computer.

Troubleshooting viewing or copying movies to computer.

Troubleshooting (Continued)

Your computer freezes.

Troubleshooting computer freezing issues.

Troubleshooting

Warning indicators and messages

Explaining error codes and warning indicators on the screen.

Self-diagnosis display/Warning indicators

Explaining error codes and warning indicators on the screen.

Additional Information

Using your camcorder abroad

Guidelines for using the camcorder in different countries.

On TV color systems

Explanation of TV color system compatibility (NTSC).

Viewing HDV format pictures recorded in HDV format

Requirements for viewing HDV recorded pictures.

Viewing DVCAM (DV) format pictures recorded in DVCAM (DV) format

Requirements for viewing DVCAM (DV) recorded pictures.

Simple setting of the clock by time difference

Adjusting the clock to local time abroad.

Additional Information

Maintenance and precautions

General care and safety instructions for the camcorder.

HDV format and recording/playback

Information on HDV format, recording, and playback.

What is the HDV format?

Explanation of the HDV video format.

Audio mode

Explanation of DVCAM audio modes (FS32K, FS48K).

Maintenance and precautions (Continued)

Compatibility of the DVCAM/DV formats

Differences and compatibility of DVCAM and DV formats.

Additional Information

Mini DVCAM and mini DV cassettes

Recording format definition based on recorder.

Compatibility on playback

Cassette compatibility for playback.

Compatibility on editing using DV jacks

Limitations on editing using DV jacks and i.LINK cables.

Additional Information

Limitations on editing

Limitations when editing tapes via HDV/DV Interface.

About the “Memory Stick”

General information about Memory Sticks, capacity, and compatibility.

Additional Information

About the “InfoLITHIUM” battery pack

Information about InfoLITHIUM battery packs.

What is an “InfoLITHIUM” battery pack?

Explanation of InfoLITHIUM battery pack functions.

To charge the battery pack

Instructions for charging the battery pack.

Maintenance and precautions (Continued)

To use the battery pack effectively

Tips for maximizing battery pack performance and life.

About the remaining battery time indicator

Information on the battery time indicator.

About storage of the battery pack

Recommendations for storing the battery pack.

About i.LINK

General information about the i.LINK interface.

Additional Information

What is i.LINK?

Explanation of i.LINK digital serial interface.

About the i.LINK Baud rate

Information on i.LINK baud rates.

To use i.LINK functions on this unit

How to use i.LINK functions for dubbing and connecting devices.

About x.v.Color

Explanation of x.v.Color technology.

About handling of your camcorder

General advice on using and caring for the camcorder.

Maintenance and precautions (Continued)

Moisture condensation

Explaining moisture condensation and its effects.

If moisture condensation has occurred

Steps to take if moisture condensation occurs.

How to avoid moisture condensation

Methods to prevent moisture condensation.

Additional Information

Video head

Troubleshooting video head issues like freezing.

LCD screen

Precautions for the LCD screen and cleaning instructions.

On handling the casing

Cleaning and handling the camcorder casing.

Maintenance and precautions (Continued)

About care and storage of the lens

Instructions for cleaning and storing the camcorder lens.

On charging the pre-installed rechargeable battery

Information on the camcorder's internal rechargeable battery.

Removing dust from inside the viewfinder

Steps to remove dust from the viewfinder.

Additional Information

Specifications

Detailed technical specifications for the camcorder.

System

Technical specifications for video and audio systems.

Lens

Specifications for the Carl Zeiss lens.

Focal length

Focal length details for the lens.

Specifications (Continued)

Output connectors

Specifications for A/V OUT, COMPONENT OUT, and HDMI OUT jacks.

Input/Output connectors

Specifications for LANC, headphones, LENS, and INPUT jacks.

General

General specifications including power, temperature, and consumption.

Additional Information

Dimensions (approx.)

Physical dimensions of the camcorder.

Mass (approx.)

Weight specifications of the camcorder.

AC Adaptor/Charger AC-VQ1050

Specifications for the AC Adaptor/Charger.

Rechargeable battery pack NP-F570

Specifications for the NP-F570 rechargeable battery pack.

Additional Information

On trademarks

List of trademarks used in the manual.

Notes on the License

Licensing information regarding MPEG-2 standard.

Quick Reference

Identifying parts and controls

Identification of camcorder parts and controls with page references.

To mount the accessory shoe

Instructions for mounting the accessory shoe.

To remove the accessory shoe

Instructions for removing the accessory shoe.

Identifying parts and controls (Continued)

To mount the accessory shoe adaptor

Instructions for mounting the accessory shoe adaptor.

To remove the accessory shoe adaptor

Instructions for removing the accessory shoe adaptor.

Quick Reference

ASSIGN buttons 1-3*

Identifying ASSIGN buttons 1-3.

ASSIGN 4 button/ZEBRA button

Identifying ASSIGN 4 and ZEBRA buttons.

ASSIGN 5 button/AE SHIFT button*

Identifying ASSIGN 5 and AE SHIFT buttons.

ASSIGN 6 button/REC REVIEW button

Identifying ASSIGN 6 and REC REVIEW buttons.

AUDIO LEVEL(CH1) switch

Identifying AUDIO LEVEL (CH1) switch.

AUDIO LEVEL(CH1) dial

Identifying AUDIO LEVEL (CH1) dial.

AUDIO LEVEL(CH2) dial

Identifying AUDIO LEVEL (CH2) dial.

AUDIO LEVEL(CH2) switch

Identifying AUDIO LEVEL (CH2) switch.

AUTO/MANUAL switch

Identifying AUTO/MANUAL switch.

SHUTTER SPEED button

Identifying SHUTTER SPEED button.

WHT BAL* button

Identifying WHT BAL button.

SEL/PUSH EXEC dial

Identifying SEL/PUSH EXEC dial.

(one push) button

Identifying the one push button.

White balance memory switch

Identifying the white balance memory switch.

Gain switch

Identifying the gain switch.

Identifying parts and controls (Continued)

HDV/DV jack

Identifying the HDV/DV jack.

COMPONENT OUT jack

Identifying the COMPONENT OUT jack.

A/V OUT jack

Identifying the A/V OUT jack.

LANC jack

Identifying the LANC jack and its function.

i (headphones) jack

Identifying the headphones jack.

INPUT2 switch

Identifying INPUT2 switch.

INPUT1 switch

Identifying INPUT1 switch.

REC CH SELECT switch

Identifying REC CH SELECT switch.

INPUT2 jack

Identifying INPUT2 jack.

INPUT1 jack

Identifying INPUT1 jack.

PUSH (lens hood release) button

Identifying the PUSH button for lens hood release.

Cable holder

Identifying the cable holder.

Memory Stick Duo slot

Identifying the Memory Stick Duo slot.

Access lamp

Identifying the access lamp.

REC START/STOP button

Identifying the REC START/STOP button.

OPEN/EJECT lever

Identifying the OPEN/EJECT lever.

LENS jack

Identifying the LENS jack.

Quick Reference

Hook for shoulder strap

Identifying the hook for the shoulder strap.

Handle zoom lever

Identifying the handle zoom lever.

REC START/STOP button

Identifying the REC START/STOP button.

Handle zoom switch

Identifying the handle zoom switch.

Rear remote sensor

Identifying the rear remote sensor.

Rear recording lamp

Identifying the rear recording lamp.

Viewfinder

Identifying the viewfinder.

Large eye cup

Identifying the large eye cup.

BATT RELEASE button

Identifying the BATT RELEASE button.

Accessory interface shoe

Identifying the accessory interface shoe.

Battery pack

Identifying the battery pack.

STATUS CHECK button

Identifying the STATUS CHECK button.

PICTURE PROFILE button

Identifying the PICTURE PROFILE button.

MENU button

Identifying the MENU button.

HDMI OUT jack

Identifying the HDMI OUT jack.

B button

Identifying the B button.

A button

Identifying the A button.

SHOT TRANSITION/FOCUS MARKING button

Identifying the SHOT TRANSITION/FOCUS MARKING button.

To attach the shoulder strap

Instructions for attaching the shoulder strap.

Identifying parts and controls (Continued)

Lens cover lever

Identifying the lens cover lever.

Focus ring

Identifying the focus ring.

Zoom ring

Identifying the zoom ring.

Iris ring

Identifying the iris ring.

ZOOM switch

Identifying the ZOOM switch.

DIGITAL EXTENDER/L1 button

Identifying the DIGITAL EXTENDER/L1 button.

LCD screen

Identifying the LCD screen.

TC/U-BIT button

Identifying the TC/U-BIT button and its function.

DATA CODE button

Identifying the DATA CODE button.

Video control buttons

Identifying video control buttons.

VOLUME/MEMORY button

Identifying the VOLUME/MEMORY button.

MEMORY/DELETE button

Identifying the MEMORY/DELETE button.

MEMORY/INDEX button

Identifying the MEMORY/INDEX button.

MEMORY/PLAY button

Identifying the MEMORY/PLAY button.

DISPLAY/BATT INFO button

Identifying the DISPLAY/BATT INFO button.

RESET button

Identifying the RESET button and its function.

To attach the lens mount cap

Instructions for attaching the lens mount cap.

To remove the lens mount cap

Instructions for removing the lens mount cap.

To attach the rear lens cap

Instructions for attaching the rear lens cap.

To remove the rear lens cap

Instructions for removing the rear lens cap.

Quick Reference

Remote Commander

Instructions for using the remote commander and changing its battery.

Quick Reference

Indicators for the LCD screen and viewfinder

Indicators shown on the LCD screen during recording and playback.

Recording movies

Indicators shown on the LCD screen during movie recording.

Recording still images

Indicators shown on the LCD screen during still image recording.

Data code during recording

Information recorded automatically during recording.

Quick Reference

Viewing movies

Indicators displayed during movie playback.

Viewing still images

Indicators displayed during still image playback.

Indicators for the LCD screen and viewfinder (Continued)

Indicators when you made changes

Icons indicating changed settings on the screen.

Quick Reference

Index

Alphabetical index of terms and page numbers.

Related product manuals