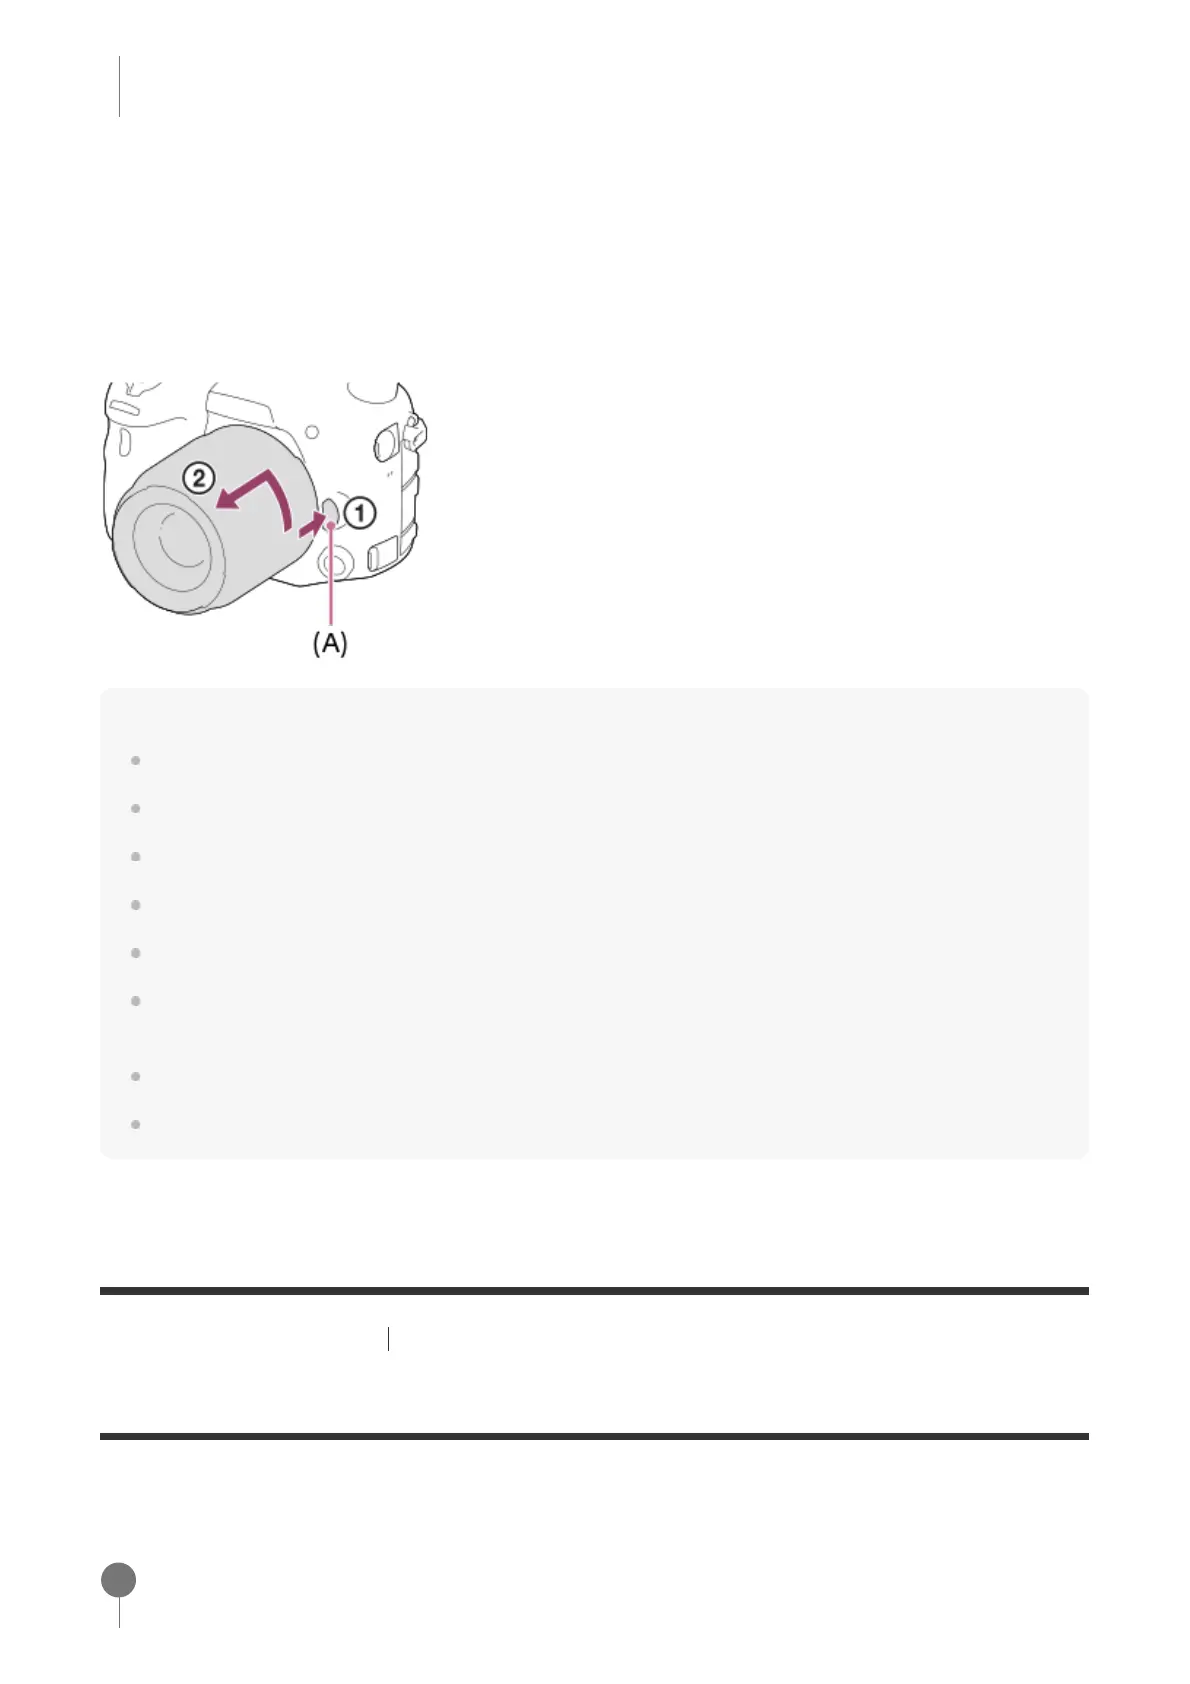
Removing the lens
Keep pressing the lens release button (A) and turn the lens in the direction of the arrow until it
stops.
After removing the lens, attach the body cap to the camera and the lens caps to the front and
rear of the lens to prevent dust and debris from entering the camera and lens.
Note
When attaching/removing the lens, work quickly in a dust-free location.
Do not press the lens release button when attaching a lens.
Do not use force when attaching a lens.
E-mount lenses are not compatible with this camera.
If you want to shoot full-frame images, use a full-frame size compatible lens.
When you use a lens with a tripod socket, attach a tripod to the tripod socket of the lens to help
balance the weight of the lens.
When carrying the camera with a lens attached, hold both the camera and the lens firmly.
Do not hold the part of the lens that is extended for zoom or focus adjustment.
[26] Preparing the camera Attaching a lens
Attaching the lens hood
We recommend that you use the lens hood to prevent light outside the shooting frame from
affecting the image.
Be sure to hold the lens straight when attaching it.
Match the shape of the lens hood mounting part and lens head, and turn the lens
hood clockwise until it clicks.
1