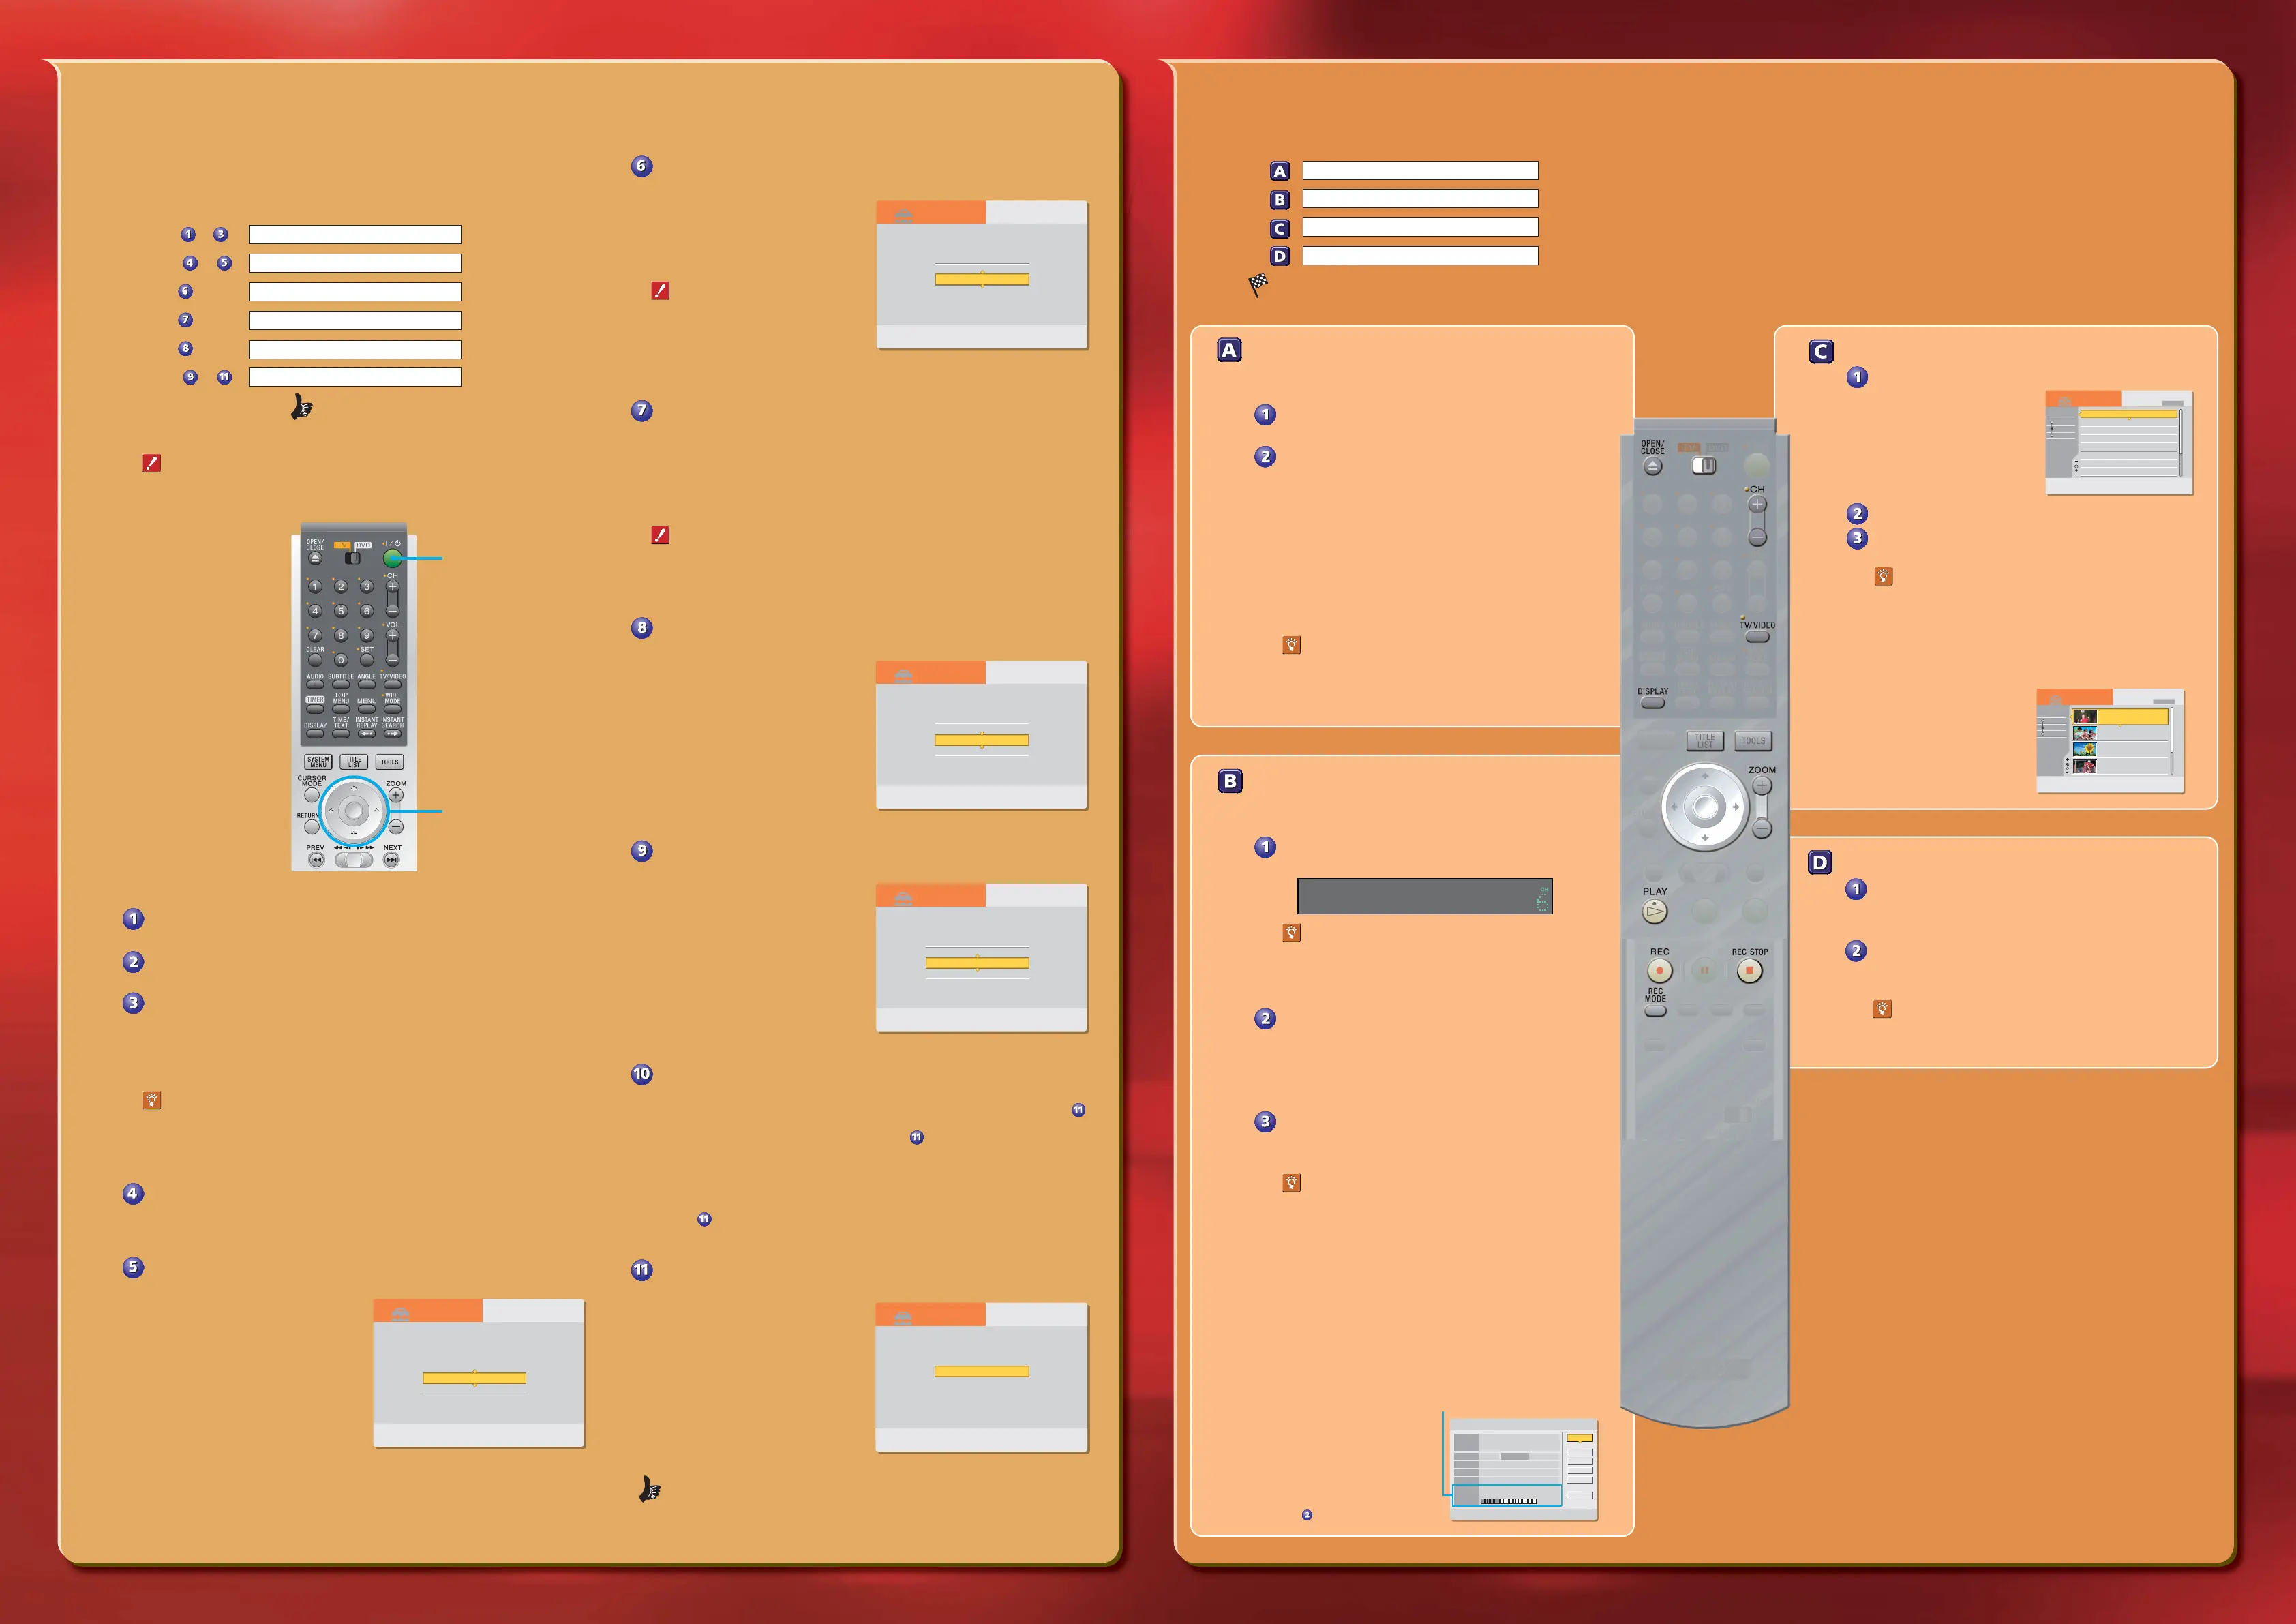
Wait! Be sure to complete Step 1 before proceeding w ith Step 2.
When you t urn on your DVD recorder f or the first time, t he Easy Setup display
aut omat ically appears on your TV screen. Follow t he steps below to make t he
minimum number of basic adjust ments t o use t he recorder.
Steps to : Displaying Easy Setup on Your TV
x
Steps
to : OSD Language Setup
x
Step
: Clock Setup
x
Step
: Tuner and Channel Setup
x
Step
: TV Type Setup
x
Steps
to : Audio Connection Setup
x
You're done!
If you do not complete Easy Setup
Easy Setup will appear each t ime you turn on your recorder until you
complet e t he steps below.
Tu rn on your TV and any other connected equipment.
Press I/ 1 on the remote.
Press the input selector on your TV so that the signal
from the recorder appears on your TV screen.
The f ollowing message appears: “ Initial set t ings necessary to operat e the DVD
recorder will be made. You can change t hem lat er using Set up.” If t his message
does not appear, select “ Easy Set up” from “ SETUP” on t he Syst em M enu. See
“ Step 7: Easy Set up” in t he Operat ing Inst ructions for details.
Having t rouble displaying Easy Set up?
Tr y looking at your TV screen each t ime you press t he input selector on your
TV. You should see an indicat or such as “ Video 1” or “ DVD 1” appear in one
of t he f our corners of your TV screen. Keep pressing t he input select or unt il
the name of t he jack t o w hich you have connect ed the recorder appears.
Press the center of the joystick (w ritten hereafter as
“Press ENTER.”)
Easy Setup begins.
Press M/m to select either English or French for the on-
screen display language, then press ENTER.
The display f or setting the clock
appears.
Step 2 Guided Setup Step 3 Basic Operations
Press M/ m to select “Auto” to automatically set the
clock, then press ENTER.
The display f or setting the tuner
appears.
Not e t hat t he clock w ill be
aut omatically set w hen you turn off
the recorder.
If the clock is w rong, or if the
time is not set
See “ Sett ings (Basic Set tings)” in
the chapt er “ Sett ings and
Adjustment s” of the Operat ing
Inst ructions.
Press M/ m to select either “Antenna” or “Cable,” then
press ENTER.
• If you connected a cable box or receive cable service, select “ Cable.”
• If you do not have cable service, or if you connect ed a satellite receiver or
digit al cable box, select “ Ant enna.”
The Tuner Preset f unct ion st art s searching f or all receivable channels and st ores
them in memory. This may t ake a couple of minut es.
If you connected a satellite receiver or digital cable box
The recorder w ill not set the channels f or your sat ellit e receiver or digital
cable box. Use your sat ellit e receiver or digital cable box to change channels
once Easy Set up is complet e.
After the Tuner Preset is finished, the display for
matching the playback image to your TV appears.
This will select the w ay f ull-screen
DVD movies are displayed on your
TV, and w ill not aff ect regular
broadcasts. If you have a
wide-screen TV, select “ 16:9.” If you
have a st andard TV, select eit her “ 4:3
Lett er Box” (shrink to f it ) or “ 4:3 Pan
Scan” (st retch to f it ).
Press M/ m to select one of the display options, then
press ENTER.
The display f or setting the audio
connection appears.
Press M/ m to select an audio connection option, then
press ENTER.
If you did not connect an AV amplifier (receiver), select “ No” and go t o step
.
• If you connected an AV amplif ier (receiver) using just an audio cord, select
“ Yes: LINE OUT (
R-AUDIO-L
)” and go t o st ep .
• If you connected an AV amplif ier (receiver) using eit her a digital optical or
coaxial cord, select “ Yes: DIGITAL OUT.” After you select “ Yes,” you w ill be
asked to select t he t ype of signal you want to send t o your AV amplifier
(receiver). If your AV amplif ier (receiver) has a Dolby Digit al or DTS decoder,
select “ Dolby Digit al” or “ On.” If not , select “ D-PCM ” or “ Off .” Then go to
st ep
.
When “Finish” appears, press ENTER to complete Easy
Setup.
Now you're ready to go to “Step 3 Basic Operations.”
How to Record a TV Program
The f ollow ing explains how to record a current TV program. For
timer recordings, see “ Timer Recording” in t he chapter “ Recording/
Timer Recording” of the Operat ing Inst ruct ions.
Press CH+/ – to select a channel.
The channel number appears in the f ront panel display.
If you connected a sat ellit e receiver or digit al
cable box
Tu rn on your satellit e receiver or digital cable box and
press CH+/- unt il “ L1” appears in t he front panel display.
Then select a channel on your sat ellite receiver or digital
cable box.
Press REC M ODE repeatedly to select the
recording mode: HQ, HSP, SP, LP, EP or SLP.
HQ off ers the best qualit y but the short est recording time.
Recording t ime increases w it h each successive mode, but
the quality gradually det eriorates. See below f or inst ruc-
tions on how to decide w hich recording mode meets your
needs.
Press z REC.
The recorder aut omat ically searches f or recordable disc space,
and start s recording. To stop recording, press
x REC STOP.
Don't know w hat ' s going on?
Press t he DISPLAY but t on on t he remot e. This w ill
display the current recording stat us on your TV screen.
Unlike a VCR, you do not need t o search f or blank space; t he
recorder does it for you. And since recordings can only be manually
deleted by you, the recorder will never accident ally record over a
previously recorded program. If you w ant t o delete some or all of
the cont ents t o f ree up disc space, see “ Erasing a Tit le (Erase)” in
the chapt er “ Edit ing a DVD.” How do you know if you have enough
free space? Read the f ollow ing to f ind out!
You can check inf ormat ion about t he disc, such as t he remaining
disc space, by pressing TOOLS
while t he disc is inserted and
select ing “ Disc Info.” from t he
displayed TOOLS menu. The
remaining disc space for each
recording mode is displayed at
the bot t om of the on-screen
display. Decide w hich mode
provides enough recording t ime
for your TV program, and select
it in st ep
above.
Wait! Be sure to complete Step 2 before proceeding w ith Step 3.
The f ollow ing explanations give a quick overview about how to use t he DVD recorder.
How to Insert a Disc
x
How to Record a TV Program
x
How to Play the Recorded TV Program
x
How to Remove the Disc
x
Congratulations! You’ve got your ow n DVD.
ENTER TOOLS
TITLE LIST
RETURN
9/15
9/17
9/25
9/25
10/15
10/19
10/26
10/28
1.5/4.7GB
Sort
Date
Number
Title
My MoviesMy Movies
TITLE LISTTITLE LIST ORIGINALORIGINAL
-RW.VR
1 2ch 1:00PM - 2:00PM
2 5ch 8:00PM - 9:00PM
3 12ch 9:00AM - 9:30AM
4 3ch 8:00PM - 8:30PM
5 25ch 8:00PM - 8:30PM
6 L2 9:00PM - 9:30PM
7 8ch 9:00PM - 9:30PM
8 125ch 10:00AM - 10:30AM
1.5/4.7GB
ENTER TOOLS
TITLE LIST
RETURN
1.5/4.7GB
Sort
Date
Number
Title
My MoviesMy Movies
TITLE LISTTITLE LIST ORIGINALORIGINAL
-RW.VR
2ch
5ch
12ch
3ch
1 2ch 1:00PM - 2:00PM
Mon 9/15 1:00PM( 1H00M) SP
2 5ch 8:00PM - 9:00PM
Wed 9/17 8:00PM( 1H00M) SLP
3 12ch 9:00AM - 9:30AM
Thu 9/25 9:00AM( 0H30M)
EP
4 3ch 8:00PM - 8:30PM
Thu 9/25 8:00PM( 0H30M) SLP
How to Remove the Disc
Press Z OPEN/ CLOSE.
“ INFO WRITE” flashes in t he front panel display for about a
minut e while an elect ronic index of t he recorded cont ent s is
written on t he disc.
Remove the disc w hen the disc tray opens,
and press Z OPEN/ CLOSE again to close the
disc tray.
Want to play a recorded DVD on ot her DVD
equipm ent ?
You may need t o f inalize t he disc. See “ Finalizing a disc
(Finalize)” in t he chapter “ Edit ing a DVD.”
Now that you have f amiliarized yourself with t he DVD
recorder, try t he f unctions below by follow ing t he st eps in
the Operat ing Instruct ions.
• Copy VCR t ape contents to a DVD
See “ Recording f rom Connect ed Equipment” in t he
chapt er “ Connecting a Digit al Video Camera or Other
Equipment .”
• Copy DV or Digital8 camcorder cont ents t o a DVD
See “ Available DV Dubbing Funct ions” in t he chapter
“ Connect ing a Digit al Video Camera or Ot her Equipment .”
ENTER RETURN
Select the way in which you will receive channels.
EASY SETUP
Tuner Preset 3/5
Antenna
Cable
ENTER RETURN
EASY SETUP
TV Type 4/5
Select your TV screen type.
16 : 9
4 : 3 Letter Box
4 : 3 Pan Scan
ENTER RETURN
EASY SETUP
Audio Connection 5/5
Is this recorder connected to an amplifier (receiver)?
Select the type of jack you are using.
Yes :
LINE OUT(R-AUDIO-L)
Yes :
DIGITAL OUT
No
D
ENTER RETURN
Disc Information
DiscName Movie
Media DVD-RW Format VR
Title no. Original 3 / Playlist 2
Protected Not Protected
Date 9/15/2003 ~ 10/28/2003
HQ : 0H30M
LP : 1H30M
HSP : 0H45M
EP : 2H00M
SP : 1H00M
2. 3 / 4. 7GB
SLP : 3H00M
Remainder
Disc Name
Format
Erase All
Finalize
Protect Disc
Close
Remaining disc space
ENTER RETURN
EASY SETUP
Clock 2/5
Select a method for setting the clock.
If you select "Auto", this recorder will look for a
time signal when you turn it off.
Auto
Manual
How to Play the Recorded TV Program
Press TITLE LIST.
The TITLE LIST menu appears.
Press M/ m to select the title you w ant to play.
Press H PLAY.
Playback st art s f rom t he beginning of t he t itle.
Don’t know w hat ’s going on?
Tr y pressing t he DISPLAY but ton on t he remote. This
will display the current playing st at us on your TV
screen.
With t his Sony DVD recorder, all of t he recorded cont ents can be
displayed in t he TITLE LIST show n
above. This list not only allows
you to directly select t he tit le you
want t o watch, but it also displays
recording data, such as the length
of t he tit le. And if you can’t
remember w hat the t itle
contained, press t he ZOOM +/-
buttons to display a t humbnail
picture of each tit le’s f irst scene.
I/1 (on/st andby)
but t on
</M/m/, (joystick)
Press t he center of t he
joystick t o make a select ion
(ENTER)
ENTER RETURN
Easy Setup is finished
EASY SETUP
Finish
How to Insert a Disc
A new, unused DVD disc w ill be f ormatted w hen inserted. For
informat ion about t he dif f erent t ypes of available DVD discs, see
the chart on t he back cover of the Operat ing Inst ruct ions.
Press Z OPEN/ CLOSE and place a recordable
DVD on the disc tray.
Press Z OPEN/ CLOSE again to close the disc
tray.
“ LOAD” will flash f or about a m inute in t he recorder’s f ront
panel display w hile the recorder det ermines w hat kind of disc
you have inserted. If t he disc is a new DVD-R or DVD+RW, it
will be aut omat ically format t ed. If the disc is a new DVD-RW,
you can f ormat the disc in either Video or VR mode.
• Video mode: Allow s for playback on most DVD equipment
once finalized
• VR mode: Allows f or a variet y of edit ing options using a
Playlist
See “ Bef ore Recording” in t he chapt er “ Recording/Timer
Recording” of the Operat ing Inst ructions f or more det ails
about t he diff erences between Video mode and VR mode.
Don’t know w hat ’s going on?
Look at your TV screen, not t he front panel display.
Messages explaining the current st at us of the recorder
or what act ions you are required t o take w ill appear on
your TV screen. Not e t hat t he remote does not w ork
while “ LOAD” is flashing, so be patient !
DVD Recorder Dist inct ive
DVD Recorder Dist inct ive
DVD Recorder Dist inct ive
Downloaded from: https://www.usersmanualguide.com/
 Loading...