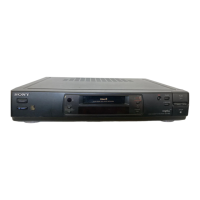
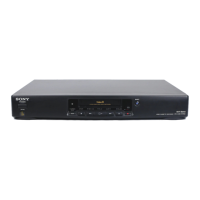
Do you have a question about the Sony Video8 EV-S550 and is the answer not in the manual?
Important warnings regarding electrical shock, rain, and moisture.
Details on radio frequency energy and FCC rules for interference.
Utilizes the latest technology for high-grade audio systems.
Enjoy dynamic Hi-Fi stereo sound by connecting to an audio system.
Features EDIT SHUTTLE for easy editing and camcorder integration.
Includes tape counter, LANC control, and remote commander with LCD.
How to protect tapes from accidental erasure by sliding the tab.
Information on SP and LP modes, including recording times.
Instructions for inserting AA batteries into the remote commander.
How to set the remote commander to control the VCR and other models.
Step-by-step guide to set the date and time on the remote commander.
Handling power interruptions and incorrect clock displays.
Diagram identifying all buttons and indicators on the VCR's front panel.
List of items supplied with the VCR, including remote and cables.
Details on buttons for playback, recording, editing, and PAUSE/STILL.
Explanation of CL button, SHARPNESS, SLOW/STILL ADJ, and SET buttons.
List of cables and connectors provided with the VCR.
Controls for REC MODE, INPUT SELECT, ANT TV/VTR, and TIMER functions.
Details on PHONES, MIC, LANC, STD AUDIO, and LINE IN jacks.
Explanation of DC OUT, LANC, AUDIO MONITOR selector, and about the LANC connector.
Details on LINE OUT jacks, X2 SOUND switch, and COMMAND MODE selector.
Explanation of AC OUTLET, ANTENNA SW selector, AUTO STEREO switch, and RF UNIT channel select.
Overview of buttons for timer, channel, input, and playback control.
Warnings about light exposure and sensor interference.
Functions of INPUT SELECT, COUNTER RESET, TAPE RETURN, and TIMER buttons.
Details on x1/10, x1/5, FRAME, x2, SHUTTLE EDIT, and TV operation buttons.
Step-by-step guide to insert a cassette and start playback.
How to stop the playback and resume normal playback.
Using buttons to rewind and fast forward the tape.
Procedure for ejecting the video cassette from the VCR.
Adjusting the sharpness of the picture using the SHARPNESS control.
Playing back a tape automatically after rewinding.
Using the COUNTER RESET for scene searching.
Causes and solutions for no picture or unclear picture on TV.
Guide to using the AUDIO MONITOR selector for PCM, MIX, or STD.
Resolving issues with no sound or intermittent sound during playback.
How to achieve a still picture and resume normal playback.
Methods for searching through recorded content using various buttons.
Controlling tape transport for editing using main unit and remote.
Viewing playback at double speed, with or without sound.
Using x1/10, x1/5, and FRAME buttons for detailed viewing.
Tips for picture shake, noise bars, and tape compatibility.
How to reset the counter and use it for scene searching.
Using TAPE RETURN and PLAY for auto-play to a counter point.
Important notes on counter accuracy and operation with blank tape.
Guide to recording TV programs, selecting mode, and input.
How to stop or pause recording and resume it.
How to watch one TV program while recording another.
How the 'STEREO' indicator shows stereo reception.
Selecting and monitoring SAP sound for recording.
Details on how standard and PCM tracks are recorded.
Setting REC LEVEL to 5 for best sound from the tuner.
Adjusting REC LEVEL for external audio sources.
Guidelines for setting levels for different signal types.
Using recording pause mode to stop and resume recording smoothly.
Steps to pause, locate, and resume recording to cut scenes.
How to use SHUTTLE EDIT controls to find points for editing.
How to record audio signals onto the PCM track.
Connecting video equipment to record both video and audio.
Special instructions for non-standard digital audio processors.
Checks before setting timer programs: clock, cassette, input.
Detailed guide to setting start/end times, mode, and channel.
Presetting programs for daily or weekly recording.
Explanation of indicators shown on the unit's display during timer setting.
What happens when timer settings overlap and how to manage them.
Technique to utilize the full tape length for recording.
How the VCR resumes recording after a power interruption.
How to display and verify set timer programs.
Steps to modify existing timer programs.
How to delete or remove set timer programs.
Procedure to stop an active timer-activated recording.
Introduction to the simple timer recording function.
Steps to set and start quick timer recordings up to 5 hours.
How to stop, change time, check, and resume quick timer recordings.
Setting up for monitoring and recording SAP audio.
Important notes on using QUICK TIMER button and cassette loading.
Connecting VCRs for synchronized editing of an entire tape.
Procedure for transferring an entire tape using editing features.
Using the VCR as a player to record onto another VCR.
How the EDIT button activates editing mode and affects picture quality.
Using synchronized edit to cut and insert specific scenes.
Step-by-step guide to record only specific segments.
Replacing unnecessary scenes with new ones using insert editing.
Steps for locating points and performing insert editing.
Selectors for controlling VCRs and camcorders during editing.
Diagram and notes for connecting a video camera recorder.
Setting tape speed, switches, and connections for editing.
Detailed guide to starting and stopping synchronized editing.
Adding music or narration to the PCM track while preserving original audio.
How to connect microphones and audio systems for dubbing.
Advice on fade-in/out operations and mixing audio sources.
Guide to starting and stopping audio dubbing processes.
How to stop audio dubbing momentarily or completely.
Information on playback compatibility and visual effects during dubbing.
How to connect VHF/UHF antennas and cables to the VCR and TV.
Important advice on unplugging units and ensuring secure connections.
Step-by-step guide for attaching an F-type connector to a cable.
Procedure for attaching a 300-ohm twin lead antenna connector.
Connecting a combined VHF/UHF antenna to the VCR.
Connecting separate VHF and UHF antennas using a U/V mixer.
How to connect a CATV cable using an F-type connector.
Using a channel converter for CATV with non-compatible TVs.
Connecting antenna and audio/video outputs to a TV with input jacks.
Connecting audio and video jacks to a color monitor.
Connecting VCR LINE OUT AUDIO to a stereo amplifier's TAPE IN or AUX IN.
Advice on preventing noise and protecting speakers.
Setting RF UNIT channel and input for VCR signal reception.
Verifying the TV is tuned correctly to the VCR's output.
Setting the VCR's RF channel and tuning the TV for cassette playback.
Verifying the TV displays the correct output when playing a cassette.
Methods for selecting channels using number buttons or +/- buttons.
How to sequentially select channels using the VCR or remote commander.
Steps to remove channels from the preset list.
Steps to re-add channels to the preset list.
Automatic channel searching, adding broadcast, and erasing blank channels.
Selecting CATV mode for the auto preset function.
Chart showing frequency ranges for VHF/UHF channels.
Chart mapping cable TV system letters/numbers to channels.
General safety guidelines for operating the VCR.
Guidelines for proper placement and ventilation to prevent overheating.
Tips for energy conservation and proper tape handling during operation.
Instructions for cleaning the VCR's cabinet and controls.
Advice on using original packaging for transport.
Proper storage methods for video cassettes.
How to handle moisture condensation on the unit and cassettes.
Details on video/audio systems, tape speed, and recording time.
Specifications for timer functions, power, operating temperature, and dimensions.
Details on remote control system, power, dimensions, and weight.
Technical details for video, audio, microphone, and headphone connections.
How and when to use video head cleaning tape.
When video head replacement is necessary.
Identifying issues caused by contaminated video heads.
Resolving problems with the power switch, clock, and timer standby.
Troubleshooting no picture, unclear picture, or picture shake.
Fixing problems with recording, playback, and cassette ejection.
Resolving issues with stereo sound and remote commander operation.
| Format | Video8 |
|---|---|
| Audio | Hi-Fi Stereo |
| Video Heads | 2 |
| Remote Control | Yes |
| Power Supply | AC 220-240V, 50/60Hz |
| Audio Heads | 2 |
| Inputs | Composite, S-Video |
| Outputs | Composite, S-Video |


 Loading...