Do you have a question about the Sorellle Presley Crib and is the answer not in the manual?
Covers suffocation, strangulation, fall hazards, and general safe use of the crib.
Specifies the exact dimensions required for the crib mattress to ensure safety.
Details entrapment risks, minimum age, and maximum user weight for toddler bed use.
Advises against strings, cords, and placement near windows to prevent strangulation.
Covers fall prevention, child supervision, and maintenance for safe changing table operation.
Tips for proper assembly, including screw checking and surface protection.
Guidelines for safe interaction with the furniture during use.
Instructions for preserving the finish and cleaning the product.
Connects the Middle-Rear Leg (E) to the Middle Panel (A1) using hardware.
Assembles frame components using dowels and bolts for structural integrity.
Adds shelves (J1, J2) and panels (I, I2) to the crib structure.
Secures the Right End Panel (A2) to the main crib frame.
Connects the Headboard (B) and Left Rear Leg (D2) to the assembly.
Fastens the Left (A) and Right (B) end panels to the main structure.
Attaches the mattress support frame, noting height adjustment options.
Fastens the side panels of the crib using the provided bolts.
Places metal shelf supports into designated holes on the side panels.
Installs the two shelves (J) into the changer unit.
Joins drawer sides (K3, K4) to the back panel (K2) using screws.
Inserts the drawer bottom panel (K5) into the assembled drawer frame.
Attaches the drawer front panel (K1) to the drawer assembly with screws.
Affixes the drawer knob (K6) to the drawer front using a screw.
Places assembled drawers into the changer and adds the changing pad (L).
Attaches the safety belt to the changing pad correctly, ensuring it is fastened.
Instructions for taking the crib apart and storing it safely.
Information and requirements for converting the crib to a toddler bed.
Information and requirements for converting the crib to a full-size bed.
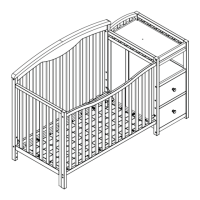
| Product Type | Crib |
|---|---|
| Brand | Sorelle |
| Model | Presley |
| Material | Wood |
| Weight Limit | 50 lbs |
| Convertible | Yes |
| Color | Multiple options available |
| Mattress Size | Standard Crib Mattress |
| Adjustable Mattress Heights | 3 |
| Convertible Options | Toddler Bed, Day Bed, Full Size Bed |
| Safety Standards | JPMA Certified, Meets ASTM and CPSC Safety Standards |