• The rope will slip on the capstan during normal operation.
Keep the rope moving so that the capstan does not contact
one spot on the rope for more than a few seconds.
Otherwise, the rope will heat up quickly and it may break.
• When pulling on the rope, do not exceed about 45 N (10lb)
of tension on the rope. If the pull becomes difficult, stop the
pull, add another wrap or two of rope to the capstan.
WARNING: Do not add wraps to Capstan with motor
running, could result in Injury or death.
• If excessive force becomes necessary, stop the pull and
inspect the setup.
• When the cable or wire comes over the roller, switch the
electric drill OFF.
1413
SET UP AND OPERATION SET UP AND OPERATION
8. Maintain tension on the rope.
• The rope will slip on the capstan during normal operation.
Keep the rope moving so that the capstan does not contact
one spot on the rope for more than a few seconds. Otherwise,
the rope will heat up quickly and it may break.
• Do not exceed about 45 N (10lb) of tension on the rope. If the
pull becomes difficult, stop the pull, add another wrap or two
of rope to the capstan. WARNING: Do not add wraps to
Capstan with motor running, could result in Injury or death.
• If excessive force becomes necessary, stop the pull and
inspect the setup.
• When the cable or wire comes over the roller, switch the
electric drill OFF.
3. Remove upper pin from adjustable outer sleeve and front
assembly and turn front assembly 180° and re-pin (Fig 11)
4. Shorten the length of the adjustable outer sleeve then extend
arm to fit into conduit. Always make sure conduit and adaptor
sits flush around the conduit you are pulling through. Thread
rope under front roller and over main roller (Fig 12).
5. Pin Adjustable Outer Sleeve (Fig 13).
6. Do not stand in line with the rope being pulled (stand to the
side of the drill) to avoid injury if rope breaks.
7. Use Southwire NoLUBE
®
SIMpull
®
cables or add proper
lubricant for all your pulling jobs.
8. Loosely wrap rope around the capstan in a clockwise direction
from the inside out. Start the electric drill by rotating the
Maxis
®
3K’s switch lever. Pull on the rope to produce some
tension. The rope will begin to advance.
9. Maintain tension on the rope.
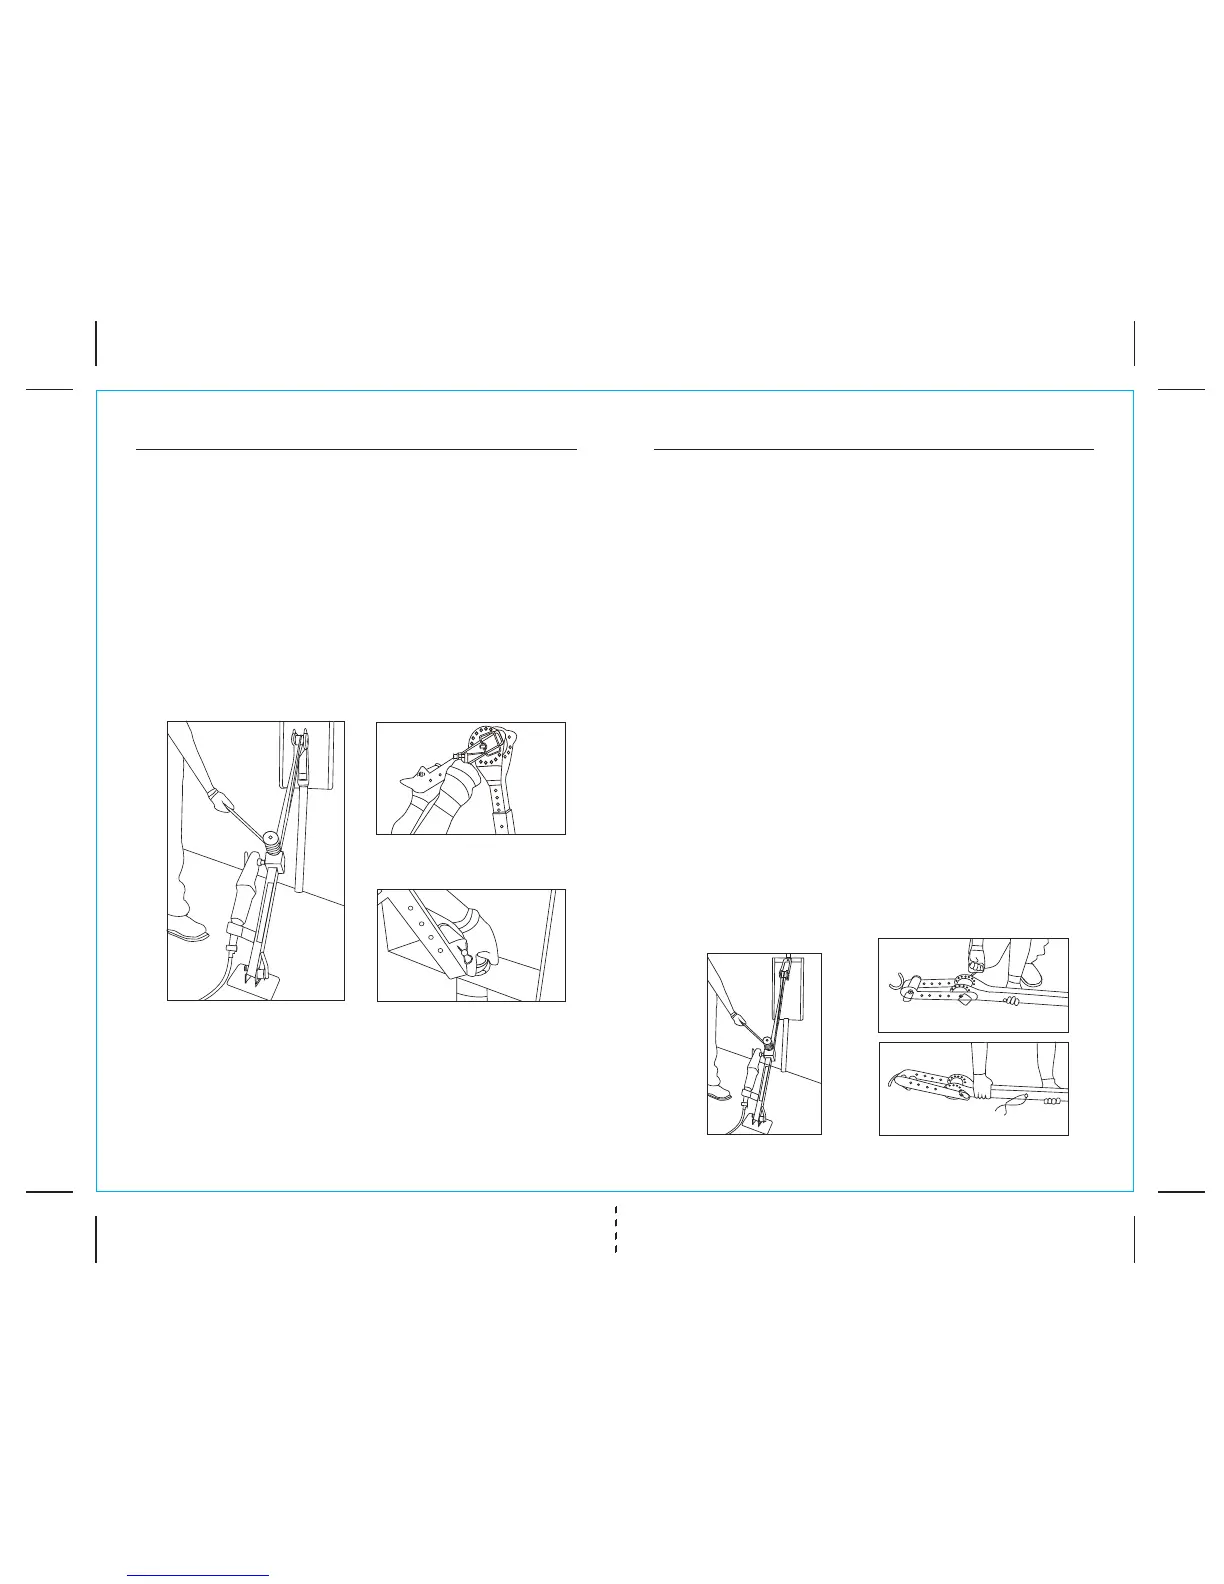
Underground Pull
Fig 8
OVERHEAD PULLS
1. Assemble puller and attach correct size conduit adaptor.
2. To convert to overhead pulls, remove front hitch pin on front
extension and swing front extension straight out and re-pin
(Fig 10).
Fig 9
Fig 11
Fig 10
 Loading...