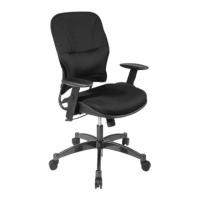
2800/2900 CHAISE DE PRÉSIDENT AVEC
SOUTIEN LOMBAIRE RENFORCÉ
INSTRUCTIONS DE MONTAGE
© Office Star Products June 2006
WARNING
1. Usethisproductonlyonepersonatatime.
2. Donotusethischairunlessallboltsscrewsandknobsare
securelytightened.
3. Checkthatallboltsscrewsandknobsaretighteverythree
monthsorasneeded.
4. Donotoverturnbacktiltknobwhendecreasingtension.
5. Disposeofpackingmaterialproperly.Donotuseplastic
coverasheadcovering.Itmaycausesuffocation.
6. Donotusechairasastepladder.
7. Usethischairforitsintendedpurposeonly.
8.Usemilddetergentonlyforcleaning.
FEATURE
• PNEUMATIC SEAT HEIGHTADJUSTMENT
Toraiseseatremovepressurefromseatandpulllever(1)
up.Tolowerseatheightsitonchairandpulllever(1)up.
• SYNCHRO TILT
Tolockreturnchairtotheuprightpositionandpushlever
(1)in.Tounlockpulllever(1)out.
• TILT ADJUSTMENT
Forindividualcomfort,thischairhasbeenequipped
withanadjustmentthatwillallowtheusertochangethe
tensionofthetiltingfeature.Turnknob(2)clockwiseto
increasetensionandcounter-clockwisetodecreaseor
easethetension.
NOTE:Becarefulnottoloosenbacktiltadjustmentknob
completely.
• ARM HEIGHT ADJUSTMENT
To adjust arm height, push button (3) in to allow the arms to move up or
down freely. Release the button (3) once the desired height is reached.
2800/2900 SUPER LUMBAR MANAGERS
CHAIR OPERATING INSTRUCTIONS
Enlever toutes les pièces du carton, les organiser selon les numéros de pièce indiqués sur la liste et s’assurer que les quantités des
pièces reçues sont correctes.
ÉTAPE 1 Pour commencer le montage, insérer les roulettes (1) dans le piétement (2) et glisser le vérin pneumatique (3) sur le piétement (2).
ÉTAPE 2 Attacher les accoudoirs (4R et 4L) au coussin du siège (6), en utilisant six vis de 1 3/8 po (8) et rondelles (11). Attacher la plaque du
siège (5) au coussin du siège (6) en utilisant quatre vis longues de 7/8 po (9).
ÉTAPE 3 Glisser le dossier de siège (7) dans le support de la plaque du siège (5) et attacher en utilisant trois vis courtes de 5/8 po (10).
SERRER COMPLÈTEMENT TOUTES LES VIS.
ÉTAPE 4 Placer le siège assemblé sur le dessus du vérin pneumatique (3) et pousser vers le bas.
ATTENTION: S’ASSURER D’AVOIR SERRÉ COMPLÈTEMENT TOUTES LES VIS.
2900
2800
2
1
3
Dessin Détaillé A:
Installer le support du dossier dans la plaque
de siège.
7
support du dossier
4R
8, 11
9
3
2
1
9
5
6
8,11
4L
10
Pièce . . . . . . . . . . . . . . . Qté
1.Roulettes . . . . . . . . . . . . . . . 5
2.Piétement . . . . . . . . . . . . . . .1
3.Vérinpneumatique . . . . . . . . . . 1
4.Accoudoirsdroit(4R)etgauche(4L) 2
5.Plaquedusiège. . . . . . . . . . . .1
6.Coussindusiège . . . . . . . . . . . 1
7.Dossierdusiège. . . . . . . . . . . .1
8.Visde13/8po. . . . . . . . . . . . .6
9.Visde7/8po(longues). . . . . . . .4
10.Visde5/8po(courtes) . . . . . . .3
11.Rondelles. . . . . . . . . . . . . . . 6
12.CléAllen(nonmontrée) . . . . . . .1
10
WARRANTY
SPACE
®
chairs are warranted* from the date of purchase against failure due to material and workmanship as follows:
• Lifetime on component parts including pneumatic cylinder, control mechanism, base and casters.
• 3 Years on upholstery fabric and foam against wear and deterioration.
• Leather is not warranted against routine scratching and scuffing, as leather is subject to minor blemishes in use.
*All warranties are limited to the original purchaser for normal commercial usage defined as a standard forty hour work week by persons
weighing 250 lbs. or less. This warranty will not cover labor, freight or damage from misuse, abuse, negligence, alteration, accident, vandalism,
rusting, acts of nature or any other event beyond the control of Office Star Products. The warranty does not cover cosmetic damage that may
result from normal use. Liability for incidental or consequential damages is excluded. The user assumes all risk of injury resulting from use of this
product. When usage is more than 40 hours per week, a five year warranty on all parts applies. Fabric is warranted for one year.
This warranty gives you specific legal rights, and you may also have other rights which vary from state to state.
All SPACE
®
chairs are built to meet or exceed ANSI BIFMA standards.
Tomakeawarrantyclaim,contactPartsDepartmentviae-mailparts@ofcestar.net,byFax1-909-930-5629,ortollfreeparts
number1-800-950-7262,MondaythroughFriday8:00a.m.-5:00p.m.PacicTime.Providemodelnumberanddescriptionof
theproblemandobtainconrmationnumber.Atit’soptionOfceStarProductswill:
(a)Supplycompatiblecomponentsofcurrentmanufacture.
(b)Repairthecustomer’scomponent.
Itisthecustomer’sresponsibilitytoprepayfreightonanycomponentsreturnedtothefactory.Returnfreightoncomponents
coveredbywarrantywillbepaidbyOfceStarProducts.